When installing tile, one of the most important things to consider is how the tiles will meet at corners. Proper corner installation is crucial for achieving a professional looking tiled surface that will stand the test of time. In this article, we will examine the key factors to consider when dealing with tile corners and provide recommendations for best practices.
Page Contents
- 1 What are the options for handling tile corners?
- 2 What are the pros and cons of a straight tile corner?
- 3 What are bullnose tile corners?
- 4 What are the benefits of using decorative tile corners?
- 5 When should you use cut tile corners?
- 6 How do tile corners impact grout lines?
- 7 What corner types work for different tile materials?
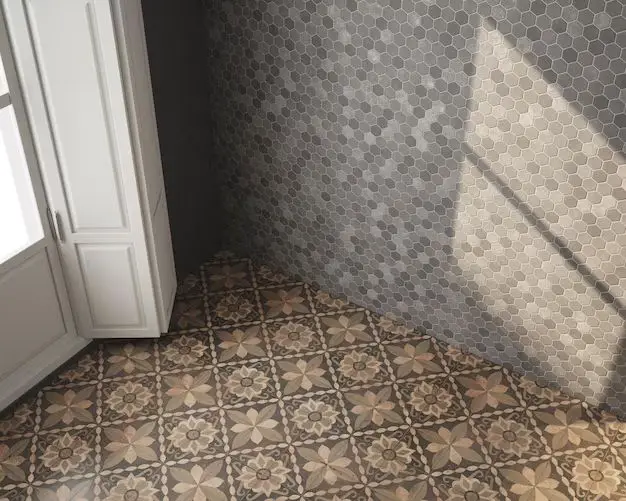
- 8 How should wall and floor tiles meet?
- 9 What tools are needed for cutting tile?
- 10 What mistakes should be avoided?
- 11 Conclusion
What are the options for handling tile corners?
There are a few main options for how tile corners can be handled:
- Straight corner – tiles simple meet straight on at a 90 degree angle
- Bullnose corner – a rounded bullnose tile is used on one or both sides of the corner
- Decorative corner – a decorative tile with pattern or design is used at the corner
- Cut tile corner – full tiles are used away from the corner and a cut tile piece is fitted into the corner
Each of these options has pros and cons that need to be weighed based on the specific goals and requirements of the tiling project.
What are the pros and cons of a straight tile corner?
Using a straight corner where tiles simply meet at 90 degrees is the simplest and most basic way to finish a tile corner. Here are some key pros and cons of using a straight tile corner:
Pros:
- Straightforward installation – no special tiles or cuts required
- Clean, sharp looking corner
- Doesn’t require purchasing special trim or decorative tiles
Cons:
- Can crack or chip over time as tiles shift or settle
- Grout lines are prone to cracking at corner
- Less finished, professional looking compared to other options
- Can be prone to cracking or chipping if bumped or impacted
Overall, a straight tile corner provides a quick and simple option, but lacks some of the durability and finesse of other choices.
What are bullnose tile corners?
Bullnose tiles have one or more rounded finished edges. Using a bullnose tile on one or both sides of a corner provides a smooth, rounded edge transition. Key features of bullnose tile corners include:
- Provide a clean, finished look
- Softer, safer rounded edges
- Well suited for countertops, showers, backsplashes
- Less prone to cracking or chipping than sharp corners
- Various profiles available – rounded on one side, both sides, or 3+ sides
Bullnose tiles do require purchasing special trim pieces and take more precision to install properly than a straight corner. But the benefits often make them worth the extra effort.
What are the benefits of using decorative tile corners?
Decorative tile corners utilize accent tiles with decorative patterns, designs, materials, or colors at the corner. Some key benefits of this approach include:
- Provide visual interest and accent the overall design
- Wider variety of looks and styles – can match or contrast main tiles
- Good opportunity to tie different tile materials together
- Softer rounded edges reduce cracking and chipping
Decorative corners do come at a higher cost than basic installations. The decorative tiles must be purchased separately and often require more precise tile cuts for seamless placement. Accuracy is crucial if the patterns are expected to match up across tiles.
When should you use cut tile corners?
Cut tile corners involve carefully cutting full tile pieces to fit perfectly into the corner. Reasons this might be the preferred approach include:
- When using large format tiles where bullnose pieces are not available
- To avoid the disruption of a decorative pattern running into the corner
- For a clean, seamless appearance with grout lines flowing smoothly
- When the tile design or shape is not conducive to bullnose or decorative options
The challenges with cut tile corners are needing proper tile cutting tools and having the skill to make accurate cuts. Tile cuts that aren’t perfectly straight or with uneven grout lines will be glaringly obvious in the corner. But skillfully executed cut tile corners can make for a very refined, built-in custom look.
How do tile corners impact grout lines?
It’s important to consider grout lines when planning tile corner installations. Grout provides crucial structural support and prevent cracking, but is also the most likely point of failure at corners. Here are some tips for accounting for grout:
- Keep grout lines uniform width and straight – inconsistencies get accentuated at corners
- Take extra care applying, packing, and cleaning grout at corners
- Use extra flexible unsanded grout for challenging applications like floor heating
- Grout release agents can help prevent cracking and adhesion issues
- Seal grout to protect against moisture and staining
Cut tile corners can allow for the most seamlessly continuous grout lines. Decorative and bullnose corners may require ending grout lines at the accent tile. Any grout line terminations should be very precisely aligned.
What corner types work for different tile materials?
The corner options suitable for a tile installation depend heavily on the properties of the tile material:
Ceramic
- Prone to chipping on vulnerable corners
- Bullnose and decorative best for durability
- Care needed cutting fired ceramic
Porcelain
- Can use straight corner with rigid porcelain in non-impact areas
- Bullnose provides safest option for cracking resistance
- Diamond blade and water cooling essential for porcelain cuts
Stone
- Softer than ceramic/porcelain, requires rounded edges
- Bullnose is ideal, decorative accents also work well
- Cut stone carefully to avoid shattering
Glass
- Prone to cracking without rounded corners
- Use bullnose and limit grout
- Factor glass thickness and fragility when cutting
Knowing the properties and appropriate working techniques for the tile material chosen is key to getting professional looking results.
How should wall and floor tiles meet?
For installations where wall tiles meet floor tiles, such as in a shower, the transition requires special consideration:
- Use tapered transition trim designed for floor-to-wall change
- Caulk joint instead of grouting for flexibility
- Take precise measurements and tile cuts
- Account for expected flooring thickness differences
- Install suitable bullnose tiles on wall edges
Trying to simply run floor and wall tiles together without a designed transition risks problematic cracking as the two surfaces expand, contract, and shift differently over time.
What tools are needed for cutting tile?
Cutting tile accurately and cleanly requires having the right tools. Recommended tools include:
- Wet tile saw with diamond blade for porcelain, ceramic, and stone
- Tile nippers and grippers for shaping cuts after scoring
- Grout cutting blades for thin accent tiles
- Safety gear – gloves, eyewear, knee pads
- Painter’s tape to guide cuts
- Compass, square, ruler for measuring
Rushing through cuts without proper tools is a recipe for sloppy corners that detract from the overall quality of the installation. Investing in quality tools pays dividends for both professionals and avid DIYers.
What mistakes should be avoided?
Some key mistakes to avoid on tile corner installation include:
- Neglecting required expansion joints for the tile
- Poor planning of tile layouts and patterns
- Using tiles from different lots or dye batches
- Failing to account for depth differences between flooring and wall
- Sloppy thinset application or overworking the adhesive
- Not using tile spacers for consistent grout lines
- Incorrect grouting or sealing methods
- Rushing or forcing improperly aligned tiles
Patience and care are required to get perfectly aligned corners that look like they came that way by design. Take time to do the prep work, measure twice, and continually check alignment while installing.
Conclusion
Tile corner installation deserves meticulous care and quality workmanship. The junction of the edges will remain highly visible and any imperfections very apparent. With proper planning and technique, the finished results can look flawlessly integrated. Consider the most durable, crack-resistant options that align with the overall tile layout. And invest in the right cutting tools and materials for professional looking results built to last. With careful attention to detail, the corners can become a subtle styling accent rather than a liability.