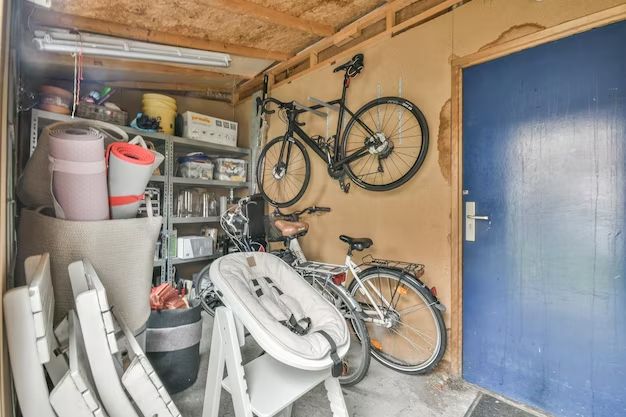
Having a hanging bike rack in your garage is a great way to free up floor space and keep your bikes organized and accessible. With some basic tools and materials, you can build a custom bike rack that mounts to your garage wall or ceiling. This allows you to store your bikes vertically and out of the way.
When planning your DIY garage bike rack, there are a few key factors to consider:
- Bike capacity – How many bikes do you need to store? This will determine the length and weight capacity needed for your rack.
- Mounting location – Will you mount to the wall or ceiling? This impacts the design and hardware required.
- Bike accessibility – Consider how easily you need to access your bikes. A ceiling rack may require a stool.
- Materials – Choose durable materials that can handle the weight of multiple bikes and won’t rust. Steel and wood are common options.
In this guide, we will outline the complete steps for building a ceiling-mounted bike rack that can hold up to 4 bikes. This type of overhead storage is great for garages that are tight on space. Let’s get started!
Page Contents
Needed Materials and Tools
Before starting your project, you’ll need to gather these supplies:
Materials:
- 3/4′′ plywood – Enough for two 36′′ x 18′′ panels
- Eight 3′′ eye bolts and nuts
- Sixteen 3/4′′ fender washers
- Four heavy-duty screw eye hooks
- Two 8′ long 1′′ x 4′′ boards
- Wood screws
- Wood glue
- Paint/stain and supplies (optional)
Tools:
- Circular saw
- Drill
- Tape measure
- Level
- Wrench
- Stud finder
- Pencil
- Sandpaper (optional)
Cutting the Wood Panels
The first step is to cut two 36′′ x 18′′ panels out of the plywood. These will form the sides of our bike rack.
Use a circular saw and measure carefully to cut the plywood into two equal rectangles. You can also have your panels cut to size when purchasing the plywood.
Smooth any rough edges with sandpaper.
Drilling Holes for Bike Hanging
Now we’ll drill holes in the plywood panels for mounting the bike hook eye bolts.
Measure and mark the center point at 1′′ and 13′′ from the top of each panel. Do the same at 1′′ and 13′′ from the bottom.
Using a 1/2′′ drill bit, drill holes at each marked point.
Then drill 1/2′′ holes at equal points in between the top and bottom holes. Space them about 6.5′′ apart for a total of 4 holes per side.
Adding the Eye Bolts
Insert the 3′′ eye bolts through each drilled hole in the panels. Use a washer and nut on the back of each eye bolt to secure it.
Tighten down the nuts with a wrench so the eye bolts are held firmly in place.
Assembling the Frame
Now for the frame that will hold the plywood sides.
Cutting the Support Boards
Cut the two 1′′ x 4′′ boards to the following lengths:
– 2 boards at 30′′ long
– 2 boards at 10′′ long
These will form the top and bottom frame supports.
Securing the Frame
Arrange the boards as shown below, with the 10′′ boards inside the 30′′ boards. This creates an inset for the plywood panels to fit into.
| Side View | Top View |
|---|---|
|
30′′ board 10′′ board Plywood panel 10′′ board 30′′ board |
30′′ board—-30′′ board 10′′ board—-10′′ board |
Attach the boards using wood glue and wood screws. Be sure to drill pilot holes before inserting the screws to prevent splitting.
Let the glue dry fully before continuing.
Mounting the Plywood Sides
Now we’re ready to mount the plywood panels into the frame.
Apply wood glue to the inside edges of the frame. Then place the plywood sides into the frame inset.
Attach using wood screws drilled through the inside of the frame into the plywood edges. Space the screws evenly every few inches.
Wipe away any excess glue squeeze-out with a damp cloth. Allow to dry completely.
Adding Ceiling Mounts
To hang our bike rack from the ceiling, we’ll need to add some mounting points.
Locate ceiling joists using a stud finder. Mark where you want to hang the rack.
At each joist location, pre-drill holes and screw in a heavy-duty screw eye hook. Make sure they are secured firmly into the joists.
Finishing and Hanging
Before hanging up your new bike rack, consider adding a finish if desired.
You can paint, stain, or use a polyurethane to protect the wood from moisture and scratches.
Once fully dry, lift the rack into position and attach carabiners or hooks through the screw eye mounts.
Then clip each carabiner through the eye hook screws on the bike rack frame to hang it securely from the ceiling.
Using Your Ceiling Bike Rack
To load bikes onto your new rack:
- Lift the bike up and rest the top bar on one set of ceiling mount eye hooks.
- Hang the front wheel from a bottom eye hook on the rack.
- Use a bike lock through the back wheel and frame to secure it in place.
Keep in mind weight limits when loading multiple bikes. Distribute weight evenly to avoid sagging or safety issues.
Now you can park your bikes overhead and free up precious garage floor space! This simple DIY bike rack is sure to serve your storage needs for years to come.
Conclusion
Building your own hanging bike rack is a straightforward project that can be customized to fit your garage and storage requirements. With some basic woodworking skills and materials, you can create a customized rack that keeps your bikes secure, organized, and out of the way.
The key steps are:
- Cutting plywood panels to size
- Drilling holes and adding eye bolt mounts
- Assembling a supporting frame
- Securing the plywood to the frame
- Installing ceiling mount hooks
- Finishing the wood
- Hanging and loading the rack
Add your own flair by painting or staining the wood, adding more mounting points, or increasing the size. This DIY garage project will get your bikes up and out of the way in no time!