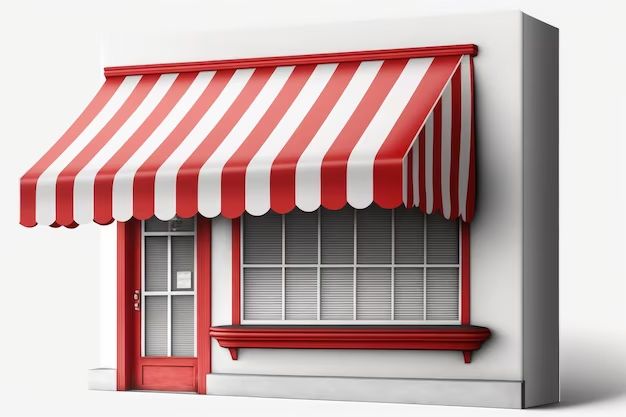
Adding an awning to your home or business can provide shade, increase curb appeal, and create an inviting outdoor space. Awnings come in many shapes, sizes and materials – from retractable aluminum to fixed fabric coverings. Building your own awning allows you to customize the size, shape, materials and features. With the right tools and materials, you can create a beautiful, functional awning tailored specifically for your needs.
In this guide, we’ll walk through the complete process of building a basic rectangular awning from start to finish. We’ll cover how to measure, design, build the frame, select awning fabric, and install your custom awning. Follow along to learn how to build your own beautiful awning.
Page Contents
Things You’ll Need
Building an awning requires some basic tools and materials. Here’s what you’ll need:
Tools
- Tape measure
- Level
- Screwdriver
- Power drill
- Saw (manual or power miter saw)
- Ladder
- Pencil
Materials
- Wood boards (typically pine), width and thickness will vary based on awning size
- Exterior wood screws
- Exterior wood glue
- Sandpaper
- Wood primer/sealer
- Exterior paint/stain
- Awning fabric
- Grommets
- Bolts, washers, nuts
Having these basic tools and materials will allow you to construct a wooden awning frame, cover it with fabric, and safely install the awning above a window, door or patio. Always use weather-resistant exterior grade materials when building an awning.
Step 1: Measure the Area
The first step is to take detailed measurements of the area where you want to install the awning. You’ll need the following measurements:
- Width – Measure the full width of the area the awning will cover.
- Projection – How far out from the house you want the awning to extend.
- Height – The height where you’ll mount the awning.
- Pitch – The angle of the awning slope. Standard residential awnings have a pitch between 15-30 degrees.
Record all the measurements – you’ll need them to calculate lumber requirements and design the frame. Use a level to ensure your measurements are accurate.
Sample Measurements
| Measurement | Example |
|---|---|
| Width | 96 inches |
| Projection | 48 inches |
| Height | 12 feet |
| Pitch | 30 degrees |
Take your time with the measuring and recording – accurate dimensions are critical for constructing the frame. Make sure to measure at multiple points along the installation area and use the narrowest width.
Step 2: Design and Build the Frame
Now it’s time to design and build the awning frame using your measurements. The frame provides the structure and shape of the awning.
Frame Design Tips
- Use 2×4 or 2×6 lumber for small to midsize awnings.
- Apply wood glue and screws at all joints for durability.
- Include supports, headers, rafters and braces for stability.
- Cut rafters to appropriate angles based on desired awning pitch.
Here are the basic steps to assemble the frame:
- Cut the front header board and side supports to length based on awning width.
- Attach the side support boards to the header using wood screws.
- Cut the 2×4 rafter boards to length based on projection measurement.
- Use a protractor to cut one end of rafter boards at the desired pitch angle.
- Connect rafter boards to header using screws to complete basic frame.
- Add support braces between the rafters for stability.
Construct a sturdy frame that won’t sag or sway under the awning’s weight. Use multiple cross supports and braces to distribute weight and keep the frame square.
Step 3: Add Finishing Touches
The awning frame is complete, but there are some finishing touches to add:
Sand the Wood
Use coarse sandpaper to smooth any rough edges on the wood frame. This prevents splinters and prepares the surface for painting/staining.
Apply Primer and Paint
Brush two coats of exterior grade primer onto all wood surfaces. Allow drying completely between coats. Top with two coats of exterior paint in your desired color. The primer/paint protects the wood from weather damage.
Install Support Bolts
Drill holes through the rafters to install bolts where you’ll later attach the awning brackets. This provides reinforcement for holding up the awning. Use washers and nuts to secure the bolts.
Once complete, your wood awning frame is ready for installing the awning fabric.
Step 4: Select and Install Fabric
The awning frame provides the structure, while the fabric is the protective, decorative skin. Here’s how to choose and install awning fabric:
Fabric Selection
- Material – Acrylic or polyester fabric are common options.
- Durability – Look for weather/UV/mildew resistance.
- Color/Pattern – Match or complement your home’s color scheme.
- Dimensional stability – Fabrics that won’t stretch or sag.
Measure the frame to determine how much fabric you’ll need. Include an extra 6 inches on all sides.
Installation Tips
- Drape the fabric over the top of the frame.
- Pull the sides down and secure with grommets/bolts along the rafters.
- Keep fabric tight across frame and trim any excess.
- Reinforce edges using galvanized roofing nails.
Proper installation keeps the fabric taut and weather resistant for years. The awning fabric protects from sun, rain and provides privacy.
Step 5: Mount the Awning
The awning is fully constructed – now it’s time to mount it above the window or door.
Mounting Options:
- Wall – Anchor into studs using lag screws.
- Roof – Attach metal brackets to roof rafters.
- Existing structure – Bolt into fascia boards or other structural elements.
Installation Tips:
- Use at least two brackets evenly spaced for support.
- Predrill holes to prevent wood splitting.
- Use angled roof brackets for sloped rooflines.
- Ensure all brackets/anchors are secured into solid structural framing.
Install screws, bolts and washers through the awning’s support bolts and into the building’s framing. Check that the awning can hold weight by carefully leaning on it.
Maintenance
Like any exterior element, an awning requires regular maintenance to maximize its longevity. Follow these tips:
- Inspect the frame yearly and touch up paint as needed.
- Use caulk/sealant on any cracks that develop.
- Check for sagging, damage or loose bolts.
- Re-stain/seal the wood frame every 2-3 years.
- Keep fabric clean and re-treat with water repellent as needed.
- Replace any torn or damaged fabric immediately.
With proper installation and care, a well-built awning can provide beauty, shade and protection for 10-15 years.
Conclusion
Building your own custom awning is a satisfying DIY project that adds function and beauty to any home. With some basic carpentry skills and the right materials, you can create an awning tailored to your space. Just be sure to use weather-resistant and durable components that can withstand wind, rain and sun. Measure carefully, construct a sturdy frame, select breathable fabric and mount the awning securely to your home. With some patience and elbow grease, you’ll soon be enjoying shade under your handcrafted awning.