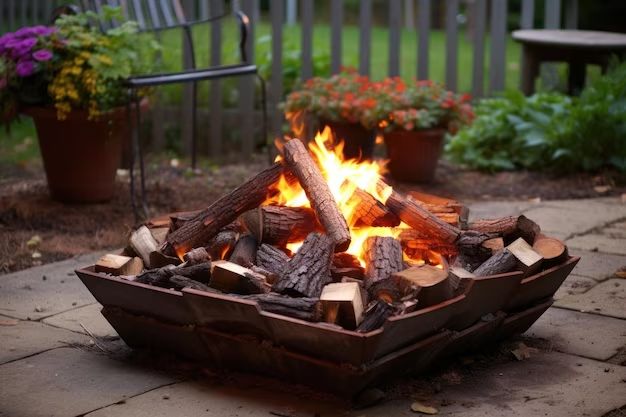
A gas fire pit is a great way to add ambiance and warmth to your outdoor living space. Gas fire pits are much easier to use than traditional wood-burning fire pits, and provide the convenience of instant ignition and easy temperature control. With some basic skills and materials, you can build your own propane or natural gas fire pit and customize it exactly as you want.
Page Contents
- 1 Benefits of a Gas Fire Pit
- 2 Planning Your Gas Fire Pit
- 3 Gas Fire Pit Materials
- 3.1 Gas Burner or Fire Pit Ring
- 3.2 Decorative Stone or Fireproof Construction Blocks
- 3.3 Gravel or Crushed Rock
- 3.4 Mortar or Adhesive
- 3.5 Steel Studs for Framing (optional)
- 3.6 Prefabricated Liner (optional)
- 3.7 Lava Rocks or Fire Glass
- 3.8 Fire Pit Lid (optional)
- 3.9 Outdoor Rated Flexible Gas Line and Valve
- 4 Instructions for Building a Gas Fire Pit
- 4.1 Select Location and Create Foundation
- 4.2 Determine Shape and Fire Pit Dimensions
- 4.3 Dig Shallow Fire Pit Foundation
- 4.4 Install Gas Supply Line
- 4.5 Build Wood Framework (optional)
- 4.6 Install Fireproof Base Layer
- 4.7 Position and Install Gas Burner
- 4.8 Build Perimeter Wall
- 4.9 Apply Exterior Finishing Surface
- 4.10 Add Gravel Layer
- 4.11 Light and Enjoy!
- 5 Natural Gas vs Propane Fire Pits
- 6 Types of Burners
- 7 Safety Tips
- 8 Conclusion
Benefits of a Gas Fire Pit
Gas fire pits offer several advantages over traditional wood-burning fire pits:
- Convenience – Gas fire pits can be ignited with the push of a button and adjusted to your ideal temperature. No need to hassle with kindling, chopping firewood, or cleaning up ash.
- Control – Gas fire pits allow you to precisely control the height and temperature of the flames using an adjustable gas valve. This makes it easy to achieve the perfect ambiance.
- Safety – Gas fire pits burn cleanly and are less of a fire hazard than open wood fires. Propane and natural gas emit very little smoke, sparks, or embers.
- Cost – While more expensive upfront, gas fire pits are often cheaper over the long run than paying for cordwood each season.
- Minimal mess – Gas fireplaces produce no ashes or burnt wood debris that requires cleanup.
For these reasons, more and more homeowners are opting for gas fire pits over the traditional wood-burning variety. Building your own gas fire pit saves money over buying a pre-fabricated model, and allows you to customize the size, features, and aesthetics.
Planning Your Gas Fire Pit
When deciding to build your own gas fire pit, there are some important factors to consider during the planning process:
Fire Pit Location
Choose a level area of your yard that is a safe distance from structures, trees and bushes, and any combustible materials. Most building codes require at least 15-25 feet clearance from the fire pit flames to adjacent structures or vegetation. Consider wind patterns when siting your fire pit so smoke will not be blown toward your house.
Gas Source
Determine if you want to use natural gas plumbed from your existing gas line, or propane from a refillable tank. Propane is easier for DIY projects, while natural gas requires professional installation but avoids the need to refill propane tanks.
Size
The diameter of your fire pit depends on how large of a gathering area you want to heat. Fire pits can range from 3 feet across for intimate gatherings, up to 10 feet across for heating a large seating area.
Fuel Burner
Select a gas burner rated for outdoor use. Choose between lava rock burners, ceramic glass burners, or metal mesh burners based on aesthetics. BTU ratings from 50,000 to 150,000 are common for residential fire pits.
Shape
Fire pits can be built as circles, squares, rectangles, triangles or freeform shapes. The shape you choose may depend on your space available. Circles are most common.
Features
Consider optional features like gas burner controls, automatic igniters, flame adjustments, safety valves, spark arrestors, lids, heat shields and drainage.
Materials
You will need fireproof construction materials capable of withstanding heat. Common options are concrete, bricks, pavers, heavy-duty metals, stone veneer, stucco, and high-temp mortar. Have materials delivered before starting your project.
Permits
Check with your local building department on whether permits are required to install a gas fire pit in your area. Homeowner’s association approval may also be needed.
Gas Fire Pit Materials
Here are the key materials needed to build your own gas fire pit:
Gas Burner or Fire Pit Ring
This provides the flames for your fire pit. Choose a stainless steel or cast iron fire ring intended for outdoor use and your fuel type. Propane models use lava rock over the burner, while natural gas models may have ceramic glass. Fire rings range from 30” to 60” in diameter.
Decorative Stone or Fireproof Construction Blocks
Use fire brick, concrete block, pavers, stone veneer, stucco or other non-combustible material to construct the structure surrounding the burner. This acts as a heat barrier to protect the gas components. Stacked stone or brick adds aesthetic appeal.
Gravel or Crushed Rock
A base of gravel around the fire pit helps with drainage and preventing the surrounding soil from becoming overly saturated with moisture. Use 1-2 inches of gravel under and around the structure. Pea gravel or crushed granite works best.
Mortar or Adhesive
Use a high-heat mortar, concrete adhesive or stone veneer adhesive rated for temperatures up to 1500°F to bond construction blocks or veneers. This creates a tight seal.
Steel Studs for Framing (optional)
If building a permanent structure, steel studs can frame the walls for added support before the finished exterior is applied. Use galvanized steel studs.
Prefabricated Liner (optional)
For quick construction, use a prefabricated liner as an instant shell for your gas fire pit. Materials like aluminum, galvanized steel, copper, concrete or survivalist concrete are common.
Lava Rocks or Fire Glass
For propane fire pits, lava rocks cover the burner element to disperse flames. Fire glass is another option for a contemporary look. Use a 1-2 inch thick layer.
Fire Pit Lid (optional)
Covers are available if you want the ability to cover your gas fire pit when not in use. Helpful for preventing debris from cluttering the pit.
Outdoor Rated Flexible Gas Line and Valve
Use stainless steel gas line rated for outdoor installation, with a manual shut-off valve to connect the gas supply to the burner system.
Instructions for Building a Gas Fire Pit
Follow these steps to build your own gas fire pit:
Select Location and Create Foundation
Choose a flat spot in your yard at least 15-25 feet from structures or plants. Remove any grass or organic matter and use crushed rock to create a level foundation.
Determine Shape and Fire Pit Dimensions
Decide the shape and diameter based on your space availability and needs. Common sizes are 3-4 feet in diameter for smaller pits, or 5-10 feet for larger groups. Outline the shape with stakes and string.
Dig Shallow Fire Pit Foundation
Excavate the fire pit area 4-6 inches deep to create a shallow depression for the foundation structure to sit in. This prevents excessive above-ground height. Slope the floor slightly for drainage.
Install Gas Supply Line
Run new natural gas line, or propane line and burial sleeve from gas source to fire pit location. Ensure proper gas pipe sizing for BTU load. Add shutoff valve.
Build Wood Framework (optional)
If using a permanent block structure, first build plywood frame to desired height and shape, supported on compacted gravel. Anchor securely.
Install Fireproof Base Layer
Line the entire pit floor with crushed gravel or sand. Install fire brick or concrete paver base. This protects the foundation from heat.
Position and Install Gas Burner
Place gas burner or fire ring in center of pit. Connect to gas supply line. Test ignition and flame height. Surround burner with lava rock or fire glass over screen.
Build Perimeter Wall
Stack concrete blocks, bricks, stone veneer, or other non-combustible materials around burner with high-temp mortar. Plan for desired seating height. Above-ground height should be 6-18 inches.
Apply Exterior Finishing Surface
Add additional masonry veneer layers, stucco, stone facing or other finishing surface materials as desired for aesthetics.
Add Gravel Layer
Cover surrounding ground area with 1-2 inch layer of pea gravel to protect soil and prevent fire pit from shifting.
Light and Enjoy!
Perform a final check that all gas connections are tight and properly sealed. Turn on gas, ignite burner, and adjust flame to desired height. Your DIY gas fire pit is now ready to enjoy! Add patio chairs, decor, and food/drinks as desired.
Natural Gas vs Propane Fire Pits
When designing your DIY gas fire pit, you’ll need to decide whether to use natural gas plumbed from your existing gas line, or propane from a refillable tank. Both have their pros and cons:
Natural Gas Fire Pit Advantages:
- Easy control – Natural gas hookup allows you to regulate the fire pit using your household valve and controls.
- Unlimited burn time – No need to refill propane tanks, so you can run it uninterrupted.
- Cheap fuel – Natural gas tends to cost less per BTU than propane.
Propane Fire Pit Advantages:
- Portability – Propane fire pits use mobile tanks, allowing you to move them around your patio.
- Easy installation – No need to plumb pipes or lines for propane models.
- Predictable costs – Propane tank refills have fixed pricing in comparison to natural gas bills.
If you don’t already have natural gas service, propane may be easier for DIY construction. Propane also avoids the effort of trenching gas lines. However, if natural gas is available, the convenience may outweigh the extra installation work.
Types of Burners
The type gas burner or fire ring you select will influence the aesthetics and functionality of your DIY fire pit:
Lava Rock Burners
- Inexpensive
- Flames spread over entire rock bed
- High heat output
- Less flame visibility
Ceramic Glass Burners
- Sleek visual flames
- Wider flame span
- Various colors available
Metal Mesh Burners
- Very open visual flames
- Less radiant heating area
- Good for smaller spaces
The amount of visual flame exposure vs. radiant heat coverage varies among the different options. Consider your heating needs and aesthetic preferences when selecting a burner. Lava rock burners are the most economical choice.
Safety Tips
While gas fire pits are generally quite safe, its crucial to follow these precautions and safety measures:
- Have appropriate clearances from structures, plants, furniture, etc.
- Keep away from children and pets when lit
- Do not pour gasoline or other accelerants on an existing fire
- Ensure good drainage to prevent flooding
- Install safety shutoff valves
- Only use fire pit outdoors
- Keep lid open while burning
- Always turn off gas valve after use
- Let cool completely before touching surfaces
Carefully planned design, good construction, and smart use help ensure your DIY gas fire pit provides an enjoyable and relaxing focal point in your yard for years to come.
Conclusion
Building your own gas fire pit requires planning, the right materials, gas and masonry skills, and time to construct – but the end result provides a beautiful and functional addition to your backyard. Gas fire pits create an instant ambiance for entertaining or relaxing. By doing it yourself, you can create a customized fire pit exactly suited to your space and needs, at significant cost savings compared to purchasing a pre-made fire pit. Be sure to do the project safely and check local codes. With some work, you can soon enjoy the convenience and atmosphere a new gas fire pit provides in your outdoor living area.