Doing your own oil change can save you money and allow you to learn more about your vehicle. While it may seem intimidating at first, changing your oil is actually a relatively simple process that most people can do at home with basic tools and supplies. In this comprehensive guide, we will walk you through the entire process step-by-step, from gathering the necessary materials to disposing of the old oil properly. We will also provide tips and advice for making the job easier. Read on to learn everything you need to know about how to do an oil change yourself!
Page Contents
What You’ll Need
Before you get started, you’ll need to gather the following materials and tools:
Supplies
- Engine oil – Check your owner’s manual for the recommended oil type and viscosity.
- Oil filter – Make sure you have the correct oil filter for your vehicle.
- Drain pan – Use a large pan that can hold at least 5 quarts of oil. An old plastic wash bin works well.
- Funnel – For pouring the new oil into the engine.
- Rags – Have some on hand to clean up spills.
Tools
- Socket wrench
- Oil filter wrench (for loosening the old filter)
- Jack and jack stands (for safely lifting the vehicle)
- Wheel chocks (for securing the wheels when lifted)
- Creeping – For lubricating the oil filter gasket
Gather all of these supplies before you get started. The last thing you want is to get under the car only to realize you’re missing something important.
Safety Tips
Changing your oil involves getting underneath your vehicle, so it’s important to keep safety in mind:
- Wear protective eyewear and gloves to protect yourself from oil splatters.
- Be sure the vehicle is on level ground and the parking brake is engaged.
- Chock the rear wheels to prevent rolling.
- Use jack stands and secure the vehicle properly before getting underneath.
- Never get under a vehicle supported only by a jack, which can slip.
- Place blocks behind the rear wheels if changing oil on an incline.
- Keep a fire extinguisher nearby in case of an oil or transmission fluid fire.
- Let the engine cool completely before draining the oil.
Working safely is crucial whenever you’re underneath a vehicle. Make sure you’re prepared before getting started.
Step-By-Step Guide
Now that you understand what’s required and how to stay safe, let’s go through the oil change process from start to finish:
1. Prepare the Vehicle
The first step is to get your car or truck ready for the oil change:
- Park the vehicle on a flat, level surface and apply the parking brake.
- Jack up the front of the vehicle and place jack stands securely underneath the manufacturer’s recommended lift points.
- Chock the rear wheels to prevent rolling.
- Remove any underbody skid plates protecting the oil drain, if equipped.
Safely supporting the vehicle gets it ready for draining the old oil.
2. Drain the Old Oil
Now that the vehicle is lifted and supported, you can drain out the old oil:
- Locate the drain plug, typically near the rear of the oil pan.
- Place the drain pan underneath to catch the old oil.
- Use your socket wrench to loosen and remove the drain plug.
- Allow the oil to fully drain into the pan, which could take 10 minutes or more.
Be sure to allow ample time for all the old oil to drain out. Avoid losing or misplacing the drain plug in the process.
3. Change the Oil Filter
While the oil is draining, you can change the oil filter:
- Locate the oil filter, typically under the engine compartment.
- Use an oil filter wrench to loosen and remove the old filter.
- Inspect the filter’s rubber gasket and remove it if it didn’t come off with the old filter.
- Use a clean rag to wipe down the filter mounting surface on the engine block.
- Apply a thin coat of fresh oil to the new filter’s gasket before screwing it on.
- Tighten the new filter by hand until the gasket contacts the mounting surface, then tighten about 3/4 to 1 full turn further.
Be careful when removing the old oil filter, as hot oil can drip from it. The new gasket doesn’t need to be very tight to seal properly.
4. Replace the Drain Plug
Once the oil has finished draining, you can replace the drain plug:
- Check the drain plug for any damage to the threads or sealing surface.
- Wipe the plug clean and apply fresh thread sealant or a new sealing washer.
- Carefully reinstall the drain plug and tighten securely.
- Avoid overtightening, but ensure the plug is sealed.
Double check that the drain plug is reinstalled correctly before moving on.
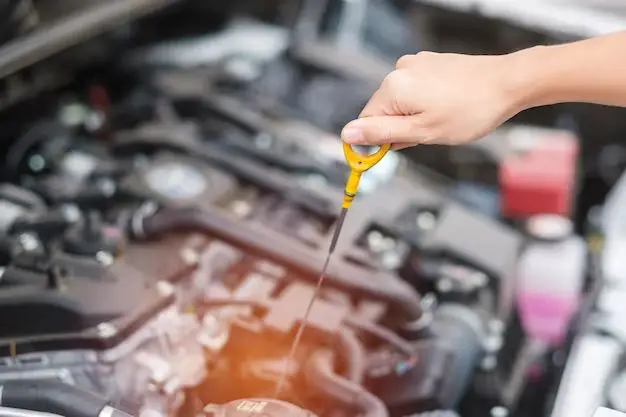
5. Add New Oil
After replacing the filter and drain plug, you can refill the engine with fresh oil:
- Refer to your owner’s manual for the correct type and amount of oil.
- Place a funnel in the engine’s oil fill hole, typically on the valve cover.
- Pour in the appropriate amount of new oil, checking the dipstick periodically to avoid overfilling.
- Stop adding oil when it reaches the “Full” line on the dipstick.
Adding too much or too little oil can cause engine problems, so measure carefully and check the dipstick.
6. Check for Leaks
Before lowering the vehicle, start the engine and check for any oil leaks:
- Let the engine idle for about 5 minutes.
- Inspect the oil drain plug, filter, and surrounding areas closely for any drips or leaks.
- Tighten plugs or fittings further if you notice a leak starting.
- If leaks persist, turn off the engine immediately and determine the cause before driving the vehicle.
Catching leaks right away prevents oil loss and extensive cleanup.
7. Lower Vehicle and Finish Up
Once leak checks are complete, you’re ready to button things up:
- Turn off the engine and carefully lower the vehicle to the ground.
- Remove the jack stands and wheel chocks.
- Dispose of the old oil and filter properly. Many auto parts stores accept used oil for recycling.
- Clean up any spills and replace any underbody shields removed earlier.
Be sure to properly dispose of the old oil. Never just dump it on the ground, down a drain, or in the trash.
Tips for DIY Oil Changes
Follow these tips for smoother oil changes at home:
- Change oil when the engine is warm, but not hot. Oil flows better and more contaminants are removed.
- Compare new and old filters side-by-side when changing brands or models.
- Check the owner’s manual if you’re unsure of the oil grade, capacity or change intervals.
- Tighten the oil filter by hand first before using the wrench to avoid overtightening.
- Consult your dealer if switching to synthetic oil for the first time.
- Consider using a top-off oil service between changes to maximize engine protection.
Following these tips will keep your DIY oil changes running smoothly while protecting your engine.
Conclusion
Changing your own oil is one of the easiest DIY auto maintenance tasks you can tackle. While it may seem intimidating the first time, it’s actually a straightforward process that anyone can learn. Just be sure to use jack stands, drain the old oil completely, replace the filter, refill carefully, and dispose of waste properly.
Equipped with the step-by-step guide above, you now have all the key information needed to start doing your own oil changes. Not only will you save money versus paying for professional changes, but you’ll also add convenience, learn more about your vehicle, and ensure only high-quality oil goes into your engine. With some basic tools and supplies, a little time, and following proper safety precautions, you can change your oil like a pro.