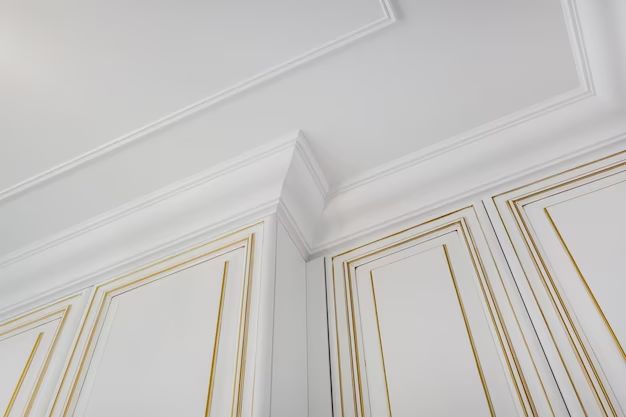
Installing chair rail in a room can add an elegant decorative touch. Chair rail is a decorative molding that runs horizontally around the room at chair height, typically about 30-36 inches from the floor. While running the chair rail along the straight wall sections is relatively straightforward, the corners can be tricky. Properly wrapping the corners with chair rail requires some precise measurements, cuts and miters. With careful planning and by following some key tips, you can get perfectly mitered corners that will give your chair rail installation a polished, professional look.
Page Contents
What is Chair Rail?
Before getting into the corners, it helps to understand what exactly chair rail is. Chair rail is a decorative strip of trim, typically 3-4 inches wide. It is installed horizontally to protect walls from chair backs and other damage. The name comes from its placement at chair height. In addition to protecting walls, it also adds visual interest by separating the lower and upper parts of the walls.
Traditionally, chair rails were made from wood. But today you can also find vinyl, MDF and PVC chair rail. The most popular profiles include:
- Standard – A simple L-shaped profile
- Colonial – A wider rail with curved detail on the bottom
- Shoe – Shaped like an upside down shoe
- Beaded – With a row of decorative beads along the bottom
No matter the specific profile, properly installing corners is key to a successful chair rail project.
Tools and Materials Needed
Installing chair rail requires just a few basic tools and materials:
- Miter saw – For cutting pieces to length and angled end cuts
- Miter box with backsaw – For minor touch up cuts if needed
- Tape measure
- Stud finder
- Level
- Hammer
- Nail set
- Nails or trim head screws
- Wood glue
- Sandpaper
- Wood putty
- Primer and paint
For the chair rail itself, determine the lineal footage needed based on the room perimeter. It’s a good idea to add an extra 10-15% to allow for mistakes and waste. Most chair rail comes in 9 or 10 foot lengths.
Preparing Walls and Measuring
Proper preparation is key to a smooth installation. Start by ensuring the walls are flat. Fill any holes or imperfections with drywall compound and sand smooth. Prime and paint the walls up to the height of the planned chair rail line before installing the rail.
Next, determine the exact height for the chair rail. The standard is 32-36 inches above the floor. Measure up from the floor and use a level to mark a perfectly horizontal line around the room. This line will guide your installation.
For walls with windows or doors, measure and mark the ends of the chair rail so you know where to stop and start. Have the rail stop about 1 inch from the window or door trim.
Cutting Chair Rail Pieces
Cut the chair rail pieces to length based on your measurements. Use a miter saw for straight, smooth cuts. Cut the ends on a 45 degree angle when needed. Test fit the pieces and make any minor adjustments for a perfect fit against the walls.
For the corners, careful measuring and test fitting is crucial. Follow these steps:
- Cut the first piece to run along one wall and stop in the inside corner.
- Place another piece along the adjoining wall into the corner.
- Mark where the corner meets the angled end of the first piece.
- Subtract 1/2 inch and cut the second piece there to allow it to overlap.
- Use a miter gauge or box to cut both ends at a 45.
- Test fit the mitered pieces and continue adjusting until they fit together snugly.
Installing the Chair Rail
Once all pieces are cut and fitted, you’re ready for installation. We recommend nailing the corner joints first before fastening the longer straight pieces. This allows minor adjustments as needed.
For fastening chair rail:
- Ensure all cuts and miters are glued first using wood glue.
- Pre-drill holes to prevent splitting, especially near the ends.
- Nail into wall studs whenever possible for a secure hold.
- For stud-free areas, use hollow wall anchors.
- Set nails with a punch and apply wood putty over holes.
Take care to keep the chair rail height consistent and level around the room. Check with a level frequently during installation. Once secured, fill nail holes and touch up with primer and paint.
Tips for Perfect Corners
Here are some additional tips to help you achieve flawless mitered chair rail corners:
- Cut test pieces to practice your miter cuts before cutting the final chair rail pieces.
- Take time to fine tune the corners for a precise fit. Don’t be afraid to re-cut one side if needed.
- Slowly sneak up on the cut rather than trying to get it perfect on the first pass.
- Use a backing block when cutting to prevent tear out on the show side of the profile.
- Cut miters slightly long and creep up to the right size.
- Apply painter’s tape to the wall side to prevent gaps when installing.
Finishing Touches
Once installed, there are just a few finishing steps. Inspect the chair rail carefully and use wood putty as needed to fill any nail holes, gaps or defects. Ensure all joints and miters are filled to create a seamless look. Sand smooth when dry.
Finish up by priming and painting the chair rail. Use a small tapered trim brush for best results. Apply at least two coats, allowing proper drying time between coats. Finally, replace wall plates or outlet covers and install quarter-round trim along the bottom edge of the chair rail.
And that’s it! Installing chair rail with beautiful corners is mostly a matter of taking measurements, repeating trial fittings and exercising patience. Follow the tips outlined and you’ll have stunning chair rail to admire for years to come.
Frequently Asked Questions
What type of saw do you need to cut chair rail?
The best saw for cutting chair rail molding is a miter saw. A miter saw allows you to make straight, angled, beveled cuts to size chair rail pieces and corners perfectly.
What is the standard height for chair rail?
The standard chair rail height is 32-36 inches above the floor. This positions it about midway up a typical room wall at approximately chair back height.
Should you miter or cope chair rail corners?
For an inside corner, the preferred technique is to miter the ends at 45 degrees. This provides a tight seam and prevents undesirable gaps. Coping could work but mitering is stronger and provides better long term durability.
How do you cut inside corners for chair rail?
Cutting inside corners involves carefully mitering each end at precisely 45 degrees and fine tuning for a perfect fit. Use a miter saw, miter box or a simple hand miter guide. Make minor adjustments until the pieces join seamlessly.
Can you use wood glue when installing chair rail?
Yes, wood glue is recommended when installing chair rail. Use wood glue on all miter joints. The glue will strengthen the bonds and help minimize any gaps or separation over time.
Conclusion
Installing chair rail really dresses up a space and adds an elegant decorative touch. While the straight runs are relatively easy, wrapping the interior corners with precise miters can be challenging. By carefully measuring, test fitting and cutting the ends at 45 degree angles, you can achieve beautiful, seamless chair rail corners. Use a miter saw, go slowly, double check your work and utilize wood glue at all joint locations. Follow the tips provided and you’ll have stunning chair rail corners that will withstand the test of time.