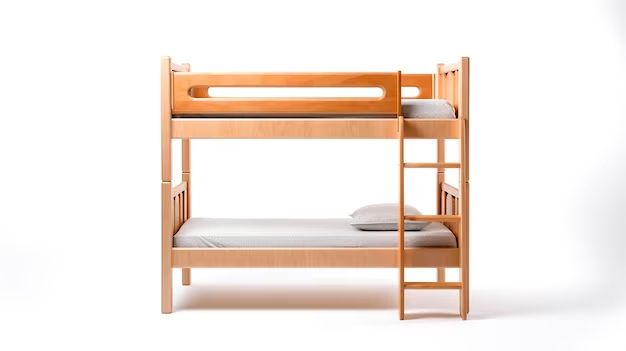
Making a bunk bed for your dog can be a fun DIY project that allows you to customize the bed exactly to your pup’s needs. Dogs love having their own space, and a bunk bed gives them both an upper and lower bed to lounge on and sleep in. This provides more areas for your dog to relax and also allows multiple dogs to have their own designated bed.
When making a dog bunk bed, there are several things to consider in terms of size, materials, safety features, aesthetics, and customization. In this article, we will provide step-by-step instructions on how to make a sturdy and comfortable bunk bed that your dog will absolutely love. We will cover how to measure your dog properly, choose durable and easy-to-clean materials, add safety railings, include storage space, and personalize the bed with your dog’s name or favorite colors.
Follow along below for everything you need to know to DIY a bunk bed fit for your furry best friend!
Page Contents
- 1 Why Make a Bunk Bed for Your Dog?
- 2 Step 1: Take Measurements of Your Dog
- 3 Step 2: Purchase Supplies and Tools
- 4 Step 3: Cut the Lumber to Size
- 5 Step 4: Assemble the Bed Frame
- 6 Step 5: Build the Bunk Platforms
- 7 Step 6: Include Access Stairs or Ramp
- 8 Step 7: Add Cushioning and Bedding
- 9 Step 8: Finish with Personal Touches
- 10 Conclusion
Why Make a Bunk Bed for Your Dog?
Here are some of the key reasons to consider making a bunk bed for your beloved canine companion:
– Provides more space and bedding area – Bunk beds instantly double the sleeping and lounging space for your dog. This allows them to spread out and get comfortable.
– Customizable for your dog’s needs – Building it yourself allows you to cater the size, shape, materials, and features to your specific dog.
– Separate spaces for multiple dogs – Bunk beds allow multiple dogs each have their own designated bed and area. This prevents fighting over a single bed.
– Elevated bed is great for older or arthritic dogs – An upper bunk with built-in stairs or a ramp allows easy access for senior dogs. Elevation helps joints.
– Adds storage space below – The lower bunk can be left open for storing dog toys, supplies, leashes, food containers, etc.
– Fun DIY weekend project – Making your own dog bunk bed is a creative project you can do yourself at home with basic tools.
– Saves money over buying – Custom dog bunk beds can be expensive. Building your own saves money.
As you can see, dog bunk beds offer several benefits for your furry friend. Now let’s get started with how to make one yourself!
Step 1: Take Measurements of Your Dog
The first crucial step in constructing a bunk bed for your dog is to carefully measure your canine companion. You want to customize the bed specifically to their size and needs. Here are the key dog measurements to take:
– Length – Measure your dog from the tip of the nose to the base of the tail. Add 12 inches. This ensures enough stretching and sleeping space.
– Height – Measure from the floor to the top of their shoulders as they normally stand. Add 3-4 inches for comfort.
– Width – Measure across your dog’s widest point – usually the hips or shoulders. Then add 12 inches for ample wiggle room.
Make sure to measure while your dog is standing normally. Don’t stretch them out fully. You want a comfortable and cozy fit.
If making a bunk bed for two dogs, measure both dogs and use the larger dimensions. You want plenty of room for both.
Write down these length x width x height measurements. We will use these to cut the lumber for the bed frame. Having accurate dimensions is key to constructing a bunk bed your dog will love.
Sample Dog Measurements
| Dog Name | Length | Height | Width |
| Spot | 32 inches | 24 inches | 20 inches |
| Rover | 36 inches | 28 inches | 25 inches |
As shown in the sample table, Rover requires bigger dimensions at 36 x 28 x 25 inches. So we would use Rover’s larger measurements for constructing a bunk bed for the two dogs to share.
Step 2: Purchase Supplies and Tools
Now that we have the proper measurements, it’s time to gather the building supplies and tools needed to construct the bed frame:
**Lumber:**
– 4 posts – Posts support the overall frame. Length depends on total height needed.
– 2 side rails – Span length of bed. Length depends on dog’s measured length.
– 5 slats – Make the platform base. Cut to fit width.
– Plywood or MDF board – For bottom and top bunk platforms.
Use pine or oak boards for durability. Avoid treated lumber which can be toxic.
**Hardware:**
– Wood screws
– Nuts and bolts
– Corner brackets for joining
**Safety:**
– Wooden railings for top bunk
– Carpeted stairs or ramp
**Cushioning:**
– Foam egg crate mattress
– Memory foam mattress
– Sheets/pillows
**Tools:**
– Tape measure
– Saw (circular, jig or miter)
– Drill
– Sandpaper
– Staple gun
– Level
– Pencil
The specific amount of lumber and hardware depends on the size of your dog and bed frame. Make a list of the supplies and materials you will need according to the measurements and bring it along to the hardware store. You likely will need to make multiple trips as the build progresses.
Step 3: Cut the Lumber to Size
With your materials purchased, it’s time to start construction. First, use a circular saw, miter saw or jig saw to cut the lumber to the proper lengths:
– Cut 4 posts to the total height needed
– For example, 40 inches long
– Cut 2 side rails to match dog’s length plus extra for post overhang
– For example, 36 inches long
– Cut 5 slats to the dog’s width measurement
– For example, 25 inches long
– Cut top and bottom platforms several inches shorter than total length and width
– For example, 32 x 22 inches
Take your time to measure carefully and cut all pieces smooth and even. Having properly sized lumber ensures sturdy construction. Sand any rough edges. Also cut plank pieces for safety railings.
Sample Cut Lumber Lengths
| Posts | 40 inches |
| Side rails | 36 inches |
| Slats | 25 inches |
| Platforms | 32 x 22 inches |
Step 4: Assemble the Bed Frame
Once the main pieces are cut, it’s time for assembly. Working on a flat surface, attach the posts and side rails together using corner brackets, nuts and bolts, and wood screws. Use a drill to pre-bore holes and avoid splitting the wood.
– Position 2 posts parallel to each other for headboard and footboard.
– Attach the side rails along the posts. Keep rails few inches below top of posts for platform overhang.
– Check corners are 90 degrees using a level.
Next, attach the slats evenly along the side rails to form the support base.
– Place slats few inches apart for ventilation and drainage.
– Drill pilot holes and screw slats into rails from underside.
The basic frame should now be complete. Double check dimensions and make sure the frame is square and level before moving to next steps.
Step-by-Step Frame Assembly
| 1. Attach corner brackets to join 4 posts and 2 side rails. |
| 2. Use bolts and wood screws to secure post-rail joints. |
| 3. Apply wood glue before screwing slats to side rails. |
| 4. Confirm frame is square by measuring diagonals – adjust as needed. |
Step 5: Build the Bunk Platforms
With the frame fully assembled, you can now add the top and bottom platforms. This will form the bunk bed structure.
Cut plywood or MDF sheets to the measured platform size. Attach sheets to frame:
– Place bottom platform on slats few inches from one end. This leaves open storage space.
– Center top platform along upper posts and side rails. Allow several inches of overhang.
– Pre-drill holes and screw sheets into posts and rails from underside.
– Use wood glue for added adhesion and rigidity.
Add safety railings around the exposed sides of the top bunk. Cut plank pieces and attach with wood screws. Make sure to sand any rough edges smooth.
The bunk bed frame is really coming together now!
Securing Bunk Platforms
| – Apply wood glue to platform edges. |
| – Drill pilot holes to prevent splitting. |
| – Stagger screws evenly around perimeter. |
| – Check platforms are level and stable. |
Step 6: Include Access Stairs or Ramp
For your dog to be able to enjoy the upper bunk, they need a way to access it easily. There are two options:
**Stairs -**
– Wide, short stair steps work best. Dogs have a hard time climbing steep stairs.
– Cut stringers from 2x4s and use outdoor carpeting for treads.
– Attach stringers securely to bottom platform.
**Ramp -**
– Cut two planks and screw together long ways to form ramp.
– Add cross slats for grip.
– Use non-slip carpet or turf on ramp surface.
– Secure ramp to bottom platform at gentle incline.
Either choice allows your dog to move comfortably between the lower and upper beds. This is important for dogs with mobility issues or that are lower to the ground. Proper stairs or a ramp ensures the bunk bed is safe and accessible.
Stair and Ramp Tips
| – Stairs work well for agile dogs. |
| – Ramps better suit older or disabled dogs. |
| – Include side rails on stairs and ramp. |
| – Check angle is not too steep. |
Step 7: Add Cushioning and Bedding
Now we’re ready for the fun part – making the beds extra cushy and cozy for your pup!
Start by adding a foam base layer. Cut egg crate or dense foam mattress pads to fit each platform. This provides cushioning and evens out the hard surface.
Next, top the foam base with a soft mattress, pillow or pad. Memory foam beds conform nicely to your dog’s body. Or use a cotton stuffed pad or pillow.
Finally, customize with your dog’s favorite blankets or sheets. You can even add small pillows for ultimate comfort! Having super soft bedding encourages your dog to lounge and sleep.
If making a bunk bed for two dogs, consider using different colors, textures, or scents in each bed so pups can identify their own space.
Bedding Tips
| – Use waterproof covers to protect foam and mattresses. |
| – Wash bedding regularly for cleanliness. |
| – Add side pillows or bolsters for snuggling. |
| – Use your dog’s worn, unwashed t-shirts for scent. |
Step 8: Finish with Personal Touches
To complete your custom dog bunk bed, add some personalized details:
– Stencil or wood burn your dog’s name onto posts or platforms
– Paint or stain the wood their favorite color
– Attach rope loops for hanging toys and leashes
– Add shelves or cubbies for storing treats and supplies
– Include baskets for holding dog toys or bones
– Affix non-slip stair treads and corner protectors
– Screw in hooks to hang food/water bowls
These finishing touches make the bunk bed unique to your beloved pet. They will absolutely love having their own customized bedroom!
Personalization Ideas
| – Name sign | – Paw print decals |
| – Stenciled colors | – Border trim |
| – Toy hammocks | – Treat jar |
| – Picture frame | – Dog bone hooks |
Conclusion
Building a bunk bed for your faithful dog or dogs is a great DIY project that allows you to create a custom bedroom just for them. By following the step-by-step instructions above on measuring, building the frame, adding platforms, stairs/ramp, bedding, and personal touches, you can construct a bunk bed ideally suited to your pup.
The end result will be a fun, safe space your dog will absolutely adore lounging, sleeping, and playing in. A bunk bed also provides more room for multiple dogs and is ideal for older dogs who need easy access to an elevated bed. As a bonus, you can save money by making the bed yourself compared to buying pre-made.
So grab your tools, head to the hardware store, and get started creating your dog’s dream bunk bed today! Just be prepared for endless tail wags and maybe even some happy doggy dreams once your precious pooch tries out their new bedroom. Let us know how your custom dog bunk bed turns out!