Making a good derby car requires careful planning, preparation and execution. The first and most important step is to understand the basic requirements and rules for building a derby car. This will determine the design, materials and construction methods used. Some key factors to consider are safety, weight limits, size constraints and structural integrity. With the right approach, you can build an effective and competitive derby car within the regulations that will withstand crashes and rolls while racing.
Page Contents
What is a Derby Car?
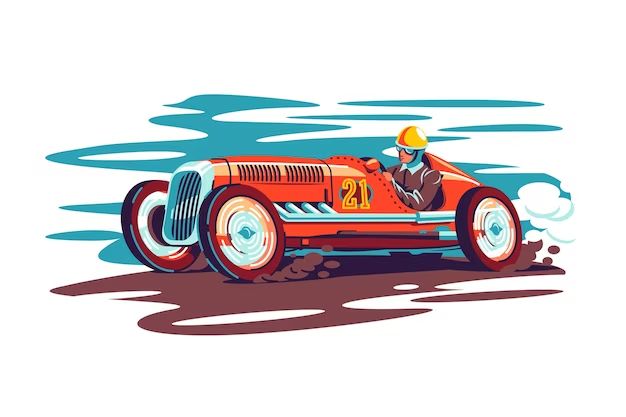
A derby car is a vehicle specifically designed and built for participating in a demolition derby competition. Derby cars are typically older full-sized automobiles that have been structurally reinforced and modified for collisions. The goals are to withstand crashing into other vehicles as much as possible while also attempting to be the last car still operational and mobile in the demolition derby arena.
Key Design Elements
There are certain important design elements that are characteristic of many good derby cars:
- A strong, reinforced frame to handle impacts
- A protective driver’s cabin with roll cage
- Bumpers and external panels designed to take hits
- Suspension modifications for stability and strength
- An upgraded engine and transmission for power
- Added weight over the rear wheels for traction
Optimizing these areas helps create a durable and competitive derby car.
Rules and Regulations
All demolition derbies have certain regulations that must be followed when building a derby car. It is critical to fully understand and abide by the specific rules for the derby you plan to enter. Rules help ensure safety and fairness.
Typical Derby Car Rules
While rules can vary between events, here are some typical standards:
- Engine and transmission swaps are allowed but must be from eligible models
- The engine must be in the stock location
- No reinforced suspension components beyond what is allowed
- Doors must be chained or welded shut
- Padding on the driver’s door and roll cage is required
- The gas tank must be relocated with proper shielding
- Working brakes are mandatory on at least three wheels
- Maximum vehicle size restrictions apply
Always consult the current rule book rather than making assumptions. Rules are in place for good reasons.
Derby Car Design Considerations
Once you understand the basics of what makes a demolition derby car and the rules involved, next you can focus on specific design considerations for building your own competitive derby car.
Car Selection
– Choose a full-sized sedan or station wagon model allowed by your derby’s rules. Avoid small cars or SUVs/trucks which are not optimal derby vehicles.
– Look for a car with a strong frame and body/chassis structure that can take abuse. Older large American-made models are preferred.
– Pick a common vehicle with readily available and affordable replacement parts.
– Make sure it’s a model approved for your derby, meets size limits, and has an eligible engine and transmission.
Weight and Balance
– Add weight over the rear wheels for needed traction, but avoid making the car too heavy to maneuver.
– Use thick steel plates welded over the trunk and wheel wells to add rear weight.
– Keep weight balanced from side-to-side for stability during collisions.
– Remove unnecessary parts to help offset any added weights.
Structural Reinforcement
– Weld the doors, trunk and hood shut so they don’t pop open. Chain doors as a backup.
– Reinforce weak points like the firewall, roof and frame with steel bars, plates or angle iron.
– Add a 4-point internal roll cage for driver safety and rigidity.
– Install a front brace bar tied into the frame to absorb hits and restrict bending.
– Use channel iron to box in and strengthen the frame as permitted.
Bumpers and Body Panels
– Attach a sturdy front bumper that won’t easily bend or sheer off.
– Bolt the bumper directly to added bumper brackets or frame mounts.
– Chain the bumper to the frame as a backup to absorb hits if mounts break.
– Remove or fold back external body panels like fenders that can crumple and restrict the wheels.
Suspension and Steering
– Weld suspension components to limit travel and create a rigid base.
– Use lift blocks or heavy springs in the rear to raise the back end.
– Add reinforcements between the frame and axle housings.
– Secure the steering wheel and column to prevent impact shifting.
– Install a racing style steering wheel quick release for safety.
Engine, Transmission and Drivetrain
– Use an engine and transmission swap for more power and durability.
– Add engine mounts and chains to secure the engine and protect wiring.
– Install high posi-traction differentials and axle braces.
– Protect and relocate all exhaust, fuel, hydraulic, and cooling lines out of harms way.
– Use ultra-high performance drivetrain fluids for longevity.
Fuel System
– Build a fuel cell protection box in the trunk or behind the seat.
– Relocate the fuel tank and lines inside the protected fuel cell.
– Use braided steel fuel lines rather than rubber hoses.
– Install an emergency fuel kill switch within the driver’s reach.
Brakes, Tires and Wheels
– Use a brake system with residual valving for a firm brake pedal.
– Maximize your tire size parameters as permitted. Tires can’t extend beyond the fenders.
– Install lug nuts and studs to secure the wheels during impacts.
– Use stiff, high air pressure tires that won’t deflate easily.
Safety Equipment
– Install quality racing seat belts, harness, window nets and fire extinguishers.
– Add an internal roll cage with side bars to protect the driver.
– Pad the driver’s side doors, roll cage and firewall.
– Use a racing helmet, neck brace, fire suit and gloves.
Electrical System
– Protect the battery by securing it inside the cab or installing a cover.
– Avoid loose wires dangling. Tie wrap or enclose all wiring harnesses.
– Install a safety master electrical kill switch to shut everything down.
Derby Car Materials
For durability during crashes, the right materials are key when constructing a competitive derby car. Using too weak or too heavy materials can be problematic.
Recommended Materials
These are ideal materials for derby car building:
- Steel: The most common metal used. It provides good impact resistance at moderate weight. Angle iron, rectangular tubing, channel iron, steel plate, rebar and expanded metal mesh are very effective.
- Aluminum: Lightweight but still strong. Often used for the roll cage, interior protection and engine transmission mounts.
- Chain: Flexible with high tensile strength. Used for securing doors, bumpers and weight boxes.
- Welding Rod: Essential for welding metals. Low hydrogen rod reduces the chance of cracking.
Materials to Avoid
These materials tend to underperform on derby cars:
- Wood – Splinters easily making dangerous shrapnel
- Plastic – Shatter prone and low strength
- Sheet metal screws – Pop out under impact
- Liquid adhesive – Doesn’t bond well to surfaces with oil and dirt
- Fiberglass – Absorbs very little impact before cracking
Stick with steel metal structures secured with welds and bolts. It withstands demolition derby abuse the best.
Derby Car Building Process
Constructing a derby car takes some time and effort. But assembling a well-designed car is also very rewarding. Here is an overview of the typical build process:
Planning Phase
– Thoroughly review the rule book and restrictions for the specific derby you are entering.
– Use the allowable budget to identify a suitable make and model car to purchase as your build platform.
– Research and gather ideas on effective car designs and features to incorporate.
– Create detailed plans for the vehicle based on the rules, your budget and goals.
Preparation Phase
– Remove all interior trim, glass, lights, engine accessories and body molding.
– Weld doors and trunk shut. Chain or bolt as a backup.
– Clean and paint the frame. Grind any cracks or rust spots before painting.
– Gather or fabricate needed steel bars, tubing, plate and hardware.
Roll Cage Installation
– Blueprint and measure for the 4-point roll cage design and dimensions.
– Cut roll cage tubing sections to length with room for welding.
– Fit and tack weld the roll cage bars into position. Double check alignments.
– Fully weld all roll cage joints. Grind the welds smooth when completed.
Frame Strengthening
– Determine sections needing internal bracing based on your car’s weak points.
– Cut and install channel iron or tubing between the frame rails to box in those areas.
– Weld external plates over the frame seams and weld seams the full length.
Suspension and Steering Modification
– Weld or clamp coil springs to prevent collapsing and limit travel.
– Secure steering stabilizer braces between the frame and steering linkage.
– Reinforce suspension mounting points with gussets between the frame and axle housings.
Bumper and Armor Installation
– Replace the factory front and rear bumpers with more rugged custom fabricated ones.
– Weld a front bumper brace between the bumper and chassis to distribute impact forces.
– Bolt armor plating onto the doors, rear compartment and wheel wells.
Drivetrain Installation
– Procure and install the new engine, transmission, differential and axles per the rules.
– Fabricate reinforced engine mounts and adapter plates.
– Run replacement exhaust, fuel, cooling and electrical systems. Protect as needed.
Interior Safety Cage
– Construct side protection bars from the main hoop down to the frame.
– Install a padded aluminum cover to shield the fuel cell from collision intrusion.
– Securely mount the racing seat, controls, gauges and fire suppression system.
Final Prep
– Do a complete car shakedown test. Check for loose parts or new rattles.
– Make adjustments, repairs and reinforcements based on the shakedown results.
– Add competition numbers, paint, decals and any final touches.
– Confirm the car conforms to all rules. Update your paperwork for inspection.
Pre-Race Prep
– Perform final checks on the brakes, tires, fluids and safety gear.
– Charge batteries and prime the engine and systems.
– Review the rules, procedures and features of the specific derby competition you’re entering.
– Get plenty of rest. Stay focused, determined and excited to go derby racing!
Tips for Derby Car Durability
A major key to success in demolition derby competition is having a car that can take repeated hits and still function. Durability is critical. Here are helpful tips for making your derby car more damage resilient:
- Overbuild everything beyond what you think is necessary. The impacts generate massive forces.
- Box and triangulate the frame for rigidity. Round tube frames flex too much.
- Weld all seams with continuous beads rather than short spot welds.
- Use gussets plates on joints between frame rails, body mounts and suspension parts.
- Choose stronger solid axle differentials over independent suspension setups.
- Keep body panels like the hood and trunk lid bolt-on replaceable. They often need repairs between heats.
- Install collapsible foam blocks inside body cavities. This dampens damage from intrusions.
- Make wiring harnesses and fuel lines quick-disconnect at the front body seam for access.
- Allow wheels a few extra inches of clearance room to move before binding up.
- Keep extra板nuts, bolts, wire, hose clamps and tape on hand for quick repairs.
Important Derby Car Features
We’ve covered many key areas involved in building a competitive demolition derby car. Here is a summary overview of some of the most important design features to incorporate:
Sturdy Frame
The frame and unibody structure needs to be super rigid to avoid excessive bending and twisting when slammed hard. Triangulate and box it in.
Roll Cage
A complete interior roll cage with side intrusion bars will protect the driver and add chassis stiffness.
Suspension Limits
Movement needs controlled. Solid axles with welding on components keeps the car planted.
Protected Driver’s Area
Padding on the inside of the driver’s door, roof and roll bars is critical for safety and impact absorption.
Bumper Brackets
Beefed up bumper brackets properly mounted to the frame are needed to allow hard frontal hits without failure.
Engine Security
The engine and transmission must be mounted super securely to avoid problems when receiving massive blows.
Rear Weight Bias
Additional rear weight over the back wheels enhances traction, braking and strength behind the rear axle.
Tire Protection
Wheel wells and fenders should allow plenty of clearance and movement to prevent tires getting ripped off their beads.
Shielded Components
The battery, fuel cell, pumps, tanks and wiring need protected locations away from likely intrusion points.
Roof Signs
Big visible numbers on the roof and sides let the officials and fans clearly identify your car in the chaos of competition.
Conclusion
Building a quality derby car takes effort but is very gratifying. By understanding the fundamentals, carefully planning the design, selecting ideal materials and components, and methodically executing the build process, you can create a durable and competitive derby car within the rules. Protect the driver, reinforce the structure, beef up the drivetrain, and add weight balance. Testing and making adjustments is key to optimizing performance. A well-constructed derby car provides the opportunity for exciting crash and bash fun and a chance at victory.