Air hockey is a fun and exciting game that people of all ages can enjoy. It provides fast-paced action as players try to score on each other by shooting a puck across the table and into the opponent’s goal. While full-size air hockey tables can be expensive and require a large space, mini tables are a great option for home use. A mini air hockey table is small enough to fit on a tabletop or counter, but still delivers that same air hockey excitement. Here is a step-by-step guide on how to make your own mini air hockey table at home.
Page Contents
Materials Needed
Making a mini air hockey table requires some basic materials that can be purchased at hardware and home improvement stores. Here is what you will need:
- 1 large, flat piece of smooth wood or plastic to use as the table surface – this should be around 3 feet long by 2 feet wide
- 4 small pieces of wood/plastic for the sides of the table, around 3-4 inches tall – these will form a border around the table surface
- Power drill and various drill bits
- Screws
- Wood glue
- Polyurethane
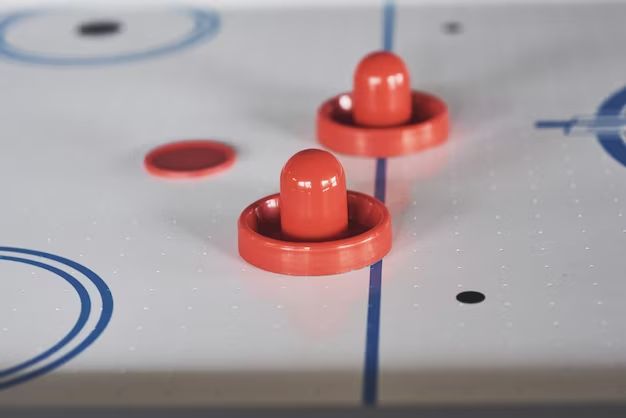
- An air hockey striker and puck
- A small, battery-powered fan or blower
- Mesh screen material
- Duct tape
- Decorative trim pieces (optional)
Having all of these supplies on hand before starting will make constructing the air hockey table much easier. Be sure to get a large enough piece of wood or plastic for the top – this is the most important part. Gather the rest of the materials based on the desired size of your table.
Cutting and Sanding the Main Table Surface
The first step is preparing the large base piece of material that will become the smooth table surface. Measure the material and cut it down to your desired size using a handsaw or power saw. Make sure you cut off any warped or uneven edges so you have a nice, flat board.
Once cut down to size, use medium grit sandpaper to smooth out the surface. You’ll want the top to be as flat and polished as possible, to allow the air hockey puck to glide freely. Sand it down evenly across the entire surface area.
After sanding, wipe away any dust and apply a thin coat of polyurethane. This will seal and protect the table surface. Allow time for the polyurethane to fully dry before moving on.
Building the Table Border
Next, you can construct the raised border that will surround the table. Take the four smaller side pieces of wood/plastic and cut them to the length needed to fit around the edges of the tabletop. They should be a few inches tall – 3 or 4 inches is standard.
Use wood glue and screws to attach the side pieces, creating a border around the tabletop perimeter. Make sure the pieces fit tightly together at the corners. Clamp them together while the glue dries for extra stability.
Once the glue has dried, sand down the table border pieces to be smooth. Round off any sharp corners and edges. Then, give the border a coat of polyurethane as well to match the slick table surface.
Adding Air Holes and Attaching the Fan
Now for the important air components. Air hockey tables get their speed from tiny holes across the playing surface that emit steady streams of air. This air allows the puck to float just above the table.
To add the air holes, first mark evenly spaced dots across the entire tabletop a couple inches apart. Use a thumbtack or hammer and nail to poke through the material at each marked dot, creating small holes. Place holes across the entire tabletop.
On the underside of the table, tape the mesh screen material over the holes. This keeps debris from getting sucked into the fan.
The battery-powered fan needs to be mounted underneath as well. Position it so it blows air directly onto the mesh-covered holes. Use screws drilled from the underside or brackets to mount it securely. Duct tape can help hold it tight against the table surface.
Make sure the fan is oriented to blow air out through the holes. Test it by turning it on – you should feel steady streams of air coming through the top.
Adding Striker Access Holes
In order for players to move their strikers around and reach the puck, you need openings at each end of the table. Measure and mark 8-10 inch circular holes near each corner. Use a jigsaw to carefully cut out these holes.
Sand down the edges so they are smooth. You may also want to attach decorative trim pieces around the holes for a nicer look.
Finishing Touches
Almost done! For aesthetics, consider painting or staining the table’s wooden border pieces. Make sure any paint or stain is fully dried and cured before using the table.
The playing surface itself should be kept slick and shiney. Waxing it helps the puck glide faster. Apply a layer of car wax or furniture polish and buff it out.
As a final step, attach rubber bumpers or foam strips along the table edges. This cushions puck impacts for game action that is less noisy.
Once you add the hockey striker and puck, your mini air hockey table is complete! Turn on the fan and enjoy hours of fast, fun gameplay. Building your own table is easy, affordable, and lets you customize features to your liking. Impress family and friends with your handmade table.
Materials and Costs Breakdown
Here is a breakdown of the approximate materials and costs for making a mini air hockey table:
| Item | Amount Needed | Estimated Cost |
| Plywood sheet for tabletop | One 3’x2′ sheet | $20 |
| Plywood boards for border sides | 4 boards, 3-4″ tall | $10 |
| Polyurethane | 1 quart | $10 |
| Wood glue | 1 bottle | $5 |
| Mesh screen | 1 yard | $5 |
| Small electric fan | 1 fan | $15 |
| Hockey striker and puck set | 1 set | $10 |
| Foam bumpers | 1 pack | $5 |
| Misc. hardware | Screws, bolts, etc. | $10 |
| Total | $90 |
As you can see, the materials to make your own mini air hockey table cost around $90 total. This is very affordable compared to buying a pre-made table, which can cost $300 or more. Building it yourself lets you customize the size and features while saving money!
Tips and Tricks
Here are some helpful tips to keep in mind as you work on your mini air hockey table project:
- Choose smooth, slick materials for the best air flow and puck movement
- Take your time cutting, sanding, and smoothing the tabletop
- Space air holes evenly across the entire surface
- Mount the fan securely so it doesn’t vibrate or move
- Make striker access holes large enough to fit your hand through
- Frequently check air flow during construction
- Wax and polish the surface periodically as needed
- Consider adding an on/off switch for the fan
- Pay attention to fan and blower noise
Following these tips will help you build a quality mini air hockey table that provides great gameplay. Take your time with each step and don’t be afraid to get creative!
Maintenance
Like any game table, a mini air hockey table will require occasional maintenance to keep it in good playing condition. Here are some key maintenance tasks:
- Inspect the table surface for any dirt, grime, or food/drink stains, and clean as needed. Use a gentle cleaner and microfiber cloth.
- Wax and polish the table every few months to maintain slickness. Regular car wax works great.
- Check the mesh filter screen underneath and clean off any major debris buildup.
- Inspect the fan/blower unit and clean out any dust. Make sure it rotates freely.
- Check for damage on the borders and trim pieces. Repair any cracks, loose joints, etc.
- Test the air flow regularly and ensure the holes aren’t clogged.
- Replace the striker and puck if they become damaged or overly worn.
Doing this periodic maintenance will keep your homemade table in tip-top shape for years of exciting air hockey action.
Safety Tips
While fun, air hockey does involve fast moving projectiles and requires some safety awareness:
- Wear eye protection if younger children are playing.
- Enforce rules against overly aggressive slam shots.
- Establish boundaries for younger kids when reaching into the table.
- Supervise play at all times.
- Set an alarm for time limits to avoid fatigue.
- Remind players to keep drinks/food away from the table surface.
- Turn off the fan when not in use.
- Check for loose parts or damage before each use.
Following basic precautions will keep the game safe. Always emphasize control and sportsmanship. With sensible supervision, a mini air hockey table provides hours of healthy recreation.
Conclusion
Constructing your own mini air hockey table is a rewarding DIY project. The ability to customize the size, features, and look makes it even more fun. By following the steps outlined, you can build an air-powered tabletop hockey game for just around $90. That’s a fraction of the cost of buying one pre-made!
With some simple tools, materials, and elbow grease, you will be amazed at the professional-quality air hockey table you can produce. Get ready for endless fast-paced excitement as you play air hockey in your own home. Challenge family and friends to pulse-pounding games anytime. Building it yourself lets you take pride and ownership in your creation.