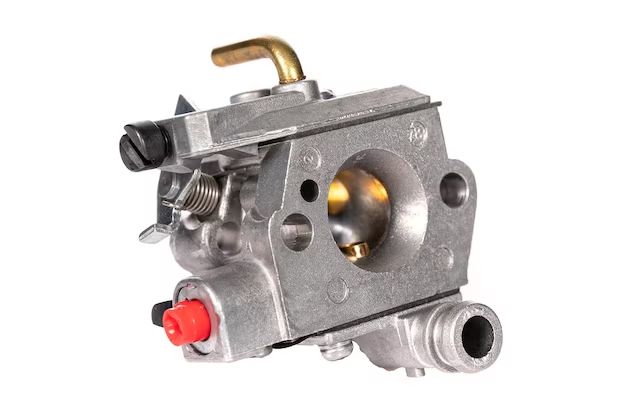
Rebuilding the carburetor on your lawn mower is an economical way to revive a poorly running engine and improve starting. While intimidating, the carburetor rebuild process is straightforward with the right tools, parts, and patience. In this comprehensive guide, we’ll walk through each step to rebuild the carburetor on a typical walk-behind lawn mower.
Page Contents
Why Rebuild the Carburetor?
The carburetor mixes air and fuel for the engine and regulates engine speed. Over time, gum, varnish, and dirt buildup inside the carburetor, clogging small passages and jets. This restricts air and fuel flow, causing hard starting, stalling, engine hesitation, or erratic idle. Rebuilding the carburetor cleans out debris, replaces worn parts, and restores proper fuel flow for a like-new engine.
Signs your mower’s carburetor needs rebuilding include:
- Engine stalls, hesitates, or backfires when hot
- Mower is hard to start or won’t start
- Engine runs rough or surges
- Mower doesn’t run at full throttle
- Black smoke comes from the exhaust
Before tearing into the carburetor, check other potential issues like bad gas, low engine compression, and dirty air filters. If the carburetor is indeed the problem, rebuilding it yourself costs a fraction of a new one.
Section 1: Disassemble the Carburetor
Let’s start by removing and disassembling the carburetor from the engine:
- Turn the fuel shutoff valve to the OFF position and disconnect the spark plug wire.
- Drain the gas from the tank and float bowl to prevent spills.
- Label any linkage rods and hoses and detach them from the carburetor.
- Remove the carburetor mounting nuts and carefully remove it from the engine.
- Clean the exterior with carburetor cleaner spray and shop rags.
- Remove the float bowl, main jet, throttle plate, and any other removable components.
- Carefully disassemble the carburetor and lay parts out in order.
Now that the carburetor is disassembled, inspect each part for wear, cracks, and damage. Set aside any parts needing replacement.
Section 2: Clean the Carburetor Body and Jets
With the carburetor disassembled, let’s clean the body, jets, and ports:
- Clean carbon buildup from the carburetor body exterior using a gasket scraper.
- Rinse the body interior passages with carburetor cleaner spray.
- Let the cleaner soak for 10 minutes then rinse again until clean.
- Use compressed air to thoroughly dry each passageway.
- Clean the main jet, pilot jet, and any orifices with carburetor cleaner spray.
- Blow out debris from the jets with compressed air.
- Dip wire in carburetor cleaner and run through each jet to finish cleaning.
Stubborn buildup can be soaked overnight in dip cleaner then scrubbed out. Ensure every hole and passage is completely clean before reassembly.
Section 3: Reassemble the Carburetor
Once cleaning is complete, it’s time to reassemble the carburetor. Follow the factory service manual for part order and proper installation:
- Install new carburetor gaskets if needed.
- Reinstall main jet, float bowl, and throttle plates.
- Verify float needle and seat are not worn, replace if needed.
- Check float adjustment and reform float if bent.
- Reattach fuel hoses, linkage, and choke components.
- Secure bowl and other covers with new gaskets.
- Turn fuel on and check for external leaks.
Double check all screws are tightened, gaskets sealed, and parts moving smoothly. Careful reassembly prevents leaks and ensures proper fuel metering.
Section 4: Install Carburetor and Adjust Settings
With the carburetor rebuilt, it’s ready to mount back on the mower:
- Install carburetor using new insulator gasket if the original is damaged.
- Attach the throttle and choke linkage rods.
- Connect fuel line and filter to carburetor inlet.
- Verify air filter and precleaner are clean and installed.
- Turn on fuel and check for leaks at connections.
Before starting, confirm carburetor adjustments are set to factory specs:
- Idle speed screw initially 1.5 turns out from lightly seated.
- Low idle or pilot jet screw set to 2 turns out from lightly seated.
- High speed jet screw initially 2.5 turns out from lightly seated.
These provide a baseline before final tuning. Install the spark plug wire on the spark plug and prime the engine if needed.
Section 5: Tune the Carburetor
With the rebuilt carburetor installed, it’s time for final adjustments:
- Start the mower and warm up to operating temperature.
- Turn idle speed screw clockwise to increase idle, counter-clockwise to decrease.
- Adjust for steady, even idle around 1500 RPM.
- Turn pilot jet screw to smooth out idle surging.
- Verify full throttle RPMs match engine specs.
- Adjust main jet richer/leaner if needed for smooth acceleration.
Make adjustments in small 1/8 to 1/4 turns, allowing time for engine response. The goal is smooth operation throughout the RPM range. Once tuned, make a final check for fuel leaks.
Conclusion
Rebuilding a lawn mower carburetor requires patience but pays off with a dramatically improved engine. The process involves disassembly, cleaning, replacing gaskets and worn parts, careful reassembly, reinstallation, and final adjustments for optimal performance. Follow the steps outlined and your mower will start easily, run smoothly, and last for years to come.
