When it comes time to paint the exterior trim on your home, you have two main application tools to choose from – a roller or a brush. Both have their advantages and disadvantages when it comes to efficiently and effectively painting exterior trim. Choosing the right tool can save you time and frustration in completing the painting project. In this article, we will compare painting exterior trim with a roller vs brush, looking at the pros and cons of each method.
Page Contents
- 1 Pros and Cons of Using a Roller on Exterior Trim
- 2 Pros and Cons of Using a Brush on Exterior Trim
- 3 Key Differences Between Rollers and Brushes
- 4 Preparing the Surface
- 5 Choosing the Right Paint
- 6 Using a Roller on Exterior Trim
- 7 Using a Brush on Exterior Trim
- 8 Achieving a Flawless Painted Finish
- 9 Conclusion
Pros and Cons of Using a Roller on Exterior Trim
Pros
- Faster application – A roller can quickly cover large surface areas of trim.
- More even coat – Rollers apply paint in thin, uniform coats over trim.
- Less fatigue – Using a roller requires less arm and wrist movement than using a brush repeatedly.
- Good for broad surfaces – Rollers excel at covering flat trim boards and panels.
- Holds more paint – A roller absorbs and holds more paint than a brush.
Cons
- Messier – Rollers tend to splatter and spill more paint.
- Overpainting – It’s easier to accidentally get paint where you don’t want it with a roller.
- Less control – Rollers provide less precision and control than a brush.
- Difficult for narrow pieces – Rollers aren’t ideal for painting trim details, corners, and edges.
- Surface texture – Rollers work best on flat, smooth surfaces and can leave an uneven coat on textured trim.
Pros and Cons of Using a Brush on Exterior Trim
Pros
- Precision – Brushes allow you to cut in closely and neatly around trim details.
- Control – Brushes provide excellent paint control and maneuverability.
- Textured surfaces – Brushes can press paint into grooves and textures for good coverage.
- Narrow areas – Brushes excel at painting trim edges, corners, and other tight spots.
- Less messy – Brushes produce fewer drips and splatters if used properly.
Cons
- Slower application – Brushes take more time to cover large surfaces.
- Fatigue – Long periods of brushing can strain your wrist and arm.
- Less paint – The brush holds less paint, requiring more frequent dipping.
- Streaking – Improper brush technique can leave visible brush strokes.
- Difficult for broad areas – Painting wide trim boards with a brush can be tedious.
Key Differences Between Rollers and Brushes
| Paint Tool | Roller | Brush |
|---|---|---|
| Speed | Much faster | Slower |
| Control | Less control | More precise control |
| Learning curve | Easier | More technique required |
| Mess and spills | More prone to splattering | Less messy |
| Fatigue factor | Less tiring on arm/wrist | More fatiguing with prolonged use |
| Type of trim | Best for broad, flat surfaces | Better for narrow pieces and details |
As shown in the table, rollers provide speed and coverage while brushes offer precision and control. Rollers tend to be less messy when using short, controlled strokes. Brushes excel at intricate trim but require more practice to master proper brushing technique.
Preparing the Surface
Regardless of which tool you choose to apply exterior trim paint, it’s crucial to properly prepare the surface first. Here are some tips:
- Clean the surface – Use soap and water or a cleansing solution to remove dirt, mildew stains, chalky paint, etc. Rinse thoroughly.
- Remove loose paint – Scrape off any paint that is cracking, peeling or blistering.
- Sand glossy surfaces – For better paint adhesion, scuff sand shiny surfaces.
- Spot prime – Prime any bare wood or metal with an oil-based primer.
- Caulk gaps – Seal any cracks, seams or gaps with exterior painter’s caulk.
- Mask off areas – Use painter’s tape and plastic to cover surfaces you don’t want painted.
Proper prep removes contaminants, improves adhesion, and leads to a smoother painted finish.
Choosing the Right Paint
When selecting paint for exterior trim, consider:
- Quality – Go with a premium-grade paint designed for exterior use.
- Sheen – Opt for a low to mid-sheen like satin, eggshell or semi-gloss.
- Color – Stick with light, reflective colors to minimize heat absorption.
- Durability – Seek paints offering mold, mildew and UV resistance.
- Application – Make sure the paint works with your roller/brush preference.
A high-quality acrylic latex paint is a good all-around choice for exterior trim. Oil-based alkyds offer greater durability but require mineral spirits for cleanup.
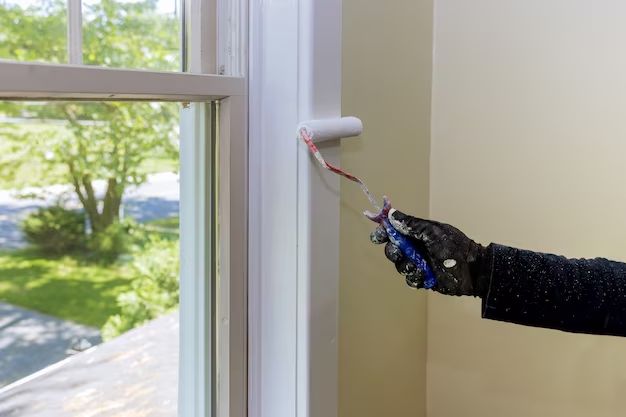
Using a Roller on Exterior Trim
When rolling exterior trim, follow these tips:
- Use a short-nap roller – Opt for a 1/4″ to 1/2″ nap length for smooth surfaces.
- Choose an angled trim roller – The angle provides better visibility for cutting in.
- Roll in one direction – Work methodically top to bottom, rolling in vertical strokes.
- Overlap strokes – Each stroke should overlap the previous by about 50%.
- Don’t press down – Roll lightly to avoid leaving ridges of paint.
- Work from dry to wet areas – Roll away from cut-in edges to avoid picking up paint.
- Backbrush – Use a trim brush to smooth out roller texture and strokes.
Proper rolling technique prevents drips, splatters, and visible roller marks. Backbrushing blends the paint for a uniform appearance.
Using a Brush on Exterior Trim
These brush painting tips will produce the best results:
- Use a high-quality trim brush – Look for angled sash brushes with synthetic bristles.
- Load the brush properly – Dip just 1/4 of the bristle length into the paint.
- Tap off excess paint – Gently tap the sides of the brush to remove drips.
- Paint top to bottom – Work methodically from the top downward.
- Apply using the brush stroke method – Paint a 2-3 inch wide section with vertical strokes.
- Overlap brush strokes – Each new section should overlap the previous section to blend.
- Paint back into newly painted areas – This helps prevent lap marks and differences in sheen.
- Paint all sides – Don’t forget to cover all trim edges and ends.
Mastering proper brush control takes some practice but leads to a smooth, professional finish.
Achieving a Flawless Painted Finish
Applying exterior trim paint flawlessly relies on thorough prep work, the right tools and techniques, and care during the painting process. Here are some final tips:
- Provide adequate lighting – Paint during daylight hours or set up work lights.
- Work in smaller sections – Cut in and paint just a few boards at a time.
- Watch paint thickness – Apply paint at the manufacturer’s recommended spread rate.
- Blend wet edges into wet paint – Working section by section prevents lap marks.
- Double check for drips – Watch for runs or drips and smooth them out quickly.
- Be patient between coats – Allow proper drying time between coats.
- Sand lightly between coats – This promotes adhesion and a smooth finish.
Taking extra care leads to a flawlessly painted surface that looks professionally sprayed on.
Conclusion
When choosing between a roller or brush to paint exterior trim, consider the unique pros and cons of each tool. Rollers provide speed and coverage but lack the precision of brushes for trim details and edges. For most trimming projects, a combination approach is best – use a roller for quickly covering broad surfaces and a quality brush for cutting in closely and painting trim boards and architectural details. Prep properly, apply using the right techniques for your tool, and work carefully to achieve a beautiful, durable finish. With the right approach, your freshly painted trim will add great curb appeal and protect your home for years.