When it comes to staining a fence, homeowners often wonder whether it is better to apply the stain with a roller or a brush. Both rolling and brushing have their pros and cons when staining a fence, so it is important to look at the key factors to determine which application method may work best for your particular fencing project.
Page Contents
- 1 Rolling Stain Onto a Fence
- 2 Brushing Stain Onto a Fence
- 3 Key Considerations for Rolling vs. Brushing
- 4 Pro Tips for Rolling Fence Stain
- 5 Pro Tips for Brushing Fence Stain
- 6 Preparing a Fence Before Staining
- 7 Conclusion
- 8 Frequently Asked Questions
- 8.1 Should you backbrush when rolling on stain?
- 8.2 What kind of roller covers work best for staining fences?
- 8.3 How long does fence stain need to dry before rain? Fence stain typically needs at least 24-48 hours of dry time before being exposed to rain. Oil-based stains may require up to 72 hours of curing time. Check the manufacturer’s recommendations for proper dry times based on humidity and other environmental factors. Should fence stain go on thick or thin?
- 8.4 How often does a stained fence need to be re-stained?
Rolling Stain Onto a Fence
Using a roller to apply fence stain can provide some advantages over brushing:
- Rolling is faster – With a roller, you can cover a larger area of fence in less time compared to meticulously brushing on stain.
- Creates an even coat – Rolling helps apply an even layer of stain across the entirety of each fence board.
- Less drips and splatter – A roller is less prone to creating drips and splatter like a saturated brush can.
- Good for textured surfaces – A mini foam roller can get into the grooves and textures of rough-sawn wood fencing.
- Easy cleanup – Rollers are fast and simple to clean up with soap and water after staining.
Rolling does have some downsides to consider as well:
- Not as precise – It can be tricky getting stain into tight corners or edges with a roller.
- Risk of an uneven coat – Applying too thin or too thick with a roller can lead to blotchiness.
- Not ideal for vertical surfaces – Using a roller on vertical fence boards can result in drips and an uneven application.
- Still need a brush – You’ll need a brush for tight areas a roller can’t reach.
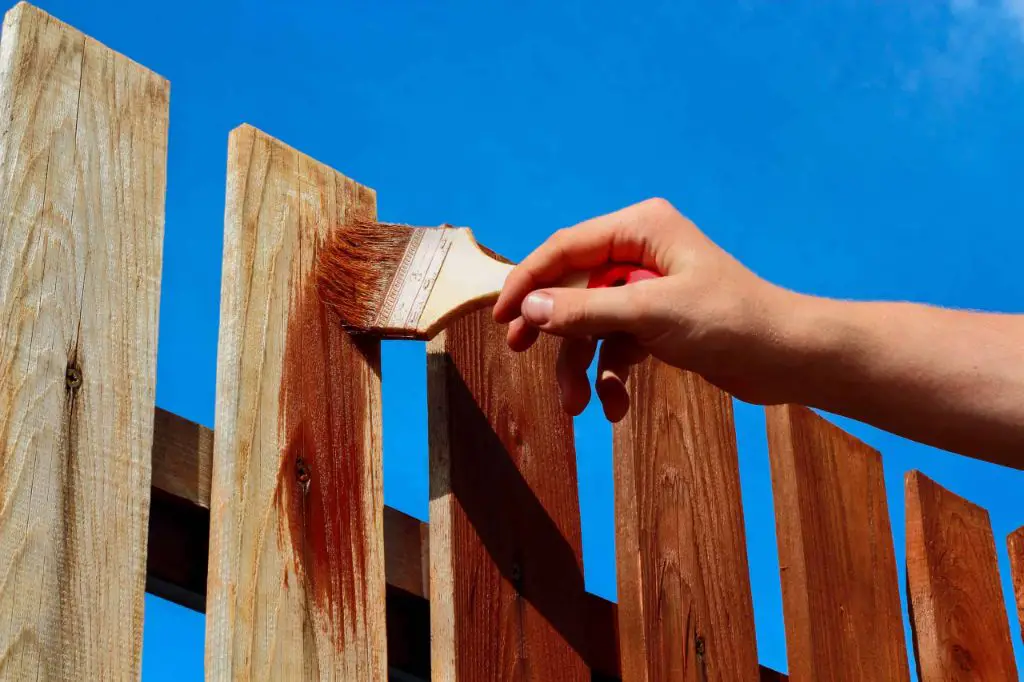
Brushing Stain Onto a Fence
Brushing fence stain onto wood has its own pros and cons:
- More control and precision – Brushing allows you to precisely coat pickets, rails, posts and tight spaces.
- Get into cracks and corners – A brush can penetrate into grooves, carvings, and other intricate areas rollers can miss.
- Even out inconsistencies – You can feather out any blotches by brushing.
- Ideal for vertical surfaces – Applying stain with a brush is the best way to avoid drips on vertical fence boards.
- Get better adhesion – A brush works stain into the wood for potentially better adhesion.
The limitations to brushing on stain include:
- Slower process – Brushing takes more time and elbow grease compared to rolling.
- Greater mess – Brushes are prone to dripping and splattering stain as you work.
- Difficult to get uniform coat – It’s challenging to get an evenly thick layer brushing freehand.
- Brushes need frequent cleaning – Brushes must be cleaned repeatedly as you work to avoid clumping.
- Hard on vertical surfaces – Applying stain with a brush vertically leads to arm fatigue.
Key Considerations for Rolling vs. Brushing
When deciding whether to roll or brush stain onto fence wood, keep these key considerations in mind:
- Type of fence wood – The texture of the wood factors into application. Smooth planks are fine for rolling, while brushing works better for extremely rough wood.
- Condition of fence – Brushing may work stain into weathered, cracked wood better than rolling.
- Type of stain – Thin stains and sealers may roll on easier than thick, viscous wood stains.
- Coat uniformity – Brushing may provide a more uniform look, while rolling works faster.
- Accessibility – Rollers can be difficult in very tight spaces better accessed by a brush.
- Vertically – Brushing excels on vertical fences whereas rolling risks drips and runs.
Pro Tips for Rolling Fence Stain
If you decide that rolling is the best method for your particular fencing staining project, follow these tips for best results:
- Use a mini foam roller approximately 4-inches wide for maneuverability.
- Select a roller with a knitted fabric cover for holding stain rather than a foam cover.
- Apply stain in thin, even coats, avoiding the temptation to overload the roller.
- Work methodically board-by-board for an even coat across the entire fence.
- Maintain a wet edge as you progress down the fence line.
- Backbrush behind the roller in critical areas to spread out any blotchiness or drips.
- Periodically check the roller cover for lint and debris that could create lumps.
- Apply two thin coats of stain for best protection and appearance.
- Change to a new roller cover every few hours to maintain quality results.
Pro Tips for Brushing Fence Stain
If your fence project is better suited to applying stain by brushing, keep these pointers in mind:
- Use a high-quality, long-handled brush made with natural bristles for oil-based stains.
- Select a brush approximately 4-inches wide for the best control and access.
- Hold the loaded brush at a 45-degree angle and make strokes following the direction of the wood grain.
- Maintain a wet edge and gently feather out borders as you progress across boards.
- Apply using thin, uniform coats without overbrushing in any single area.
- Keep multiple loaded brushes on-hand to speed up the staining process.
- Clean brushes every 30-60 minutes to prevent drying and clumping of stain.
- Use a small trim brush for tight areas, corners, posts and pickets the larger brush can???t reach.
- Plan to apply two coats, with gentle scrubbing of the first coat into the wood.
Preparing a Fence Before Staining
No matter which application method you choose, proper prep work is vital for successful, lasting fence staining. Here are key steps to take before applying the stain:
- Clean the fence using a pressure washer and wood cleaner to remove dirt, mildew and other contaminants.
- Scrape off any loose paint or splinters then sand to smoothing any rough areas.
- Replace severely damaged pickets, posts, and rails.
- Make any needed repairs to gates, latches, hinges, etc.
- Caulk cracks wider than 1/4-inch to protect from moisture.
- Counter sink protruding nails or screws so they don’t mar the finish.
- Allow the freshly cleaned and prepped wood to dry completely before staining, at least 24-48 hours.
Choosing the Right Fence Stain
Take time to select the right type of stain for your particular fencing wood and project:
- Penetrating oil stain – Offers excellent protection for rough sawn woods like cedar and pine. Allow to penetrate several minutes before wiping.
- Semi-transparent acrylic – Dries faster than oil and ideal for smoother woods like cypress. Provides UV protection.
- Solid color stains – Opaque, painted look. Ideal for covering flaws. Requires more frequent re-coating.
- Water repellents – Offer minimal protection but won’t change the wood’s look. Fast drying.
Match the stain color and finish to your preferences, from natural wood tones to opaque solids. Always test the stain on scrap wood before committing to the entire project. Purchase enough stain in advance to complete the full job, boxing stains from different batches to ensure color consistency.
Conclusion
Deciding between a roller vs. brush for applying fence stain comes down to the type of wood, accessibility, desired results and other factors. Many homeowners opt to use both a roller and brush in combination to capitalize on the best of both techniques.
Rolling works fastest on broad expanses of fencing, while switching to a brush for precision work in corners, on intricate pickets and for vertical surfaces. Prepare the fence properly before staining and maintain a systematic approach for professional looking results. Periodically cleaning application tools helps maintain optimal results.
Always test stain colors and techniques on scrap wood ahead of time. Follow the manufacturer’s recommendations for application and dry time. With the right combination of rolling and brushing, you can achieve a beautiful stained fence that enhances your property’s curb appeal.
| Rolling Fence Stain | Brushing Fence Stain |
|---|---|
|
|
Frequently Asked Questions
Should you backbrush when rolling on stain?
Backbrushing after rolling can help smooth out any blotches, drips or inconsistencies in the stain coat. Use a natural bristle brush to gently blend and feather out the stain rolled onto the wood. Backbrushing also helps work the stain into the wood grain for enhanced penetration.
What kind of roller covers work best for staining fences?
The best roller covers for fence staining have a knitted or woven fabric surface, which holds the stain material better than foam covers. Mini rollers around 4-inches wide allow you to maneuver in tight spaces while covering fence boards efficiently.