Repacking wheel bearings is an essential maintenance task that keeps your vehicle’s wheels turning smoothly. However, like any automotive repair, it requires some mechanical skill and knowledge. In this article, we’ll look at what’s involved in repacking wheel bearings, analyze the difficulty level, and provide tips for DIYers.
Page Contents
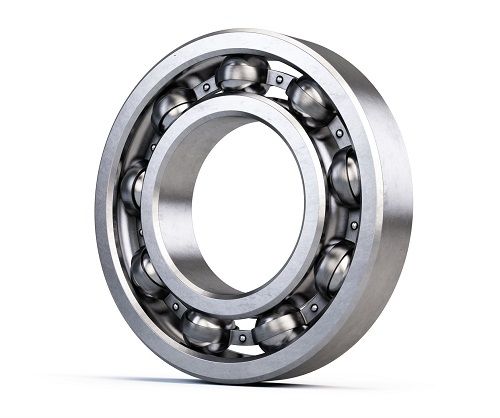
What is a Wheel Bearing?
The wheel bearings are located inside the hub of each wheel. Their job is to allow the wheel to spin freely while supporting the weight of the vehicle. Inside each bearing are rows of small steel balls that roll between an inner and outer race. This allows near frictionless rotation of the wheel.
A bearing is “packed” by filling the empty space between the balls with high-temperature wheel bearing grease. This lubricates the bearings and protects them from moisture and dirt. Over time, the grease breaks down and needs to be replaced – usually around every 30,000 miles depending on driving conditions.
Difficulty Level of Repacking Wheel Bearings
For experienced DIY mechanics, repacking wheel bearings is a relatively straightforward job. The basic steps are:
- Remove the wheel and brake components to access the wheel hub
- Remove the hub bearing assembly from the knuckle/axle
- Thoroughly clean the old grease from the bearing
- Pack fresh grease into the bearing
- Reinstall the hub assembly
- Replace brake components and wheel
It’s very important that the bearings are completely cleaned and freshly packed with the correct amount of high-quality grease. Skipping steps can lead to premature failure.
For a DIYer with basic mechanical skills and tools, expect it to take 1-3 hours per wheel the first time. With some practice, around 1 hour per wheel is reasonable. The front wheels are typically easier on most vehicles due to easier access.
Challenges of Repacking Wheel Bearings
While not extremely complex, repacking wheel bearings presents some challenges:
- Wheel removal – Safely jacking up the vehicle and removing the wheel/tire.
- Brake component removal – Disc brakes have multiple parts that need to be disassembled to access the hub.
- Stuck bolts – Stubborn caliper bracket and hub bolts that can become seized over time.
- Press fit bearings – Some bearings are press fit and require a hydraulic press for removal/install.
- Adjusting end play – Setting the proper preload adjustment by tightening the hub nut.
- Messy work – Expect lots of old, dirty grease that needs cleaning up.
Additionally, without the proper tools and knowledge, it’s easy to damage components like seals, ABS tone rings, and threads. Patience and care is required.
Tips for Repacking Your Own Wheel Bearings
Here are some tips to make your DIY wheel bearing job go smoothly:
- Use a service manual specific to your vehicle – don’t rely on generic instructions.
- Have the correct tools – e.g. impact wrench, torque wrench, quality grease gun.
- Inspect components like ball joints, tie rods, and steering components while you have them exposed.
- Clean everything thoroughly including old grease, dirt and rust from mating surfaces.
- Wear protective gloves and eyewear when cleaning bearings.
- Pack grease thoroughly between each steel ball in the bearing.
- Follow torque specs when reinstalling components.
- Road test the vehicle to ensure proper installation before driving normally.
Conclusion
Repacking wheel bearings requires intermediate mechanical skill, automotive knowledge, patience, the proper tools, and attention to detail. The job can be successfully accomplished by an experienced DIYer willing to take their time and follow all the steps properly.
However, for those without the skills, knowledge, tools, or time, it’s often wise to have a professional mechanic handle wheel bearing maintenance. The cost of shop labor is reasonable for most vehicles, and gives peace of mind that the job is done right.
Wheel bearings are a vital safety component, so if in doubt, err on the side of caution and have them serviced by a qualified auto repair technician.