Replacing a belt tensioner is a repair that many car owners can do themselves. While it may seem intimidating, it is not necessarily a difficult job. With the right tools and preparation, you can replace a belt tensioner efficiently. In this article, we will walk through the entire process of replacing a belt tensioner, from assessing if you need a new one to proper installation. We will also provide tips and tricks for making the job easier. Read on to learn everything you need to know about replacing a belt tensioner.
Page Contents
What is a Belt Tensioner?
The belt tensioner is a pulley that applies force to keep the timing belt tight. It consists of a static arm and a pulley that rotates on a bearing. The tensioner arm pivots to adjust belt tension. Most have an internal spring that provides continuous adjustment to maintain proper tension as the belt ages.
Proper belt tension is critical to prevent slippage that can damage the engine. The timing belt synchronizes the rotation of key engine components like the camshaft and crankshaft. Slippage causes the valves and pistons to fall out of sync, leading to poor performance, engine damage, or even complete failure.
Signs You Need a New Belt Tensioner
Here are some signs your belt tensioner needs to be replaced:
- Noisy operation: As a tensioner starts to fail, you may hear squealing, chirping, or growling noises from the timing belt area. This indicates slippage from inadequate tension.
- Loose belt: Visually inspect the belt to see if appears loose or sagging. You should not be able to twist or turn the belt more than 90 degrees.
- Belt wear: Look for cracked, frayed, or glazed sections of the timing belt’s ribbed underside. Premature wear indicates it hasn’t been properly tensioned.
- Tensioner leakage: If the tensioner pulley bearing is failing, you may see grease or oil leaking from it.
- Engine performance issues: Problems like check engine lights, misfiring, rough idling, or loss of power can occur if the timing is off from belt slippage.
Replacing the belt tensioner at the first sign of problems can help prevent further damage. In some cases it may also need to be replaced along with the timing belt per the maintenance schedule.
Gather the Proper Tools
Replacing a belt tensioner requires common hand tools most DIYers would have. Here’s what you’ll need:
- Ratchet and socket set
- Wrenches
- Pry bar
- Torque wrench
- Screwdrivers
- Needle nose pliers
- Gloves
- Rags
- Drain pan
- Plastic bags
- Belt tension gauge
You’ll also need a new belt tensioner for your specific make and model vehicle. Aftermarket parts are available at auto parts stores. Only use OEM or OEM-equivalent parts to ensure proper fit and performance.
Helpful Tips for DIY Replacement
Here are some tips to make the belt tensioner replacement job easier:
- Use a haynes repair manual for your vehicle for detailed, model-specific procedures.
- If needed, use a belt tension gauge to measure belt tension before and after installation.
- Have a timing belt installation tool to hold cam/crankshaft gears in proper alignment.
- Use zip ties or mechanics wire to temporarily secure the tensioner arm while installing the belt.
- Make sure the engine is cold to avoid burns.
- Have a can of belt dressing spray to improve grip when seating the new belt.
- Take pictures during disassembly to aid in proper re-assembly.
Following the proper procedures and using the right tools will help the project go smoothly.
Step-by-Step Instructions
Here is a step-by-step overview of how to replace a belt tensioner:
1. Disable the Engine
With the engine off, remove the negative battery cable. This prevents accidental starting while you work. Next, check for any components that may need to be removed for access, like a skid plate.
2. Release Belt Tension
Locate the belt tensioner pulley. Use a wrench to rotate the pulley and release tension from the belt. With tension removed, slip the timing belt off of the pulley.
3. Remove Tensioner
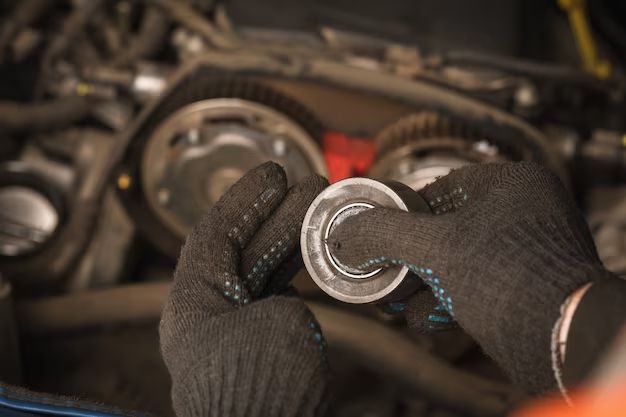
Check your vehicle repair manual for all required disassembly steps to access the tensioner. You may need to remove covers or other engine parts depending on the layout. Once accessible, remove the main pivot bolt holding the tensioner in place. Some tensioners are removed completely at this point, while others can pivot out of the way without full removal.
4. Install New Tensioner
Thoroughly clean the mounting area to ensure a proper seal. Apply thread locker to the tensioner bolt threads. Install the new tensioner and torque the main bolt to spec with a torque wrench. Use zip ties to hold the pulley out of the way if needed.
5. Install Timing Belt
Route the new timing belt onto all pulleys except the tensioner using your manual’s diagram. Slowly rotate the tensioner to add tension while sliding the belt into place. Continue rotating until proper tension is achieved per your manual or using a gauge.
6. Secure and Check Belt
Run the engine briefly to check belt operation. Then power down and recheck tension. Make any final adjustments needed. Reinstall all accessories and components removed earlier. Attach the negative battery cable when complete.
Conclusion
While replacing a belt tensioner requires time and patience, it is well within reach for a home mechanic. Following detailed procedures and using the right tools helps eliminate mistakes. Proper tension is critical to avoid serious engine damage, so take your time. Don’t forget to check your manual for any additional steps required for your specific vehicle. With some auto repair know-how and the help of this overview, you can replace your belt tensioner and get your vehicle running smoothly again.
Frequently Asked Questions
How much does it cost to replace a belt tensioner?
The parts cost for a belt tensioner is typically between $50-$150. Add another $50-$100 for any other new belts and supplies needed. Labor at a shop generally runs $150-$300. So you can save over $200 by DIYing it.
How long does it take to replace a belt tensioner?
With the right preparation, the average DIY replacement takes 1-3 hours. Professional shops can usually complete it in under an hour.
When should you replace the belt tensioner?
Most manufacturers recommend replacing the belt tensioner every 60k-105k miles as preventative maintenance when you change the timing belt. It’s also a good idea to replace it any time the timing belt needs to be changed due to failure or slippage issues.
Can I drive with a bad belt tensioner?
You can drive a short distance with minor tensioner problems, but it risks further damage. At the first sign of issues you should replace it to prevent breakdowns or expensive engine repairs. Never ignore symptoms like squealing or loose belts.
How do I know if my belt tension is correct?
Use a belt tension gauge to measure deflection force on the belt. Compare to your manual’s specs. Rule of thumb is roughly 10 lbs of force for every 1/2 inch of span length. The belt should be taut with no more than 90 degrees of twist.
Warnings and Precautions
– Use extreme care when working around a running engine to avoid contact with moving parts or hot components.
– Do not allow dirt or debris into any engine openings while replacing the tensioner.
– Make sure all components are properly seated and torqued to spec after installation to prevent detachment.
– Follow all procedures exactly as stated in your vehicle repair manual. Do not skip any steps.
– Dispose of old belts, tensioners, and fluids properly.
Conclusion
Replacing your belt tensioner is straightforward with some mechanical skill and the right information. While it may look daunting, taking it slow and following proper procedures prevents mistakes. With the steps and tips outlined here, you can save money and get some hands-on auto repair experience by DIYing this service item. Just make sure to always put safety first and use the proper tools. Take your time, and your vehicle will be back on the road with a smoothly running belt drive.