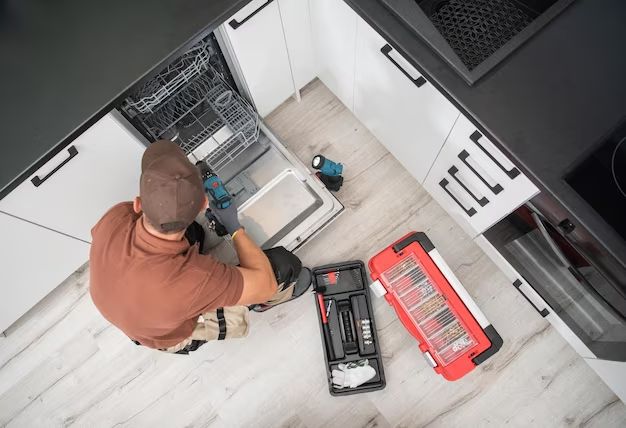
Swapping out a dishwasher may seem like a daunting task, but with some preparation and the right tools, it can actually be a straightforward DIY project. In this article, we’ll walk through the step-by-step process and provide tips to make dishwasher installation as easy as possible.
Page Contents
How long does it take to replace a dishwasher?
On average, plan to spend 3-5 hours replacing a dishwasher. This allows enough time for removing the old unit, preparing the new one, sliding it into place, securing it, and connecting the drain line and water supply lines. If this is your first time, err on the side of more time. An experienced DIYer may get it done faster, but don’t rush through your first dishwasher install.
Key factors that affect install time
- Skill level – Beginners will need more time reading directions and getting familiar with the process.
- Dishwasher type – A built-in model takes longer than a portable rollaway unit.
- Prep work – Moving appliances for access or redoing countertops or cabinets adds time.
- Plumbing challenges – Hard-to-reach or rusty pipes can complicate connections.
- Electrical work – Upgrading wiring or electrical hookups takes extra time.
Step-by-step guide
Follow these key steps to successfully swap out a dishwasher:
1. Turn off power and water supply
Start by flipping the circuit breaker to cut electrical power to the dishwasher. Turn off the hot water supply line and position a pan under the water line to catch any water still in the line. Finally, disconnect the drain line from the disposal or sink drain pipe.
2. Remove the old dishwasher
First, remove the outer door panel and disconnect the wire harness. Then, disconnect the water supply line from the L-shaped copper tubing under the dishwasher. Next, detach the drain line, brackets, and any screws or clamps securing the unit. Finally, slide the dishwasher out from the cabinetry.
3. Prepare the new dishwasher
First, attach the side mounting brackets to match the old unit’s configuration. Position the new dishwasher in front of the cabinet opening to connect the drain and water supply lines. Thread the electrical cable through a cabinet access hole. Use Teflon tape on plumbing connections to prevent leaks.
4. Slide new dishwasher into place
Slide the new dishwasher into the cabinet cutout using a wood block to protect the floor. Center it under the countertop overhang. Adjust the leveling legs to ensure it sits evenly. Attach the mounting brackets to the cabinet sides to secure the unit.
5. Make final connections
First, connect the drain line to the garbage disposal or sink drain pipe. Then, connect the hot water supply line to the L-shaped copper tubing. Make sure rubber sealing washers are in place at both ends of the water line. Finally, plug in the electrical cable and flip the power back on at the circuit breaker.
Tips for an easier install
Follow these tips to make your dishwasher installation process smoother:
| Tip | Details |
|---|---|
| Review instructions thoroughly | Read the installation guide several times to understand each step before starting. Watch online tutorial videos for guidance. |
| Have a helper | It’s much easier with two people to slide the dishwasher in and out of the cabinet. |
| Buy a water supply line extension | Adding 2-3 feet of extra tubing makes connecting water lines much less stressful. |
| Take pictures during disassembly | Photograph wire and pipe connections for reference when re-assembling. |
| Use thread seal tape | Wrap plumbing threads with Teflon tape to prevent leaks at connections. |
| Have a bowl for small parts | Keep screws, washers, and clips organized during the process. |
What tools do you need?
Having the right tools makes dishwasher installation much simpler. Here are the most important items to have on hand:
| Tool | Purpose |
|---|---|
| Safety glasses | Protect your eyes from debris when sliding the unit out. |
| Flashlight | Illuminate the interior cabinet space when working. |
| Cordless drill | Drive screws to attach mounting brackets and control panel. |
| Adjustable wrench | Loosen plumbing connections and tighten new ones. |
| Phillips screwdriver | Remove screws from old unit and attach new ones. |
| Pliers | Grip fittings when loosening or tightening plumbing lines. |
| Bucket | Catch water drips when disconnecting supply line. |
| Wood block | Protect flooring when sliding dishwasher out and in. |
Pre-installation tips
Proper planning and preparation will make your dishwasher installation go smoothly. Keep these tips in mind:
- Purchase a dishwasher designed to fit your existing opening. Note the height, width, and depth.
- Read the installation manual thoroughly before starting.
- Make sure you have all necessary tools and supplies on hand.
- Turn off electricity to the appliance before beginning.
- Arrange for a helper if heavy lifting is required.
- Clear the work area to allow space to pull the dishwasher in and out.
- Keep all hardware organized in a bowl during the install process.
Conclusion
Swapping out a dishwasher is definitely doable as a DIY project. Set aside a few hours for the job and make sure you have the proper tools. Carefully follow the installation guide for your new dishwasher. Pay special attention when disconnecting and reconnecting the drain, water, and electrical lines. Have an assistant help with the heavy lifting. And take your time – don’t rush through the steps. Following this advice will lead to successful dishwasher installation you can be proud of.
