Keeping your vehicle’s air intake system clean is an important part of regular maintenance. Over time, dirt, debris and oil can build up on the air filter, restricting airflow to the engine. Cleaning your cold air intake filter periodically helps maintain proper engine performance and fuel economy.
Page Contents
What is a cold air intake?
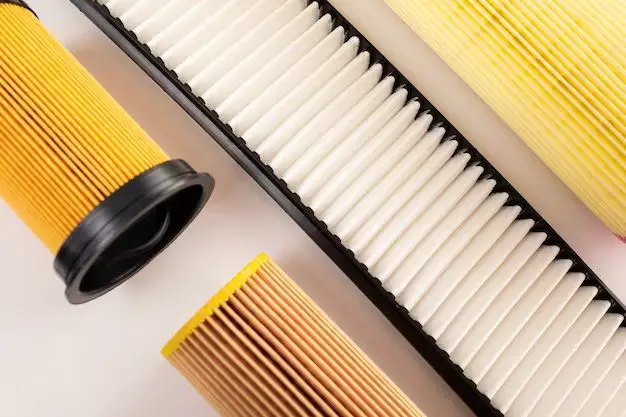
A cold air intake is an aftermarket replacement air intake system that pulls cooler outside air into the engine instead of hot air from the engine bay. It replaces the factory airbox and air filter housing with a short ram intake pipe, high flow conical or oval filter and heat shielding to isolate it from the heat of the engine compartment. This denser cold air creates a richer air/fuel mix for more power. The key components of a cold air intake system include:
- Air filter – High flow cotton gauze or synthetic filter that allows maximum airflow.
- Intake pipe – Often made from mandrel-bent aluminum alloy tubing for smooth interior walls and minimum restriction.
- Heat shield – Shields the filter from hot engine bay air, usually made from steel or composite materials.
- MAF sensor housing – For engines with mass airflow (MAF) sensors, this housing isolates the sensor from turbulence which could throw off readings.
Because of its exposed filter, a cold air intake needs cleaning more often than a standard factory airbox. But proper maintenance will allow it to provide colder denser air and performance benefits.
Why clean your intake filter?
Here are some of the main reasons it’s important to clean your cold air intake system regularly:
- Maintain proper airflow – Dirt and debris buildup will restrict airflow, potentially reducing power,throttle response, fuel economy and performance.
- Protect the engine – As the filter gets clogged, it can allow dirt particles to bypass the filter and enter the engine, causing internal wear and damage over time.
- Improve fuel economy – An excessively dirty air filter forces the engine to work harder to get the air it needs, wasting fuel and money.
- Prevent check engine lights – A severely restricted air filter can trigger check engine lights and error codes related to low airflow or oxygen sensor readings.
- Prolong filter life – Regular cleaning removes particles trapped on the surface before they can embed deeper into the filter fibers and reduce airflow capacity.
How often to clean intake filter?
Most automakers recommend inspecting your engine air filter every 6 months or 6,000-12,000 miles and replacing it as needed. But a cold air intake system, with its exposed high flow filter, will need cleaning more frequently. Here are some guidelines on intake filter cleaning intervals:
- Street use – Clean every 15,000-25,000 miles depending on driving conditions and filter monitoring.
- Off-road use – Clean every 5,000-15,000 miles or even more often if subject to excessive dust and dirt.
- Track use – Clean before and after each track event due to high airflow demands and exposure to debris.
- When restriction reaches 10-15 inches of vacuum – This can be measured with a vacuum gauge on the intake system.
- When visibly dirty – Don’t wait for scheduled interval if filter appears excessively clogged with dirt and oil.
The actual interval will vary depending on your driving environment, mileage, and how the filter looks when inspected. More frequent cleaning is recommended for off-road, high dust or heavy traffic conditions. For optimal performance and engine protection, inspect the filter at least every other oil change or 5,000 miles.
How to clean a cold air intake filter
Cleaning a cold air intake filter is a quick and simple process. With the proper cleaning tools and techniques, you can restore airflow and remove trapped particulates without damage. Here is the general process:
- Remove filter – Unclip any retaining clamps or screws and remove the entire filter assembly from the intake pipe. Make note of original orientation.
- Tap and shake – Gently tap the filter against a solid surface to dislodge any loose surface debris.
- Spray cleaner – Use an air filter cleaner spray and let soak for 5-10 minutes.
- Rinse – Rinse the filter with low pressure water from the clean side to push particles out of the fibers.
- Dry – Allow filter to air dry completely so no moisture remains inside the cotton or foam. A hair dryer on low setting can speed up drying.
- Re-oil (optional) – Apply air filter oil to restore lost tackiness and create adhesion for dust.
- Reinstall filter – Reinstall in original orientation, reconnect clamps or screws, and reattach any intake plumbing.
Avoid using high pressure sprays, harsh chemical cleaners, or compressed air as these can damage the filter fibers. Always start cleaning from the clean side of the filter and rinse debris out toward the dirty side. Let the filter fully dry before reinstalling to prevent oil runoff into the intake.
Improper cleaning methods
It’s important to avoid certain air filter cleaning methods which can actually do more harm than good:
- Compressed air – Air pressure can blow holes in the filter material and drive debris deeper into the fibers.
- Harsh chemicals – Strong cleaners like carb cleaner can degrade the filter cotton, glue or rubber end caps.
- High pressure water – Pressurized water can distort the shape of the filter and damage the structure.
- Gasoline – Gasoline will simply spread dirt around, dry out the filter, and create a fire hazard.
- Shop vacuum – Vacuuming can also tear holes the filter material and lodges particles deeper in the fibers.
- Dishwasher – Dishwasher detergents are too harsh and can degrade the filter media.
- No re-oiling – Skipping re-oil after cleaning removes the sticky adhesion layer that captures dust.
Always stick to the filter manufacturer’s recommendations for approved cleaning methods. Use mild spray cleaners and low pressure water rinses specifically designed for air filters. This will remove dirt without compromising the filter’s internal structure, adhesion, or airflow capacity.
When to replace cold air intake filter
While regular cleaning can extend the life of your cold air intake filter, it will still need periodic replacement to maintain proper engine performance. Here are some signs it’s time for a new air filter:
- Failed visual inspection – Filter appears excessively dirty even after thorough cleaning.
- Hardened rubber – Sidewalls or base have hardened from long-term exposure to engine heat.
- Warped housing – Filter no longer fits correctly in the housing due to distorted shape.
- Torn material – Holes, tears or splits in the filter material itself.
- Low airflow – Reduced airflow capacity that can’t be restored by cleaning.
- Check engine light – Persistent intake restriction error codes after cleaning.
- Mileage – Over 30,000-50,000 miles of use for maximum filtration.
Be sure to replace your filter with another high flow performance filter designed specifically for your cold air intake system. This will ensure optimal airflow, filtration and engine protection. The small upfront cost of a new filter is cheap protection compared to extensive engine repairs down the road.
Homemade filter cleaners
Specialized air filter cleaners provide the best deep cleaning and protection against damage during cleaning. But if you need to clean your filter and don’t have cleaner spray, here are some homemade alternatives:
Simple Green
The non-toxic biodegradable cleaning product Simple Green works as a great DIY air filter cleaner. Mix Simple Green with hot water at a 1:5 concentration. Submerge the filter and swish it around to loosen debris. Rinse thoroughly with water.
Dish Soap
Regular dish washing liquid like Dawn also does a decent job breaking up grease and oil on dirty intake filters. Mix a few drops of soap per quart of warm water and soak filter for 15-20 minutes before rinsing.
Kerosene
Kerosene has solvent properties that can dissolve built-up residue on filters. Avoid using gasoline as it leaves an oily residue. Soak the filter in a shallow tub of kerosene, then rinse with running water and allow to fully dry before reinstalling.
Rubbing Alcohol
Isopropyl alcohol is another household item that works as an air filter cleaner. The solvents in it cut through grease, oil and residue. Rinse the filter upside down in a tub of rubbing alcohol and let fully dry before re-oiling and reinstalling.
Thoroughly rinse off any cleaning solutions with water and dry before re-oiling or installing to prevent any chemicals from entering the engine. Avoid breathing in any vapors when using chemical cleaners. While not as ideal as a purpose-made filter cleaner, these household items will work in a pinch.
Air filter cleaning services
Some automotive service shops and parts stores offer air filter cleaning services using professional spray cabins and air pulses to deep clean filters. Here are some of the benefits of having your filter professionally cleaned:
- Thorough cleaning – Removes embedded debris that typical DIY methods can’t reach.
- Maintains filter integrity – Proper cleaning methods prevent filter damage.
- Saves money – Restores filters to like-new condition at a fraction of replacement cost.
- Speeds process – Professional spray washers can clean in 5-10 minutes versus hours for DIY.
- Proper disposal – Filters coated in oil and grease can be properly recycled.
- Adds convenience – Drop off filter anytime instead of cleaning at home.
However, a potential downside is that some shops use harsh chemicals or compressed air that can damage filters. Always clarify their cleaning method before leaving your filter for service. Proper professional cleaning typically costs around $10-15 and can extend the life of your air filter.
Conclusion
Replacing your factory air intake with a cold air intake system can provide noticeable horsepower, throttle response and sound improvements. But to maintain those performance benefits long-term, the exposed high flow filter needs regular inspection and cleaning every 15,000-25,000 miles on average.
Cleaning the intake filter periodically prevents reduced airflow, poor engine performance, increased emissions and unnecessary engine wear from particles bypassing a clogged filter. Use a mild cleaner spray and low-pressure water rinse to safely remove built-up debris and oil from the filter’s cotton gauze or foam material.
Avoid harsh chemicals, high pressure sprays or compressed air when cleaning to prevent filter damage. Allow sufficient drying time before re-oiling and reinstalling the filter. Replace the filter if it shows tears, holes or excessive dirt that can’t be cleaned. Proper cold air intake maintenance keeps your engine running strong.