Page Contents
What is crown molding?
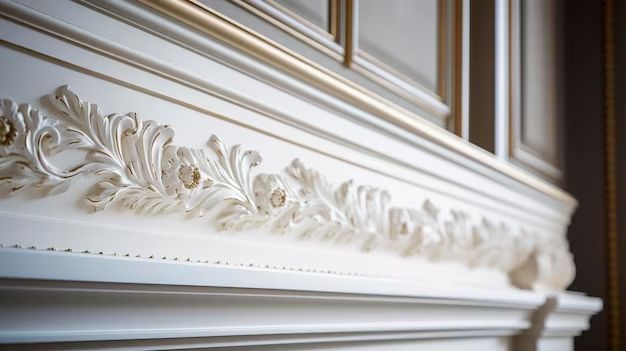
Crown molding is decorative trim that is installed where a wall meets the ceiling. It adds an elegant finishing touch to a room. Crown molding comes in various materials like wood, polyurethane, and polystyrene. It is available in different shapes and sizes as well. The most common crown molding profiles are:
- Ogee – An S-shaped profile
- Dentil – Rectangular blocks placed in a row
- Cove – A concave profile
- Beadboard – Vertical boards with grooves
Crown molding serves both aesthetic and functional purposes in a home. It conceals the uneven junction between walls and ceiling while giving a room a polished, designer look. Installing crown molding can significantly increase the value of a home as well.
Should you use adhesive or nail crown molding?
Crown molding is attached to the wall and ceiling using adhesives, nails, or a combination of both. The two main installation methods are:
- Adhesive – Liquid construction adhesive like Liquid Nails is applied to the back of the molding which is then pressed to the surface.
- Nail Gun – Crown molding is nailed to the wall and ceiling using a pneumatic nail gun and finishing nails.
So should you use adhesive or nail crown molding? Here is a comparison of the pros and cons of each method:
Benefits of using adhesive:
- Creates a stronger, long-lasting bond than just nails
- Useful for delicate or ornate molding that may split from nail gun pressure
- Allows precise positioning of the molding before the adhesive sets
- Does not require filling nail holes with putty
- Suitable for uneven surfaces where nails may not hold
- Quieter installation process than hammering nails
Drawbacks of using adhesive:
- Messy application and clean up
- Adhesive may squeeze out and stain surfaces
- Heavy molding needs temporary support until the adhesive dries
- May damage surfaces if molding needs to be removed later
- Fumes require proper ventilation during installation
Benefits of using nails:
- Faster installation than waiting for adhesive to cure
- Holds molding firmly in place immediately
- Nail gun is quicker than applying adhesive manually
- Nails are hidden after installation
- Allows easier molding removal if needed
- Minimal clean up required after installation
Drawbacks of using nails:
- May cause splits or dents in delicate molding
- Not suitable for uneven surfaces
- Nail holes need to be filled with putty
- May loosen over time allowing gaps behind molding
- Noise from hammering nails
- Extra step of nail hole filling required
Based on these pros and cons, here are some recommendations on when to use adhesive or nails:
Recommendations
- For heavy ornamental or carved molding, use adhesive alone to prevent damage from nail gun pressure.
- On uneven plaster or concrete surfaces, adhesive provides a stronger bond than nails.
- If noise is a concern, adhesive installation is quieter than hammering nails.
- For installing long spans of lightweight PVC or foam molding, nail gun installation is faster.
- In areas where appearance matters most, use adhesive to avoid nail holes that require filling.
- On projects where time is limited, nail gun installation is quicker than waiting for adhesive to dry.
- For ceilings or high walls, nails lend immediate support while adhesive cures.
- A combination of both adhesive and nails creates the strongest bond on heavy molding.
The condition of your walls, type of molding, and project timelines all impact the best installation method. Many carpenters recommend using a combination of adhesive and nail gun fastening whenever possible. The adhesive provides a lasting, gap-free bond while the nails offer immediate grab and extra strength.
What types of adhesive work best?
If you opt to use adhesive, it is important to select the right type for the job. Here are some top-rated adhesive options:
Liquid Nails Heavy Duty Construction Adhesive
- Water-based formula
- Tenacious grip on multiple surfaces
- Withstands indoor and outdoor conditions
- Long working time for positioning
- Install crown molding, wainscoting, panels
Gorilla Glue Adhesive Caulk
- Flexible when cured
- 100% waterproof bond
- Paintable when dry
- Quick drying time
- Install molding, trim, wainscoting
Loctite Power Grab All Purpose Adhesive
- Crystal clear formulation
- Works on diverse materials
- Minimal shrinkage as it dries
- Low odor formula
- Install crown, baseboards, panels
LePage PL Premium Polyurethane Construction Adhesive
- Strong initial tack
- Bonds to multiple surfaces like wood, metal, concrete
- Withstands indoor and outdoor conditions
- Low VOC formula
- Install trim, boards, tile backsplashes
When selecting an adhesive, check that it is designed for the type of molding material you are installing and suitable for use on your wall or ceiling materials. Follow all safety precautions during application as recommended by the manufacturer.
What types of nails work best?
If your installation method involves nailing, you need to select the proper nail size and material:
Nail Material
- Galvanized – Ideal for most indoor molding projects. Galvanized coating prevents rusting.
- Stainless steel – For molding exposed to moisture. Does not rust or corrode.
- Hardened steel – Improved strength and less likely to bend than standard nails.
Nail Length
- 1 1/4″ to 2 1/2″ nails – Common lengths for installing crown molding
- Match nail length to combined thickness of molding and trim
- Too short leaves nail heads exposed; too long risks poking through
The gauge, or thickness, of the nails also needs to suit the molding. Thicker 18-gauge nails are recommended for dense hardwood molding. Thinner 16 or 18-gauge nails are suitable for lightweight foam or finger-jointed molding.
Nails should be driven into wall studs or use special hollow wall anchors when installing on drywall or plaster. Follow the nail spacing recommended by the molding manufacturer, usually every 16 to 24 inches.
What tools do you need?
Installing crown molding requires some specific tools to get clean, professional results:
Miter Saw
A miter saw accurately cuts crown molding angles. Adjustable up to 60 degrees for precise compound miters.
Nail Gun
A finish nail gun drives nails quickly without splitting molding. Features an adjustable nail depth control.
Compound Miter Sliding Box
Holds molding steady for angled cuts. Swivels up to 60 degrees for compound miters.
Laser Level
Creates a guide line to align molding. Ensures level installation across ceilings and walls.
Utility Knife
Trims excess adhesive squeezing from molding joints. Score molding for cleaner breaks at cut points.
Caulking Gun
Dispenses adhesive smoothly and evenly across molding. Accepts adhesive tubes, cartridges, and sausages.
Hammer
Gently taps molding into place once adhesives are applied. Non-marring finish hammer avoids damage.
Having the right tools for the job will make the installation process easier and give professional looking results. Safety gear like glasses, gloves, and masks are also recommended when working with power tools, nails, and adhesive.
What are the steps to install crown molding?
Once you have gathered the necessary supplies, follow these key steps for proper crown molding installation:
Step 1 – Measure and cut molding
Accurately measure each wall and ceiling section. Transfer exact dimensions to the molding pieces and cut with a miter saw set for the required angles.
Step 2 – Install corner blocks
Nail non-marring triangle blocks into the top corners. This provides a solid backing to anchor the molding ends.
Step 3 – Apply adhesive
Run a 1/4″ bead of adhesive along the length of the back side of the molding. The adhesive type should suit the molding material.
Step 4 – Position molding
Align the molding on the wall and hold in place with finishing nails, inserting them into studs whenever possible.
Step 5 – Nail the molding
Use a nail gun to secure the molding with nails spaced as recommended, countersinking nail heads.
Step 6 – Install adjoining pieces
Adhere and nail any adjoining sections, aligning edges tightly. Wipe away any excess adhesive.
Step 7 – Fill nail holes
Use putty that matches the molding color to fill any visible nail holes. Let it dry completely before sanding smooth.
Step 8 – Apply caulk
Run a thin bead of paintable latex caulk along the top and bottom edges for a seamless look.
Follow all safety procedures when working on ladders, with power tools, and handling adhesives or nails. Now stand back and enjoy your professionally finished crown molding!
Helpful Tips
Here are some additional pointers to ensure successful crown molding projects:
- Test cuts on scrap pieces first to confirm angles
- Cut molding face up to prevent splintering the design side
- Pre-drill molding to avoid splits when hand nailing
- Apply adhesive in a continuous stream; avoid globs
- Immediately wipe any adhesive oozing from seams
- Work slowly in sections for best alignment
- Fill gaps with caulk, match to molding paint color
Cost Factor
Crown molding costs between $2 – $10 per linear foot depending on the material, size, and detailing:
| Molding Type | Cost Per Linear Foot |
|---|---|
| Foam | $2 – $3 |
| Wood | $4 – $8 |
| Polyurethane | $7 – $10 |
The adhesive and nails add about $0.50 – $2 per foot in additional materials. So for a typical 10′ x 12′ room with 50 linear feet of molding, total costs range from $150 on the very low end up to $700 or more for expensive molding types and installation methods.
Hiring a professional costs $4-$8 per foot including materials, or $200 – $400 for an average room.
Conclusion
Installing crown molding can give any room an instant upgraded, designer look. While both adhesive and nail installation methods work, a combination offers the best results for strong, seamless molding. Preparing with the right tools and materials for the specific job and taking care with the cutting and application steps will create beautiful, long-lasting moldings. Your rooms will have an elegant, finished appearance without the high cost of contracting a professional.