A caulking gun is a hand-held tool used to apply caulk, adhesive sealants, and other viscous materials. Caulking guns allow the user to easily and accurately apply caulk in a smooth, controllable fashion for use in construction, home repairs, crafts, and hobbies.
Page Contents
Main Components
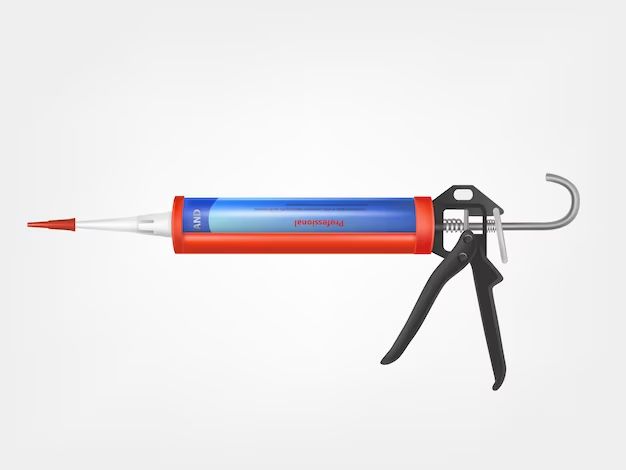
While caulking guns may differ slightly in design, most contain the same basic components:
- Frame
- Trigger mechanism
- Pusher or plunger
- Barrel or tube holder
- Sealant cartridge or tube
Frame
The frame refers to the body or handle of the caulking gun. It serves as the main structural component that holds all the other pieces together. The frame is typically made of metal or durable plastic. It may feature ribs or indentations to make the tool easier to grip with one or two hands during use.
Trigger Mechanism
The trigger mechanism operates the internal push rod or plunger that dispenses the caulk. When the trigger is squeezed, it pushes the plunger forward. When the trigger is released, a spring returns it back to the starting position. This allows the user to easily control the flow of caulk material with the simple motion of squeezing the trigger.
Pusher/Plunger
The pusher, also known as the plunger or thrust rod, is connected to the trigger assembly. When the trigger is squeezed, the pusher moves forward through the barrel, applying pressure to the back of the sealant cartridge. This pressure forces the caulk material out of the tip in a controllable bead.
Barrel/Tube Holder
The barrel, also called the tube holder, is the chamber where the sealant cartridge or tube fits. The barrel securely holds the caulk tube while keeping the back end exposed so that the pusher can apply even pressure across the end of the tube. This helps ensure smooth, consistent caulk flow.
Sealant Cartridge
The sealant cartridge or caulk tube contains the caulk material itself. Standard sizes are 10 and 28 ounce cartridges that are loaded into the back of the barrel. When the trigger is pulled, the pusher presses against the cartridge end, forcing the caulk out in a steady, controlled bead.
Types of Caulking Guns
While sharing the same basic mechanisms, caulking guns can be divided into two main types based on their design and operation:
Drip-Free Guns
Drip-free caulking guns feature a lever or rachet mechanism that allows the user to stop and start the flow of caulk with the squeeze of the trigger. When the trigger is released, the mechanism stops the pressure on the cartridge to prevent unwanted dripping or oozing. This allows for cleaner caulk application.
Bulk-Load Guns
Bulk-load, also called professional guns, use larger tubes or boxes of caulk that are loaded directly into the barrel. No cartridge is required. While more expensive, bulk-load guns are preferred for frequent or heavy caulking work as they can hold more material. They are also more cost-effective when working with larger quantities of caulk.
Key Parts and Features
In addition to their core components, caulking guns incorporate various parts and features to improve functionality and user control:
Frame Handle
The frame or handle may have grip areas textured for easier grasping with wet or gloves hands. Ergonomic handles that better fit the hand may also improve comfort and control when applying caulk.
Trigger Guard
A guard around the trigger prevents accidental squeezing and unintended caulk discharge.
Spool
A fixed or retractable spool allows the caulk tube tip to be easily trimmed for a clean start and finish to each bead.
Pusher Release
A pusher release allows the plunger to be disengaged so caulk tubes can be changed quickly and cleanly. Once the fresh tube is loaded, the pusher is easily re-engaged.
Cutoff Rod
A cutoff rod runs the length of the barrel allowing used tubes to be punctured so no caulk goes to waste. This enables easy replacement of empty tubes.
Follower Plate
A spring-loaded follower plate sits behind the caulk tube and moves forward as the tube empties. This applies even pressure on the caulk tube from back to front for a consistent caulk flow rate.
Swappable Tips
Removable tips in various sizes and shapes allow for different bead sizes and greater control for different caulking needs and personal preferences.
Common Materials
Caulking guns may be constructed from different materials, each offering distinct advantages:
Metal
- More durable and rigid
- Heavier than other materials
- Can resist warping from solvents
- Prone to rusting
Plastic
- Lightweight yet strong
- Lower cost
- Various colors available
- May warp or crack over time
Fiberglass
- Strong, durable, and rigid
- Lightweight
- Resists solvents and corrosion
- Higher cost
Size and Capacity
Caulking guns range in size and capacity to suit different caulking needs:
Small Guns
- Best for small jobs
- Typically 6-10 ounce capacity
- Lower weight and easier to handle
- Require frequent reloading
Standard Guns
- Ideal for most common caulking jobs
- 10-28 ounce capacity
- Comfortable middle weight
- Good balance of capacity and handling
Heavy Duty Guns
- Built for large-scale caulking
- 28+ ounce capacity
- Larger frame and higher weight
- Minimal reloading needed
Common Brands
Popular caulking gun brands known for quality and reliability include:
Albion
– Founded in 1926
– Offers a wide range of models
– Known for comfortable handles
Newborn
– Leading manufacturer since the 1940s
– Specializes in guns for pros and DIYers
– Many patents for innovations
DAP
– Producer of popular caulks and sealants
– Manufactures caulking guns to match products
– Provides excellent customer support
Loctite
– Trusted brand for adhesives and sealants
– Makes guns suited for high viscosity products
– Ergonomic handles reduce fatigue
Makita
– Top power tool company
– Known for cordless battery caulking guns
– Lightweight and high performance
How to Use a Caulking Gun
Using a caulking gun properly ensures an easy, mess-free caulking experience. Here are some tips:
Cutting the Tube Tip
– Use the integrated cutter or a sharp utility knife
– Cut at a 45 degree angle for optimal caulk flow
– Make a 1/8″ to 1/4″ diameter opening
Loading the Cartridge
– Pull the pusher rod back completely
– Insert cartridge tip first into the barrel
– Push until the tube tip aligns with the barrel opening
Priming the Gun
– Point tip into a waste container
– Pull trigger several times to begin caulk flow
– This purges air bubbles for a smooth bead
Applying the Caulk
– Hold at a 45 degree angle to join surface
– Pull trigger and move along joint evenly
– Use steady pressure for a smooth, consistent bead
Releasing Pressure
– Always release trigger fully when stopping
– On drip-free guns, cut tips remain sealed
– Leave rod pressure on bulk gun tubes to prevent oozing
Finishing the Job
– Run a finishing tool along the bead for a smooth finish
– Wipe the gun tip before storing to prevent clogs
– Close cartridge tightly or puncture used tubes
Safety Tips
Observing a few key safety precautions will ensure safe caulking:
- Always read manufacturer safety instructions
- Work in a well-ventilated area
- Wear protective gloves and eyeglasses
- Keep hands and fingers away from triggers and rods
- Do not point or spray caulk at people
- Use a ladder or scaffold for high areas
- Dispose of used cartridges properly
Troubleshooting Guide
Common caulking gun issues and solutions include:
| Issue | Possible Cause | Solution |
|---|---|---|
| No caulk flow | Empty cartridge, clogged tip | Replace cartridge, clean tip |
| Caulk oozing from tip | Too much pressure on cartridge | Loosen pusher rod, ensure smooth trigger motion |
| Caulk flow uneven | Air bubbles, clogged passages | Prime gun before use, clean with solvent |
| Rod hard to push | Thick caulk, stuck cartridge | Thin caulk, ensure cartridge moves freely |
| Rod won’t move | Jammed trigger mechanism | Loose and realign trigger parts |
Maintenance
Regular caulking gun maintenance ensures peak performance:
- Remove cartridges and rods when not in use
- Wipe tools clean after each use
- Lubricate rods and triggers periodically
- Inspect parts for damage or wear
- Replace worn parts like o-rings and springs
- Protect guns from dirt, dust and moisture
- Lightly oil exposed metal surfaces
Conclusion
With a basic understanding of the components, operation, troubleshooting, and maintenance for caulking guns, anyone from home DIYers to professional contractors can expertly dispense caulk for any project. Advances continue to improve caulking gun designs, but the core function and use remains fundamentally the same. Properly using caulking guns allows for efficient, clean caulk application in any environment.