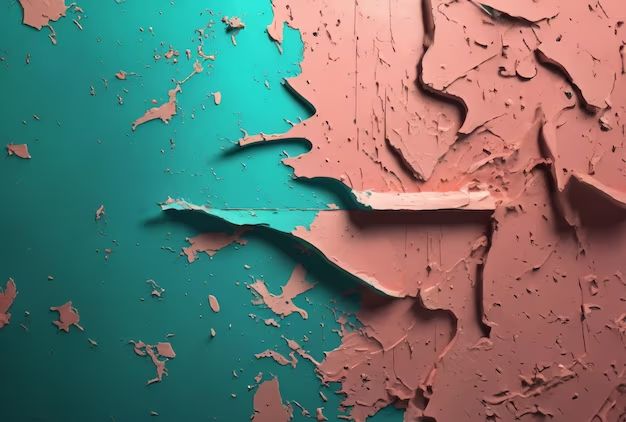
Paint chipping is a common problem that can happen both indoors and outdoors. When your paint starts chipping, it not only looks unsightly but can lead to further paint damage or wood rot if left untreated. The good news is there are several solutions you can try to stop paint from chipping and flaking off surfaces in your home.
Page Contents
Why Does Paint Chip?
There are a few key reasons paint may start chipping or peeling from a surface:
- Moisture – Excess moisture getting under the paint from rain, sprinklers, etc. can cause the paint to bubble and peel away.
- Sun exposure – UV rays from the sun can dry out and degrade exterior paint over time.
- Improper surface preparation – If the surface was not properly cleaned, primed, or sealed before painting, the paint may not adhere properly.
- Cheap or old paint – Lower quality paints or those past their prime may chip more easily.
- Temperature changes – Expanding and contracting of the surface from temperature swings can cause paint to crack and peel.
- Physical damage – Scuffs, scrapes, bumps, etc. can chip away at painted surfaces.
How to Stop Paint From Chipping
If your paint has started to chip or peel, there are several product options you can apply to help stop further damage:
Clear Coatings
Applying a fresh clear top coat over existing painted surfaces can help seal in the paint and prevent further chipping or peeling. This is best for minimal paint damage. Options include:
- Polyurethane: Polyurethane is a clear finish that forms a durable protective seal over paint. It resists moisture, sun exposure, and general wear and tear. It can be brushed or sprayed on.
- Acrylic sealer: Water-based acrylic sealers offer UV protection and mild water resistance. They can be easily applied with a paintbrush.
- Epoxy coating: For indoor concrete floors with painted chips, a clear epoxy can help seal them in place when applied in thin layers.
Primers
Primers are designed to help new paint adhere properly to surfaces. Using them before repainting can improve paint integrity. Some good options include:
- Exterior primer – Helps new paint stick to existing painted surfaces outdoors.
- Masonry primer – Seals porous concrete, stucco, and brick before painting.
- Wood primer – Seals wood grain and prevents tannin stains from bleeding into new paint.
- Metal primer – Prevents rust and helps paint stick to smooth metal siding or trim pieces.
Rust-Inhibiting Paint
For metal surfaces that are prone to rust-related paint chipping, using rust-inhibiting paints can help. These contain agents that prevent rust formation. Options include:
- Rust-oleum – Provides rust prevention and corrosion resistance.
- Hammerite – Contains a rust inhibitor specifically for metal protection.
- Tremclad Rust Paint – Offers industrial-grade rust protection.
Elastomeric Paint
Elastomeric paints are flexible coatings designed to bridge cracks and expand/contract with temperature changes. This prevents chipping and peeling. They work well on stucco, brick, and wood siding.
Textured Paint
For surfaces with existing paint chips or peeling, textured paints can help hide imperfections by covering them with slight bumps or grooves in the paint. Options include:
- Popcorn ceiling paint – Creates a “cottage cheese” ceiling look that hides flaws.
- Knockdown paint – Has a light orange peel-like texture to cover defects.
- Skip trowel paint – Provides a plaster-like finish that smooths bumps.
How to Use Above Products
Proper prep and application technique is key to getting good results from protective clear coats, primers, and textured paints. Here are some tips:
- Clean the surface thoroughly first to remove any dirt, grease, or chipping paint flakes.
- Sand rough paint edges smooth to help new coatings adhere evenly.
- On previously painted surfaces, use sandpaper or a wire brush to lightly scuff up the surface before applying your product. This helps it bond.
- Apply in thin, even coats according to manufacturer directions. Thick coats can lead to running or dripping.
- Allow proper dry time between coats as recommended on the product label.
- Keep air circulation flowing for faster drying and to decrease dust landing on wet paint.
- Use painter’s tape and drop cloths to protect surrounding surfaces from drips.
What Not to Do
When working to repair chipping or peeling paint, there are a few things you’ll want to avoid:
- Don’t paint over glossy surfaces – Remove any glossy sheen with sandpaper so the new paint can adhere.
- Don’t apply coatings over dirty surfaces – Always clean and remove loose paint first.
- Don’t paint in cool/humid weather – This can impact proper drying and curing.
- Don’t apply too thick of a coating – Multiple thin coats look better than one thick coat.
- Don’t forget the prep work – Proper surface prep leads to better results.
Conclusion
Repairing chipping and peeling paint may seem daunting, but is totally doable with some simple solutions. Clear coatings like polyurethane or acrylic sealer help protect existing painted surfaces from further damage. Primers ensure proper adhesion of new paint layers. Specialty paints like elastomeric or textured paints can flex and hide flaws in the substrate. Just remember to properly prepare surfaces first and apply products as directed. Stopping paint chips in their tracks will keep your painted surfaces looking fresh and flawless.