There are a variety of household items that can be repurposed as makeshift grill grates if you find yourself without a proper grate for your barbecue. With some creativity and improvisation, you can grill your food successfully using grates made from various metals, ceramics, or even wooden materials lying around the house. The key factors to consider when selecting an improvised grate are heat resistance, stability, grill mark creation, and food safety.
Page Contents
Metals as Grill Grates
Various metal materials can work well as impromptu grill grates due to their ability to withstand high heat. Stainless steel, cast iron, and aluminum are ideal metals to use. You can fashion a grate using items such as:
- A stainless steel baking sheet or roasting pan – Perforate the bottom with holes to allow airflow and grease drainage.
- An old cast iron pan or griddle – Flip it upside down and place food directly on the cooking surface.
- Aluminum foil – Fold sheets into ridges to create a ribbed grate surface.
- A small stainless steel colander or mesh strainer – Place directly on the grill.
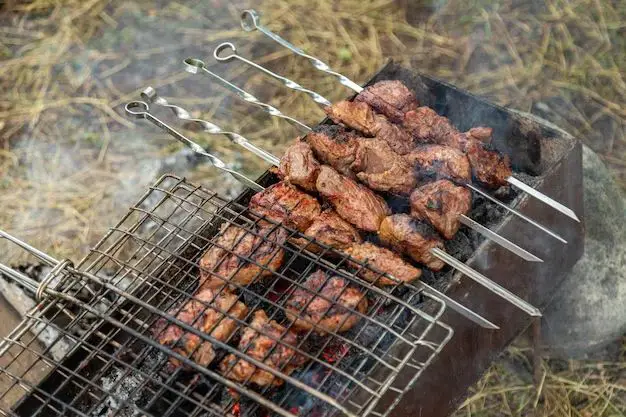
- Metal kabob skewers – Lay skewers parallel to each other to form a grate.
The benefit of metal grates is they get hot enough to sear and char food nicely, producing those appetizing grill marks. Just ensure to clean the repurposed metal materials thoroughly first since metals can retain odors and bacteria.
Ceramics and Stones
Heat-safe ceramic and stoneware materials are another handy option for DIY grill grates. Consider using:
- Unglazed ceramic floor or wall tiles – Arrange in a single layer as a grate surface.
- Terracotta plant saucers – Flip large saucers over to make instant grates.
- Pizza stones – These large stones distribute heat evenly.
- Bricks or concrete pavers – Clean thoroughly first since they are porous.
Ceramics and stones retain heat well, producing even cooking results. Just ensure your homemade grate is stable enough to hold foods safely. Avoid wet or brittle materials that may break under high temperatures.
Wood-Based Grill Grates
You can craft DIY wooden grill grates in a pinch too. Good options include:
- Cedar planks or shingles – Soak first to prevent burning.
- Wood cutting boards – Use large, thick boards that won’t scorch.
- Bamboo steamer baskets – Weave together for a unique grate.
- Hardwood sticks or small logs – Skewer parallel to make a grate.
Wood materials will not get as hot as metals, so expect slower cooking times. Avoid soft woods like pine that may contain unhealthy resins. Soaking wood prevents flare-ups but reduces searing capacity.
Everyday Household Items
With creativity, the possibilities are endless for household items that can substitute as grill grates. Possibilities include:
- Aluminum foil – Fold sheets into ridges across the grill.
- Steel wire mesh – Cut sheets to size and lay across grill.
- Baking cooling racks – Place directly on grill surface.
- Metal pie tins – Invert and use bottoms as a small grate.
- Metal kitchen utensils – Skewer in parallel rows to make grates.
Ensure materials can withstand high heat and are food-safe. Avoid plastic, rubber, or painted items that may melt or leach chemicals when heated. Test stability and integrity before grilling food.
Choosing a DIY Grill Grate
When selecting household items for improvised grill grates, consider these key factors:
- Heat resistance – The material must be able to withstand flames and high heat without melting, scorching, or breaking down.
- Stability and strength – Items should lay flat and not warp under the weight of food. No tipping or wobbling.
- Conductivity – Materials like metals will get hot enough to sear meats nicely.
- Grill mark creation – Ribbed or wire mesh surfaces brand food with appealing sear marks.
- Food safety – Ensure materials are thoroughly cleaned and food-safe for cooking.
Avoid any materials that don’t meet these criteria. Grill on low heat initially to test the DIY grate’s performance.
Setting up DIY Grill Grates
Follow these tips when setting up makeshift grill grates:
- Completely clean materials first – Use soap and water or dilute vinegar solution.
- Arrange grate materials in a single layer across the grill.
- Ensure proper stability – No gaps, tipping, or wobbling.
- Preheat the grill on low first before adding food.
- Use tongs or spatulas – Don’t pierce meat which could cause flare-ups.
- Watch closely – Quickly remove or adjust if materials warp or scorch.
Take care when reaching across a makeshift grate so it doesn’t shift or dislodge. Remove food promptly if you notice burning or material breakdown.
Preparing Food for DIY Grates
To use improvised grill grates successfully:
- Cut food into smaller pieces – For stability and even cooking.
- Use foil packets – For small or delicate food items prone to falling through grates.
- Skewer foods like kebabs – Helps keep items stable and contained.
- Brush or spray oil – Prevents sticking instead of hard scrubbing later.
- Turn carefully using tongs – Don’t pierce meat which can cause flare-ups.
Avoid chopping foods directly on makeshift grates which can damage their surface. Use soft metals that won’t scratch. Grill slowly on medium heat until DIY grate performance is known.
Safety Tips
When using homemade grill grates:
- Use caution when handling – Can have sharp or rough edges.
- Keep children and pets away – Don’t let them dislodge the unstable grate.
- Don’t leave grill unattended – Monitor closely to prevent mishaps.
- Protect yourself – Use mitts, long sleeves; splatter may be more likely.
- Have an extinguisher nearby – Flare-ups can occur on makeshift grates.
Improvised materials may be prone to breakage, instability, or contributing to flames. Stay alert and prepared to make quick adjustments as needed.
Top 5 Recommended DIY Grill Grates
If you need to improvise a grill grate, the following common household items typically perform well:
1. Aluminum Foil – Mold sheets into ridges across grill for a disposable grate surface.
2. Cast Iron Pan – Gets scalding hot for excellent sear marks and stability.
3. Metal Cooling Rack – Provides heat conduction and allows grease drainage.
4. Stainless Steel Colander – Imparts grill marks and sturdy enough for turning foods.
5. Concrete Pavers – Retain and distribute heat evenly despite low conductivity.
Conclusion
While specialized grill grates are ideal, a variety of DIY grate materials can be successfully substituted in a pinch. Focus on finding household items made of heat-safe metals, ceramics, or wood that will remain stable, sear foods nicely, and safely support foods across the grill’s surface. With caution and common sense, you can execute impromptu backyard grilling using everyday materials on hand when your regular grill grate goes missing.