Drop ceilings are commonly used in basements to conceal pipes, wires, ductwork, and insulation. However, they have some drawbacks that make homeowners consider other options. Drop ceilings can make a basement feel lower and enclosed. They also allow less flexibility in layout and design. Luckily, there are several attractive alternatives to the standard drop ceiling for basement spaces.
Page Contents
Reasons to Avoid Drop Ceilings in Basements
Here are some of the downsides of using drop ceilings in basement spaces:
- Reduces headroom – Drop ceiling panels are typically 2×2 or 2×4 feet and hang down at least 6 inches from the structural ceiling. This lowers the space, making it feel more enclosed.
- Limited design options – Drop ceiling tiles come in limited colors and styles. It can be difficult to create an attractive look.
- Access issues – Drop ceilings don’t provide easy access to pipes, wires, and ducts. Panels need to be removable or contain cutouts.
- Can feel cheap – The institutional look of drop ceilings reads as low budget.
- Prone to sagging and stains – Humidity can cause drop ceiling tiles to sag or stain over time.
For these reasons, finding an alternative to drop ceilings is worth considering for basement remodeling projects.
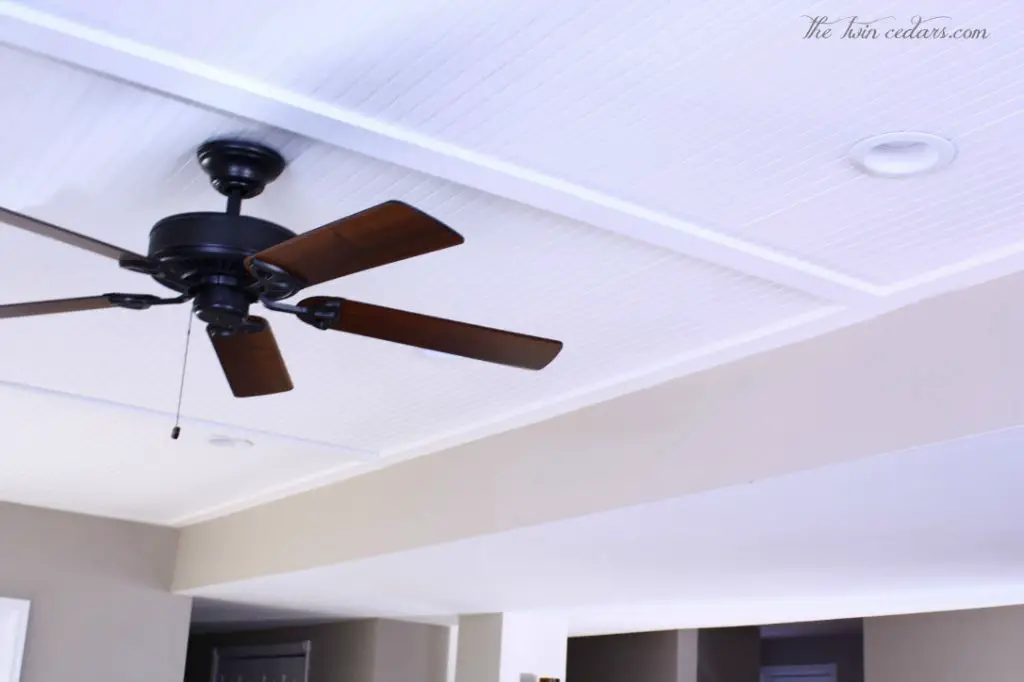
Drywall Ceilings
One of the most popular and versatile ceiling choices is drywall. With drywall ceilings, the underside of floor joists above are covered in moisture-resistant drywall panels that are mudded and taped for a seamless appearance.
Benefits of Drywall Basement Ceilings
- Increased ceiling height – Drywall can be applied directly to the underside of joists, maintaining the full ceiling height.
- Smooth and seamless – Joints between drywall panels are concealed with tape and mud for a uniform appearance.
- Easily painted – Drywall accepts paint readily, allowing custom colors.
- Versatile – Drywall ceilings work with any interior design style.
- Good access – Drywall panels can be cut to provide access where needed.
The main downside of drywall ceilings is that plumbing, ducting, and wiring are not concealed. One way to get around this is to box in pipes and ducts with additional framing.
How to Install a Drywall Basement Ceiling
Here is a quick overview of installing a drywall ceiling:
- Check that overhead floor joists are properly supported and do not have any sagging.
- Install furring strips perpendicular to the joists every 12 to 16 inches. Screw into joists.
- Cut drywall panels to size and install with screws into the furring strips.
- Tape drywall joints with fiberglass mesh tape and apply joint compound over.
- Apply two to three coats of joint compound, sanding between coats.
- Prime and paint drywall for desired finish.
Proper planning is needed to determine required access points or boxed areas for concealing ductwork. Ventilation should also be addressed. Overall, drywall is an excellent option for achieving an attractive, seamless ceiling surface in a basement.
Exposed Ceilings
Exposing the underside of floor joists and leaving infrastructure like pipes and ducts visible is another basement ceiling route. This industrial look provides a sense of openness and space.
Benefits of Exposed Basement Ceilings
- Increased perceived height – Exposing the full structural framing adds height.
- Industrial, loft-like appeal – Raw finishes like exposed metal ducts and piping create an urban style.
- Easy access – An exposed ceiling provides access to all infrastructure without panels or boxes.
- Cost effective – Other than cleaning, painting, or sealing the exposed elements, there is no additional spend.
The challenge with exposed basement ceilings is managing the infrastructure. Carefully planning the layout and an organizational system helps keep pipes, wires, and ducts orderly. Boxing in especially unsightly elements is an option too.
Overall, an exposed ceiling can be a stylish, budget-friendly basement ceiling choice for the right space.
How to Create an Exposed Basement Ceiling
Follow these general steps:
- Inspect ceiling structure and make repairs if needed. Check for sagging joists.
- Clean surface of joists or ducts. Remove loose paint or rust.
- Make any desired boxing around pipes, wires, or ducts with wood framing.
- Apply primer and paint to surfaces as desired.
- Add finishing touches like pendant lighting that extends from ceiling.
Just keep in mind that all pipes, ducts, and wires will remain visible, so an orderly layout is ideal.
Wood Plank Ceilings
Wood planks are a warm, inviting choice for basement ceilings. Tongue-and-groove planks can be installed directly to joists or on furring strips.
Benefits of Wood Plank Basement Ceilings
- Natural appeal – The rich look of wood adds coziness to a basement’s atmosphere.
- Customizability – Stain, paint, or seal planks to personalize the look.
- Easy installation – Planks nail or screw into place similarly to a subfloor.
- Conceals infrastructure – Planks can be removed as needed for access.
Pine, cedar, and spruce are common wood types used. Make sure any wood is rated for damp environments.
How to Install a Wood Plank Basement Ceiling
Here are the basics of installing wood planks:
- Install furring strips perpendicular to the joists if needed to level or lower the ceiling.
- Run boards perpendicular to joists, nailing or screwing into place.
- Maintain a 1/8” gap between boards to allow for expansion.
- Make cutouts for any ducting, wiring, or plumbing.
- Finish boards with stain and/or polyurethane.
Pre-primed, pre-stained pine boards are available to simplify installation. Just take care that cutouts for infrastructure are neatly framed and accessible.
PVC or Vinyl Plank Ceilings
PVC or vinyl planks provide the look of wood with added durability and moisture-resistance. These are easy-install panels made to click or hook together over joists or furring strips.
Benefits of PVC/Vinyl Plank Basement Ceilings
- Realistic wood look – Textures and grains mimic real hardwood.
- Waterproof – Vinyl stands up to humidity and condensation.
- Low maintenance – Doesn’t require sanding, staining, or refinishing.
- Easy installation – Panels click together and many are adhesive backed.
- economical – Comparable cost to real wood but easier to install.
PVC ceiling planks come in a range of color and grain patterns. Installation is simple, but be mindful of allowing for any openings needed.
How to Install PVC/Vinyl Plank Basement Ceilings
Here is an overview of installation steps:
- Install furring strips if lowering or leveling ceiling.
- Measure ceiling and cut planks to fit perimeter.
- Pre-drill planks for nails/screws if needed.
- Affix first row of planks to joists or furring strips.
- Click or hook together subsequent rows.
- Caulk perimeter seams for clean look.
PVC planks require little cutting and no finishing for an easy ceiling project. Just take care with layout to accommodate any ducting or wiring.
Suspended Ceilings
A less common but still viable approach is a suspended ceiling system. Metal grid frameworks hang from the overhead structure. Ceiling panels fit into the grid.
Benefits of Suspended Basement Ceilings
- Accessible – Panels lift up easily to access above-ceiling space.
- Install on uneven ceilings – Grid hangs down to desired height.
- Conceals infrastructure – Ducts, pipes, and wires hide above panels.
- Acoustic damping – Sound absorption panels available.
- Aesthetic options – Choose flush or drop-down paneled appearance.
Suspended ceiling systems take more expertise to install but provide excellent overhead access. Panels also help dampen sound in a basement space.
How to Install a Suspended Basement Ceiling
- Determine desired ceiling height and required clearance for grid.
- Attach perimeter wall trim at needed height.
- Hang ceiling grid from overhead joists or concrete ceiling.
- Insert panels into grid openings as final step.
A suspended ceiling is one of the more complex DIY installations. But the benefits can make it worthwhile in the right basement space.
Spray-On Ceilings
Spray-on ceiling coatings offer seamless, sound-dampening ceiling finishes. These coatings can adhere to most surfaces including concrete, wood, drywall, and tile.
Benefits of Spray-On Basement Ceilings
- Seamless appearance – Coatings fully cover surfaces and infrastructure.
- Quick installation – Entire ceiling is coated in one step.
- Reduced echo – Textured coatings absorb sound.
- Aesthetic flexibility – Many texture and color options.
- Water resistant – Effective on damp masonry.
Spray coatings require professional installation but can create a unique, finished ceiling treatment easily. Useful for covering cracked concrete or block ceilings.
How Spray-On Ceilings are Installed
Here is the basic process:
- Clean and prepare the ceiling surface.
- Cover nearby walls and floors with plastic sheeting.
- Apply primer if coating concrete or masonry.
- Spray coating using a hopper gun to desired thickness and texture.
- Apply multiple coats for full coverage and color effects.
Selected coatings like this can be installed directly over imperfect basement ceilings. The result is durable and sound-absorbing.
Covered Beam Ceilings
Exposing basement ceiling joists and covering them in wood or other finishes is an appealing hybrid approach. Beams remain visible while getting an upgraded look.
Benefits of Covered Beam Basement Ceilings
- Maintains an open, exposed aesthetic.
- Beams become an architectural feature.
- A broad range of covering options – wood, metal, stucco, etc.
- Conceals imperfections like cracks or stains on beams.
- Can cover pipes or wires running between beams.
Covered beams provide style while allowing infrastructure to remain discreetly exposed between finished joists.
How to Create Covered Basement Ceiling Beams
The process involves:
- Inspect and repair any damaged beams first.
- Clean beam surfaces thoroughly.
- Box in ducts or pipes between beams (optional).
- Prime and finish-coat beams with selected covering.
- Install molding at ends for a polished look (optional).
Wood planks, plywood panels, metal sheeting, or stucco/ plaster can cover beams nicely. Just maintain access to any covered infrastructure.
Conclusion
Tired drop ceilings don’t have to be the only basement covering option. Today’s materials and styles make it easier than ever to create the ceiling you want. From warm wood planks to industrial exposed beams, there is a look for every taste. Just keep accessibility for any wiring, ducts or plumbing in mind. With some planning and creative thinking, your basement ceiling can get a fresh new look and feel.