Concrete edging is an important finishing touch that can really enhance the look of any concrete surface. Proper edging gives concrete a clean, finished appearance and helps protect the edges from damage. There are several effective options for edging concrete that each have their own advantages and best uses. In this comprehensive guide, we will discuss the most popular edging materials, their benefits, and how to use each one properly for best results. Knowing the right edging technique for your specific project is key to achieving a polished, professional concrete finish.
Page Contents
Types of Concrete Edging
There are five main types of edging that can be used on poured concrete surfaces:
Plastic Edging
Plastic lawn edging is a lightweight and affordable option. It comes in long strips that can be bent to shape. Plastic edging has these advantages:
– Low cost
– Easy installation
– Flexible – bends to shape
– Wide range of colors/finishes
Best for decorative edging of sidewalks, patios, and driveways. Not suitable for high-traffic areas.
Steel Edging
Steel edging provides a thin, straight border. It has these benefits:
– Creates very straight lines
– Durable for high-traffic
– Sturdy support
Best for driveways, parking lots, and commercial applications. Takes professional installation.
Aluminum Edging
Aluminum edging offers functionality similar to steel but with a more decorative look. Features include:
– Decorative shapes and finishes
– Lightweight for easy installation
– Good durability
Ideal for accenting landscaping, gardens, patios. Not for heavy load applications.
Brick/Stone Edging
Using brick or natural stone provides an elegant finish. Benefits include:
– Classic, upscale appearance
– Many color/texture options
– Complements landscaping
– Can make curved edges
Best for upscale residential settings like patios, gardens, pool areas. Needs professional installation.
Concrete Footing
Pouring a footer of concrete along the edges creates a clean, seamless border. Advantages:
– Smooth, uniform edge
– Can curve or bend footer
– Matches surface color perfectly
– Highly durable
Recommended for any new concrete installation. Done at time of pour.
Choosing the Right Edging Method
Selecting the appropriate edging technique depends on several factors:
Location/Use
Consider the location and usage when deciding on edging. High-traffic driveways and parking areas need durable edging that can withstand vehicles, snowplows, etc. Decorative garden paths can use softer plastic borders.
Shape of Area
Straight edges are easiest to achieve with steel strips or concrete footings. For smooth curves, flexible plastic, aluminum, or brick can contour well.
Budget
Plastic and aluminum edging are the most affordable options. Brick, stone, and poured footings have a higher upfront cost.
Aesthetics
For a visible decorative border, choose elegant materials like brick, stone, or textured aluminum. If the edging will be mostly hidden, plastic or plain steel will suffice.
| Edging Material | Durability | Cost | Appearance | Good For |
|---|---|---|---|---|
| Plastic | Low | Low | Average | Gardens, patios |
| Steel | High | Medium | Average | Driveways, lots |
| Aluminum | Medium | Medium | Decorative | Accent borders |
| Brick/Stone | High | High | Upscale | Residential |
| Concrete | Very High | Medium | Seamless | Any new pour |
Installing Plastic Lawn Edging
Plastic edging provides a quick, inexpensive way to edge landscaping and decorative concrete. Here are some tips for installing it properly:
Materials Needed
– Plastic edging strips
– Landscape spikes or stakes
– Rubber mallet or hammer
– Utility knife/scissors
– Shovel
Step 1: Layout the Edging
– Mark the border layout with string and stakes. For curves, lay out the shape with a hose or rope.
– Make the trench 6-12 inches from the slab edge, depending on edging width.
Step 2: Dig the Trench
– Dig a 2-4 inch deep trench along the marked line.
– Level and compact the soil in the trench.
Step 3: Install the Edging
– Lay the edging strip into the trench. Overlap pieces and connect with landscape spikes.
– Pound spikes through the edging every 12-18 inches.
– Use a mallet to tap edging flush with the ground.
Step 4: Backfill and Finish
– Shovel soil over the edging strip to fill the trench. Compact the soil.
– Cut edging flush at the endpoints with utility knife or scissors.
Maintenance
– Inspect periodically and re-secure any loose sections.
– Control grass and weeds around edging.
– Replace worn or damaged pieces as needed.
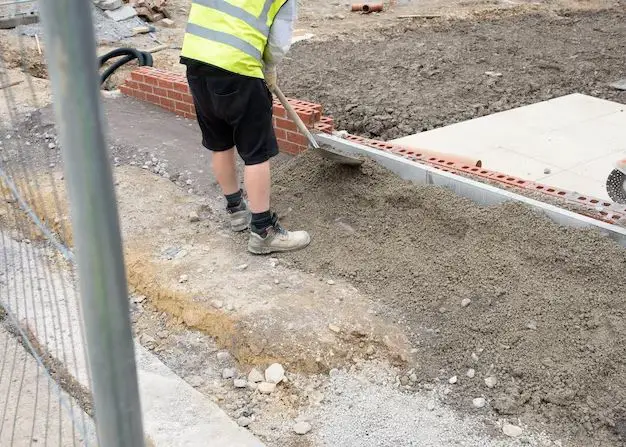
Installing a Concrete Footing
Creating a concrete footing provides a smooth, seamless border:
Materials
– 2×4 lumber for forming
– 16d nails and wood stakes
– Concrete mix
– Shovel
– Trowel
Step 1: Build the Forms
– Cut 2×4 boards to the perimeter length.
– Assemble into a form with 16d nails. Stake in place 2-3″ from edge.
– Mix concrete to a firm, workable consistency.
– Shovel concrete into the form.
– Use a trowel to smooth and slope top edge.
Step 3: Finish the Edges
– Once concrete begins to set (1-2 hours), remove form boards.
– Smooth and round the footer edges with trowel.
– Brush a textured finish if desired.
Step 4: Cure the Concrete
– Cover footing with plastic sheeting for 24-48 hours while concrete cures.
– Mist occasionally with water to prevent drying.
– Remove sheeting once concrete has hardened.
Conclusion
Installing high quality edging is an important step in achieving a truly professional concrete finish. The right edging choice depends on the specific project. Plastic and aluminum edging offer affordable options for most residential applications, while steel, stone, and concrete footings provide heavy-duty durability for commercial projects and high-traffic areas. With the proper techniques, nearly any concrete surface can be given clean, crisp edges that really make the final project pop. Edging should be both functional for protecting the slab edges and also aesthetically pleasing to enhance the overall look of patios, driveways, walkways and more.