Page Contents
Quick Answer
There are a few common options for sealing a valve cover gasket:
- Silicone sealant – This is often the go-to product for sealing valve covers. Avoid RTV silicones as they can react with some gaskets.
- Gasket sealant – Specialty products like Hylomar and Permatex Form-A-Gasket can help seal gaskets.
- Gasket dressing – These products help soften and condition gaskets to improve the seal.
Silicone sealant or a gasket sealant like Hylomar are good all-around options. Make sure the old gasket is removed and the sealing surfaces are clean before applying the new sealant. Allow proper curing time before reinstalling the valve cover.
What is Causing the Leak?
Before deciding on the best sealant to use, it’s important to understand why the valve cover gasket is leaking in the first place. Here are some potential causes:
- Old, hardened gasket – Gaskets deteriorate over time. The heat and oil exposure will cause the gasket material to harden and lose its sealing capability.
- Warped valve cover – If the valve cover has warped it can allow oil to leak past the gasket seal. Warping is common as the metal heats and cools.
- Rough sealing surfaces – Damage like pits or scratches on the sealing surfaces where the gasket contacts can lead to leaks.
- Incorrect installation – If the valve cover is not properly installed and uniformly torqued down, it can cause leakage.
- Overfilled oil – An overfull oil level can potentially cause leaks by increasing pressure inside the engine.
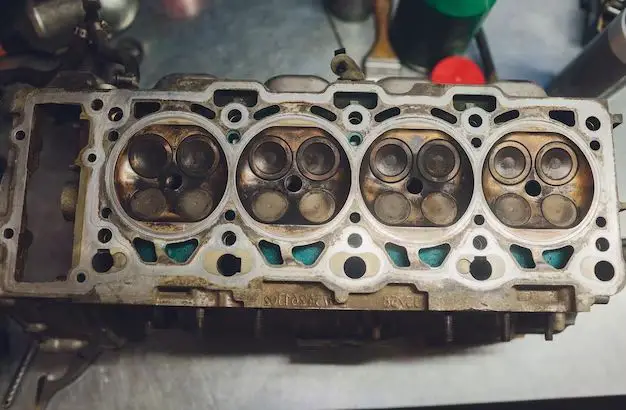
If the valve cover or sealing surfaces are damaged, these areas may need to be cleaned up or refinished to achieve a reliable seal.
Materials for Sealing Valve Cover Gaskets
Here are some of the most common options for sealing a leaky valve cover gasket:
Silicone Sealant
Silicone is one of the most popular and effective products for sealing valve covers. The silicone flows into small irregularities and forms a flexible, oil resistant seal. Some pros of using silicone:
- Easy to apply
- Stays flexible and durable long-term
- Withstands high temps
- Chemically resistant to oil, coolant, etc.
Avoid using RTV silicones as they can interact with some gasket materials. Make sure to use a non-corrosive neutral cure silicone sealant suitable for automotive use.
Gasket Sealers
There are also specialized gasket sealers made for improving the seal between imperfection surfaces like valve covers. Some popular products include:
- Hylomar – Forms a thin flexible coating that fills in surface imperfections. Often blue in color.
- Permatex Form-A-Gasket – A thicker sealant that turns into a gasket-like layer. Often red in color.
- Permatex Ultra Black – Oil resistant black silicone good for high temp areas.
These products are a step above regular silicone and designed specifically for sealing challenging gasket joints. They have exceptional oil resistance and ability to fill small voids.
Gasket Dressings
You can also use gasket dressings and sealers to recondition old hard gaskets. Products like Permatex Gasket Maker or Gear Oil RTV contain solvents that soften the gasket material and make it more pliable. This can improve the sealing capability of old valve cover gaskets.
Replacement Gasket
Finally, the best repair may be to replace the valve cover gasket altogether. This avoids any uncertainty with sealants. Ensure the new gasket is an exact matched part for your valve cover. Proper installation is key for a leak-free seal.
How to Apply Gasket Sealant
When using a sealant like silicone or gasket sealer, follow these application tips:
- Clean the sealing surfaces – Use a gasket scraper and degreaser/cleaner to remove all traces of old sealant and oil residue.
- Apply sealant – Put a thin uniform bead or layer around the valve cover sealing surface. Follow product instructions.
- Let cure – Allow the recommended cure time before installing valve cover.
- Torque cover – Tighten the valve cover bolts/nuts to the specified torque in a criss-cross pattern.
Taking the time to prep the sealing areas and applying the sealant properly will give the best results. Be patient during the cure time before reassembly.
DIY Tips for Resealing Valve Covers
Here are some helpful DIY tips for properly resealing a leaky valve cover at home:
- Use gasket remover – Saving time by just applying sealant over the old gasket rarely ends well. Use a gasket scraper and remover to clean to a fresh surface.
- Degrease thoroughly – The sealant needs to bond to clean metal, so degrease the sealing surfaces very well. Brake cleaner works well.
- Check for warpage – Feel for any significant warping in the valve cover by laying a straightedge across it. Warped covers may need to be replaced or machined.
- Torque in pattern – Tighten valve cover bolts in a criss-cross pattern to the proper torque spec. This ensures even clamping force.
- Replace grommets – Inspect any crankcase vent tube grommets and replace them if deteriorated. This prevents future oil leaks.
- Allow cure time – Be patient after applying sealant. Follow the cure times in the product instructions before reinstalling cover.
Taking the extra time to do prep work and following the sealant directions will give a repair that lasts. Be methodical and don’t cut corners.
Troubleshooting Leaks After Resealing
If you have resealed a leaking valve cover but are still seeing signs of oil leaks, here are some troubleshooting tips:
- Check for missed spots – Closely inspect the resealed area and look for any voids, gaps or areas the sealant may have missed.
- Scrape and reapply – If there are missed spots, thoroughly scrape and clean those areas again before reapplying sealant.
- Ensure full cure – Make sure sufficient cure time was allowed before reassembly. This lets the sealant fully harden.
- Try an alternate product – Switching to a different sealant like Hylomar may fix persistent small leaks from imperfections.
- Revisit torque – Double check the valve cover bolts are tightened to the proper specs in the manufacturer’s recommended sequence.
- Inspect grommets – Make sure any engine vent tube grommets are in good shape. Dry, cracked grommets can permit leaks.
Methodically re-check for proper sealant application, cure time, torque and gasket condition. This will help troubleshoot most leaks following a valve cover reseal.
Preventing Future Valve Cover Leaks
Here are some good ways to help prevent valve cover gasket leaks down the road:
- Use OEM or high quality gaskets – Aftermarket gaskets can be hit or miss. Stick with high quality valve cover gaskets.
- Proper torque – Always tighten valve cover bolts to the manufacturer’s torque spec and sequence.
- Avoid overfilling oil – An overfull oil level puts more pressure on gaskets and seals.
- Use good quality oils – Higher quality motor oils contain more detergents which prevent deposit buildup.
- Watch heat cycles – The more heat cycles, the faster gaskets deteriorate. Limit excessive idling.
- Check PCV system – Make sure the PCV system is working properly. This prevents excessive pressure buildup.
- Fix warpage – Remedy any warped valve covers through replacement or machining. This prevents future leaks.
Proper maintenance and using quality parts goes a long way towards preventing leaks. But valve cover gaskets will eventually need to be resealed, so keep the sealant handy.
Professional Resealing Options
While the above outlines DIY valve cover gasket replacement, there are also professional options available:
- Dealership – Most dealership service centers can complete valve cover resealing, often for $150-300 in labor costs.
- Local auto shop – An independent local auto repair shop may offer better rates than the dealership. Shop around.
- Mobile mechanic – Some mobile mechanics will come to your home or office to complete valve cover gasket replacement.
Professionals have the benefit of experience doing many repairs. They also have access to professional grade tools and lifts. This can make the repair much easier versus DIY. Get an estimate before having one of the above reseal your leaky valve cover.
Conclusion
Resealing a leaky valve cover gasket is a common repair that arises after many miles of service. In most cases, a DIYer can complete this repair at home themselves with the proper materials and procedure. Silicone sealant or a gasket sealer like Hylomar applied correctly after thorough cleaning are good options for resealing most valve covers. Paying close attention to prep work, cure times and proper torque is the key to success. For those who don’t want to tackle this repair themselves, dealerships and local shops can also complete the job efficiently. With the right techniques and materials, resealing valve cover gaskets can restore these critical sealing surfaces for thousands more miles of leak-free driving.