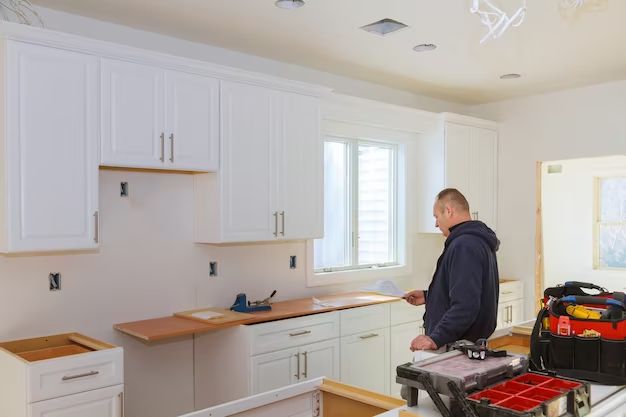
Installing upper cabinets in your kitchen can seem like a daunting task, but with the right tools, materials, and preparation, it can actually be quite straightforward. In this article, we’ll walk through everything you need to know to successfully install upper cabinets on your own.
Page Contents
Planning Your Upper Cabinet Layout
The first step when installing upper cabinets is planning out where exactly you want them to go. Here are some tips for mapping out your upper cabinet layout:
- Measure your wall space carefully and sketch out a floor plan showing all your base and upper cabinet locations.
- Standard upper cabinets are 30-36 inches high and 12-24 inches deep. Make sure to account for these dimensions in your layout.
- Decide on which cabinets will be full height to the ceiling vs. having a soffit or crown molding gap.
- Map out where you want cabinets with glass doors or other special features.
- Plan placement of corner cabinets and appliances like microwaves.
- Leave sufficient clearance for open cabinets – 18 inches minimum from countertop to bottom of cabinet.
- Make sure upper cabinets align properly with base cabinets and any windows or doors.
Having a detailed floor plan will make installing your upper cabinets much smoother and help you order the correct cabinet sizes.
Tools Needed for Installation
Installing kitchen cabinets requires some specialized tools designed for precise measuring, leveling, and securing the cabinets. Here are the tools you’ll need:
- Tape measure
- Carpenter’s level
- Stud finder
- Power drill and drill bits
- Screwdriver set
- Hammer
- Cabinet clamps
- Laser level (optional but helpful)
You’ll also need materials like shims, screws, and wall anchors. Having an extra set of hands can be useful too!
Preparing Your Walls
To ensure your upper cabinets get mounted securely, your walls need to be properly prepared before installation:
- Remove any existing cabinets, countertops, or backsplashes if renovating.
- Repair and fill any holes or imperfections in the wall.
- Ensure walls are flat – shim out any framing studs that protrude.
- Locate and mark studs using a stud finder.
- Mark your planned cabinet layout on the walls using a level.
Prepping your walls ahead of time will make mounting your cabinets much easier compared to trying to fix wall flaws later.
Hanging The Cabinets
When ready to install, follow these steps to hang your upper cabinets securely and level:
- Install corner or end cabinets first so you can work outward.
- Lift cabinets into place, using help or a lifting device if needed.
- Secure to studs using 2-1/2 to 3-inch cabinet screws through the cabinet back.
- Pre-drill holes for screws to prevent splitting cabinet material.
- Use shims to make cabinets level and fill any gaps against the wall.
- Drill pilot holes for wall studs if needed to relocate cabinets.
- Continue installing cabinets, checking for level frequently.
- Allow cabinets to settle overnight before final adjustments or loading.
Take care when lifting cabinets and drilling holes – having an extra set of hands makes a big difference here. Work slowly and carefully to hang cabinets straight and true.
Finishing Touches
Once all cabinets are installed securely, add these final touches:
- Install cabinet doors, drawers, and adjust hinges for proper alignment.
- Add decorative trim pieces like crown molding.
- Run wires for lighting or outlets through cabinet backs as needed.
- Seal around cabinets with caulk for an air-tight installation.
- Add cabinet hardware like knobs or pulls.
Taking time with final details gives your new upper cabinet installation a built-in, high-end look.
Stocking Your Cabinets
Once fully installed, you can fill your shiny new upper cabinets! Keep these tips in mind:
- Only load cabinets attached securely to studs.
- Heavier items should go in bottom cabinets.
- Use organizing inserts to maximize space.
- Install child safety latches if needed.
- Add under-cabinet lighting to illuminate interiors.
Filling your newly installed cabinets makes all your hard work worthwhile. Just be sure to work safely and not overload upper cabinet shelves.
Conclusion
Installing kitchen upper cabinets is definitely a project you can DIY with proper planning, tools, and care. Following the steps outlined above will set you up for success as you enhance your kitchen with new upper storage space. Take time to get your measurements, layout, and preparations exactly right – it will pay off in a smooth installation. Before you know it, you’ll have custom-built, high-end looking cabinets that add function and style to your kitchen.