Installing tongue and groove flooring can transform the look and feel of a room by adding beautiful new floors. However, it’s important to make sure you have all the right supplies before starting the project. Having the proper tools and materials on hand will ensure the installation goes smoothly and safely. In this article, we’ll outline everything you need to install tongue and groove flooring successfully.
Page Contents
Flooring
The first thing you’ll need for a tongue and groove flooring installation is the flooring itself. There are many options when it comes to wood species, widths, lengths, and finishes. Some popular choices include oak, maple, hickory, and exotic species like Brazilian cherry. The width of the boards ranges from 2 1/4″ up to 7″ wide. The most common is 3″ or 4″ wide solid tongue and groove flooring. The length can also vary, with shorter boards being more suitable for smaller spaces. Typically, you’ll want boards in random lengths of 18″ to 8 feet long. Finish options include prefinished floors with aluminum oxide or urethane coatings and unfinished flooring. With unfinished wood, you’ll apply stains and sealers after installation. Calculate the square footage of your space and add 5-10% extra to allow for off-cuts. Purchase all flooring materials at the same time to ensure consistent color and grain.
Underlayment
Underlayment is an important component when installing tongue and groove floors. It creates a smooth, even substrate for the flooring and helps control moisture. Some common underlayment options include:
- Felt paper – A fiber material made from recycled paper that absorbs moisture.
- Foam – Closed-cell foam adds cushioning and insulation.
- Cork – Natural material that reduces sound transmission.
- Rubber – Provides excellent moisture protection and sound dampening.
Look for an underlayment with at least the minimum thickness recommended by the flooring manufacturer. An attached vapor barrier on the underlayment is also a good idea to prevent moisture issues. Make sure to purchase an underlayment wide enough to cover the entire floor area.
Adhesive
While some types of tongue and groove flooring are designed to be installed as a floating floor without glue, most traditional solid wood flooring requires adhesive for a secure bond. Using the proper adhesive helps lock boards together at the tongue and groove joint. Some common adhesives for wood flooring include:
- Urethane adhesive – Waterproof and flexiblebond.
- Epoxy adhesive – Extremely durable and moisture resistant.
- Moisture cure adhesive – Designed for damp concrete subfloors.
Always check the flooring manufacturer’s recommendation for the best adhesive for the product. Make sure to buy enough adhesive for the entire project, with some extra as backup.
Vapor Barrier
For concrete subfloors, a vapor barrier provides crucial protection against ground moisture that can damage wood flooring over time. The most effective vapor barriers for below a wood floor are plastic sheets. Options include:
- 6 mil polyethylene sheeting
- Asphalt laminated kraft paper
The vapor barrier should cover the entire concrete slab, with sections overlapping by 6-12 inches. Tape all seams to seal the barrier. A vapor barrier is unnecessary for wood subfloors. Check moisture levels before deciding if a vapor barrier is needed.
Tools and Supplies
Installing tongue and groove flooring requires some specialized tools and accessories. Here are some must-have items:
- Pry bar – For prying up baseboards or window trim.
- Miter saw – For cutting boards to size along walls.
- Table saw – Cuts boards lengthwise with a super smooth edge.
- Jamb saw – Specialized saw to undercut door jambs.
- Tapping block – Soft block for tapping boards into place.
- Pull bar – Tool used to pull floorboards tightly together.
- Spacers – Plastic spacers allow for expansion gaps.
- Chalk line – Marks straight layout lines on the subfloor.
- Hammer – For tapping flooring into place as needed.
- Moisture meter – Tests moisture levels in the subfloor.
- Safety gear – Knee pads, gloves, eye and ear protection.
Having these essential items on hand will make the installation process safer and easier. Don’t forget accessories like transitions strips, vent covers, and reducers molding too.
Preparing the Subfloor
Proper subfloor preparation is crucial for a successful tongue and groove flooring installation. Here are key steps:
- Remove existing floor coverings – Rip up old carpet, vinyl flooring, tack strips and any padding.
- Clean the subfloor – Sweep and vacuum up all debris, dirt and dust.
- Check for level – Use a straightedge and level to identify any low or uneven spots.
- Fill low areas – Use floor leveler compound to patch and fill low spots.
- Test moisture – Use a moisture meter ensure moisture is within specifications.
- Install vapor barrier – For concrete subfloors, install a 6mil polyethylene vapor barrier.
The subfloor must be flat, clean and dry before starting the flooring installation. Address any problem areas to prevent issues down the road.
Planning the Layout
Carefully planning the layout is key for the best looking finished floor. Here are some tips:
- Determine direction – Decide if boards should run lengthwise or widthwise to the room.
- Find center point – Measure room to find the middle point along the length and width.
- Snap chalk lines – Use chalk lines as a guide, perpendicular to each other.
- Dry lay boards – Lay boards along chalk lines to test fit before installing.
- Check width of end rows – Avoid very narrow boards on the edges.
- Allow for expansion – Leave proper expansion gaps along walls and objects.
Having a clear layout strategy will streamline the installation and create a uniform floor design.
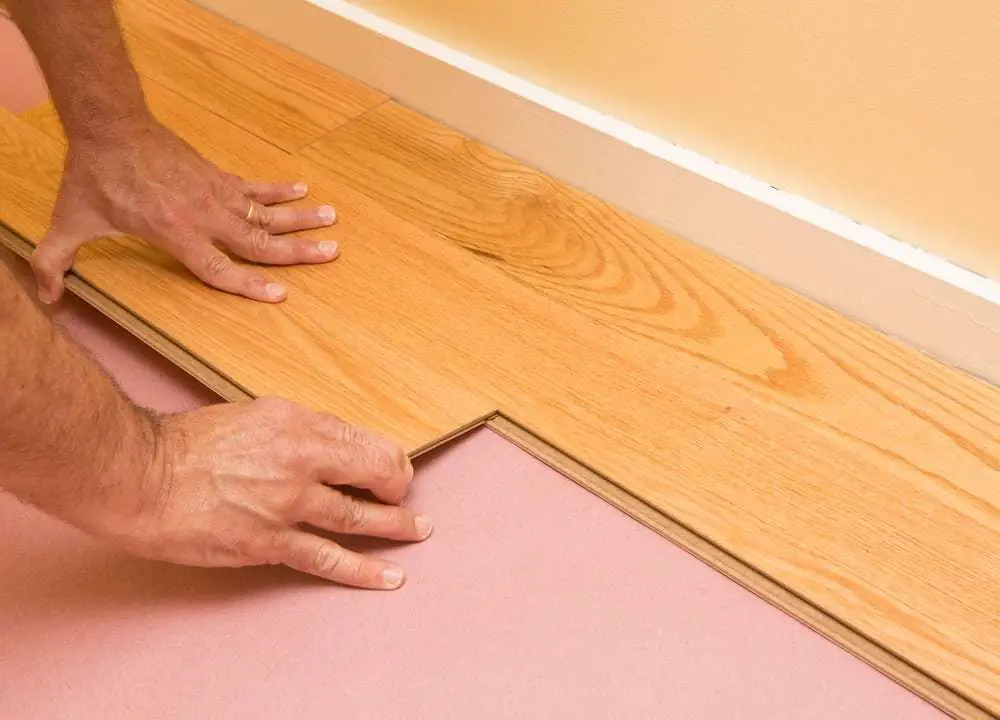
Installing the Floor
Once subfloor prep is complete and boards are laid out, it’s time to start nailing or gluing boards in place. Follow these key steps:
- Install underlayment – Roll out underlayment and tape seams.
- Use spacers – Set spacers along walls to maintain expansion gaps.
- Spread adhesive – Use a trowel to spread a uniform layer of flooring adhesive if required.
- Blind nail boards – Drive nails at a 45° angle through the tongues by hand or with a pneumatic floor nailer.
- Stagger boards – Alternating end joints between rows creates a staggered pattern.
- Tap joints – Gently tap boards together with a tapping block to tighten joints.
- Inspect as you go – Periodically lift boards to check adhesive transfer and joints.
Work methodically row by row, making sure boards are aligned and joints are tight before moving on. Having a second person helps align and tap boards in place.
Completing the Job
The last steps include trimming the perimeter, installing trim pieces, and finishing the floor protection:
- Install final row – Use a pry bar to install the last row under door jambs.
- Trim final row – Cut the last row to width with a table saw for an exact fit.
- Reinstall trim – Nail baseboards, quarter rounds and thresholds back in place.
- Seal floor – Apply urethane floor finish for protection if needed.
- Install transitions – Use transition strips between rooms and flooring types.
- Protect floor – Cover with cardboard or floor protection paper until project completion.
Double check for gaps, damaged boards, or uneven transitions before wrapping up the tongue and groove flooring installation.
Safety Tips
Installing wood flooring requires working with power tools and heavy materials. Keep these safety guidelines in mind:
- Use safety goggles, gloves, knee pads and ear protection.
- Work in a well-ventilated area when using adhesives or floor finishes.
- Follow all power tool safety practices – unplug when changing blades, don’t force tools, ensure blade guards are in place.
- Use a respirator or dust mask when cutting boards.
- Keep your work area clean and free of clutter to prevent slips or tripping hazards.
- Follow manufacturer safety guidelines for any specialty flooring tools.
- Get help lifting heavy flooring boxes and appliances.
Staying safe should be your top priority during the tongue and groove flooring installation process.
Conclusion
Installing a beautiful new tongue and groove floor requires careful planning, the right tools, and attention to detail. Making sure you have all the necessary supplies and take the time to prep the subfloor and map out boards will pay off with a smooth installation process. Safety is also critical when handling power tools and heavy materials. Once complete, you’ll have a stunning new hardwood floor to enjoy for years to come. With some patience and know-how, installing tongue and groove flooring can successfully be a DIY project.