When installing or renovating a shower, an important consideration is what to put behind the cement board. Cement board, often known by the brand name HardieBacker, is a common substrate used in showers before adding tile. Properly preparing the wall behind the cement board is crucial for preventing moisture problems and ensuring a durable, long-lasting shower.
Page Contents
Why Use Cement Board in Showers?
Cement board is made from Portland cement and sand reinforced with fibers. It is an ideal underlayment for showers because it is waterproof and provides a stable, rigid surface for tile installation. Key advantages of using cement board in showers include:
- Waterproof – Cement board does not absorb moisture or deteriorate when exposed to water.
- Mold resistant – Cement board does not support mold growth.
- Durable – Cement board stands up well to damage from impacts.
- Thin profile – At 1/4 to 1/2 inch thick, it adds minimal thickness.
- Tile bond – Cement board provides an excellent substrate for tile adhesion.
By using cement board behind tiles, you create a water barrier that protects the shower walls from moisture damage. Tile alone does not provide adequate water protection.
Prep the Wall Behind Cement Board
Although cement board itself is waterproof, you still need proper moisture protection behind the cement board. Any moisture that gets through the tile grout or penetrates around plumbing fixtures can damage the wall behind the tile if not properly protected.
There are several options for prepping the wall behind a cement board shower surround:
Vapor Barrier
One option is to install a vapor barrier such as plastic sheeting behind the cement board. A vapor barrier prevents moisture from traveling through the wall into stud bays and wall cavities. To install a vapor barrier:
- Secure plastic sheeting to studs with staples, nails, or specialty plastic sheeting fasteners. Overlap seams at least 6 inches.
- Install cement board over the plastic sheeting using recommended fasteners and spacing.
The benefit of a vapor barrier is that it is inexpensive and easy to install. However, plastic sheeting may be prone to punctures and does not provide any insulation value.
Insulation Board
Using insulation boards behind the cement board adds a layer of protection against moisture while also increasing the energy efficiency of the wall. Options for insulation board include:
- Extruded polystyrene (XPS) boards – XPS provides both insulation and moisture resistance. Look for products designed specifically for shower surrounds.
- Polyisocyanurate – This rigid foam board insulates well and resists moisture, but is more prone to damage than XPS.
- Fiberglass boards – These are not as moisture-resistant as XPS or polyiso boards.
Check manufacturer instructions, but in general insulation boards can be installed behind cement board similar to a vapor barrier. Be sure to seal seams with tape.
Moisture-Resistant Drywall
Moisture-resistant drywall, often denoted with green coloring, is another option for cement board showers. Look for products intended for high-moisture areas. While not completely waterproof, moisture-resistant drywall holds up well when protected by cement board and tiles.
Advantages of moisture-resistant drywall include:
- Low cost
- Easy installation
- No additional vapor barrier needed
Disadvantages include no insulation value and reduced moisture resistance compared to other options.
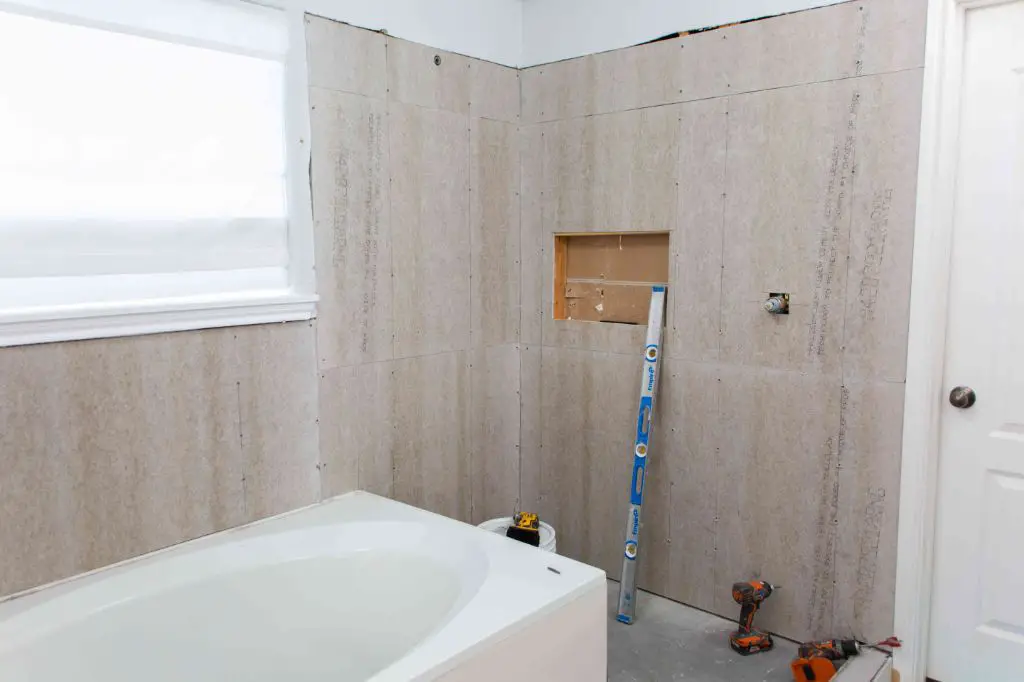
Cement Board Installation
Once you prep the wall, you are ready to install the cement board itself. Here are some tips:
- Use cement board screws or other corrosion-resistant fasteners designed for cement board.
- Follow recommended spacing for screws, usually 8 inches on center for walls and 6 inches on center for ceilings.
- Stagger vertical seams between boards when possible.
- Leave a 1/8-inch gap between boards at seams and corners.
- Fill any gaps with thinset mortar.
- Tape joints with alkaline-resistant fiberglass mesh tape.
Allowances may need to be made around shower valves, so plan your cement board layout accordingly. Cut holes for valves using a hole saw or rotary tool.
Ready for Tile
Once the cement board is installed over a proper moisture barrier, you can begin tiling. Use a latex-modified thinset mortar adhesive to install the tiles over the cement board according to manufacturer specifications. Properly installed cement board provides a reliable substrate for shower tiles.
What to Put Behind Cement Board in Showers: Key Takeaways
- Install cement board over a vapor barrier, insulation board, or moisture-resistant drywall.
- A plastic vapor barrier provides a minimum level of moisture protection.
- Insulation boards add protection against moisture and improve energy efficiency.
- Use cement board screws or corrosion-resistant fasteners to install the cement board.
- Tape and fill joints between cement board sheets.
- Allow for openings around valves and fixtures.
- Cement board installed over proper moisture protection provides an ideal substrate for shower tiles.