When it comes to patching a floor, having the right materials and tools is essential for a successful repair. The key requirements for patching a floor include selecting the appropriate patching compound, prepping the damaged area, mixing and applying the compound, and smoothing it to blend with the surrounding floor. The right techniques allow you to patch floors effectively whether its wood, concrete, vinyl, or other surfaces.
Page Contents
- 1 What causes damage to floors that requires patching?
- 2 What types of patching compounds are available?
- 3 What tools do I need for floor patching?
- 4 How do I prepare the damaged floor area for patching?
- 5 How do I mix floor patching compounds?
- 6 How do I apply patching compounds?
- 7 What do I use to blend and smooth patch edges?
- 8 How long should floor patches dry before use?
- 9 What are some tips for durable, permanent patches?
- 10 Conclusion
What causes damage to floors that requires patching?
There are a few common causes of floor damage that may require patching:
- Cracked or chipped concrete: Concrete can develop cracks from settling, temperature changes, improper installation, etc. This exposes the subsurface and requires patching.
- Rotted or warped wood: Wood floors can warp from water damage or rot from moisture. The damaged boards need to be replaced.
- Vinyl tears or bubbles: Vinyl can tear from heavy impacts or bubble from moisture getting under the flooring. These areas need patching.
- Holes from removing fixtures: Removing fixtures or appliances often leaves holes that require patching with a compound.
- Dents and gouges: Heavy impacts can dent, gouge, or scrape floors. The damaged areas need to be filled in.
Patching compounds are used to fill in these types of damages to create a permanent, smooth repair.
What types of patching compounds are available?
There are a few major types of patching compounds used for floors:
- Cement-based compounds – A powder that mixes with water for a concrete-like fill. Often used for concrete repairs.
- Latex-modified compounds – These have latex added to the powder mix for more flexibility. Used for concrete and wood.
- Epoxy compounds – Two-part epoxies create a glass-like fill. Useful for concrete and metal.
- Wood putty – A paste used to fill small holes and dents in wood. Dries hard to sand smooth.
- Vinyl patch kits – Contains glue compounds and vinyl patches specially made for vinyl floor repairs.
The type used depends on the floor surface and extent of the damage.
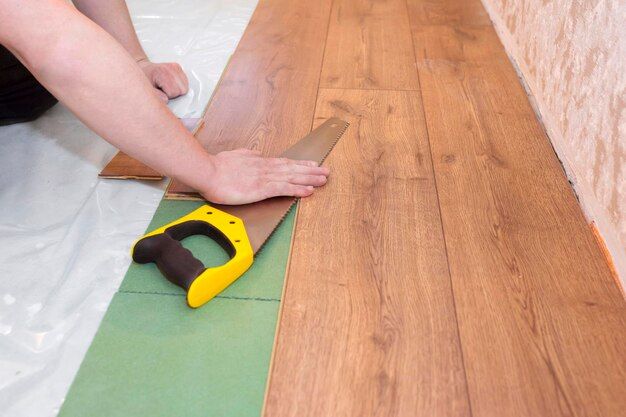
What tools do I need for floor patching?
Having the right tools makes patching floors easier and improves results. Recommended tools include:
- Putty knife or trowel for applying compound
- Mixing bucket and drill mixer for mixing multi-part compounds
- Painters or masking tape to blend edges
- Sandpaper and sanding block to smooth the patch
- Utility knife, circular saw or oscillating tool to cut away damaged flooring
- Hammer and pry bar to remove damaged flooring
- Shop vacuum to clean away debris
- Eye protection, gloves, and dust mask
For concrete repairs, you may also need a chisel and masonry brushes. Having the proper tools is key for correctly prepping the damaged spot, mixing and applying the patch, and blending it into the surrounding floor.
How do I prepare the damaged floor area for patching?
Proper prep is crucial for a lasting, flush floor patch. Prepare the area by:
- Cleaning away debris – Vacuum and sweep the floor to remove loose debris and dust.
- Removing damaged flooring – Cut away loose wood, vinyl, or broken concrete until you expose solid material.
- Chipping away uneven concrete – Use a chisel and hammer to chip away cracked or uneven concrete edges.
- Sanding wood – Sand damaged wood edges to create a smooth surface.
- Vacuum again – Thoroughly remove all dust and particles with a shop vacuum.
- Wipe clean – Use a damp cloth to wipe away any remaining particles or dirt.
Proper prep removes contaminants so the patching compound bonds tightly for a permanent repair.
How do I mix floor patching compounds?
The mixing process depends on the type of compound:
- Cement-based – Gradually mix powder with water in a bucket using a drill mixer. Follow label ratios to achieve proper consistency.
- Epoxy – Thoroughly mix the resin and hardener together according to package directions. Mix only as much as can be used in time frame.
- Wood filler – Wood fillers are premixed pastes that do not require mixing.
- Vinyl patch kits – Any powder compounds need to be mixed with water per label instructions.
Mix compounds very thoroughly to activate the ingredients. Test consistency and adjust mix if needed before application.
How do I apply patching compounds?
Use the following process to apply compounds:
- Use a putty knife or trowel to press compound into the damaged spot, overfilling slightly.
- Smooth to a flush, level finish with sweeping strokes.
- For large patches, apply in layers, allowing each to dry before adding more.
- Remove any dried excess compound with a utility knife or sander.
- Blend and feather out edges so patch is flush with floor level.
- Use painters tape along patch edges for a clean finish on wood and vinyl.
Applying in thin, even layers produces the best results. Allow proper drying time between coats. Consult product instructions.
What do I use to blend and smooth patch edges?
Here are materials to blend patch edges flush:
- Sandpaper – Use graduated grit wet/dry sandpaper to smooth wood or concrete patches.
- Scrapers – Plastic, wood, or metal scrapers help remove dried excess material.
- Edging tools – Specialized vinyl edging tools blend vinyl patch edges into flooring.
- Emory board – Useful for smoothing small uneven edges on any material.
- Utility knife – Trim excess compound after drying for a flush edge.
- Painters tape – Apply along patch edges to protect floor from excess compound.
Work edges until the patch blends seamlessly into the surrounding floor. The patch should be invisible after blending and smoothing.
How long should floor patches dry before use?
Drying times vary based on product used:
- Cement compounds – 12-24 hours
- Epoxy – 6-12 hours
- Latex-based compounds – 4-6 hours
- Wood filler – 30-60 minutes
- Vinyl patch kits – 1-3 hours
Review manufacturer instructions for recommended drying times. Test patch hardness before use. Avoid walking on patch until fully cured. Patience leads to optimal durability.
What are some tips for durable, permanent patches?
For great results, remember these tips:
- Use an appropriate compound for the floor type
- Completely clean and prep the damaged area
- Mix compounds thoroughly before use
- Apply in thin, even layers
- Allow each layer to dry between application
- Blend edges completely flush
- Allow patch to fully cure before use
- Prime and refinish wood patches to match the floor
Proper selection, preparation, application, drying, and finish blending are the keys to lasting, professional floor patch repairs.
Conclusion
Damaged floors can be reliably repaired with patching compounds. The keys are to: fully clean and prep the area, select an appropriate compound, mix thoroughly, apply in layers, smooth edges, allow proper curing time, and blend the finish. With the right process, materials, and tools, floor damage can be patched to restore the look and function of the flooring.