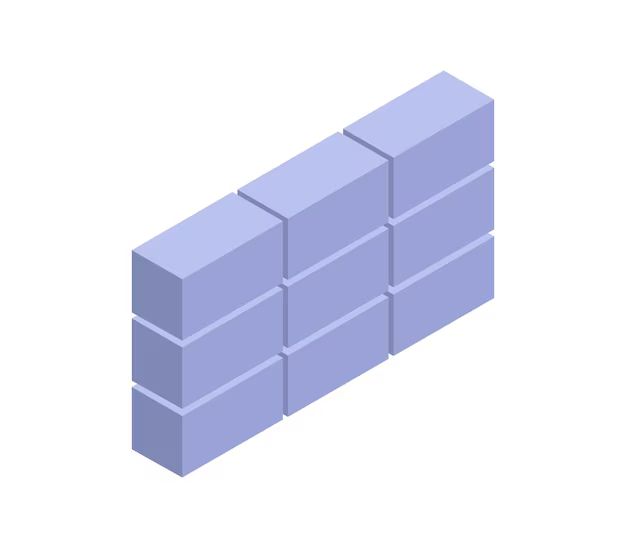
A siding mounting block is a small piece of material that is installed behind exterior siding to provide a solid backing surface and proper spacing between the siding and the structure. Mounting blocks create a gap that allows proper drainage and airflow behind the siding, which helps prevent moisture damage and rot. They are an important component in proper siding installation.
Page Contents
- 1 What is the Purpose of a Siding Mounting Block?
- 2 Where are Mounting Blocks Used on a House?
- 3 What Materials are Used for Siding Mounting Blocks?
- 4 How Thick Should Siding Mounting Blocks Be?
- 5 What is the Optimal Size of Mounting Blocks?
- 6 What is the Proper Spacing for Siding Mounting Blocks?
- 7 How are Siding Mounting Blocks Installed?
- 8 How Far Should Mounting Blocks Extend Past Window Trims and Doors?
- 9 Should Mounting Blocks Touch? There is some debate about whether mounting blocks should touch each other or be installed with small gaps between them. Here are some things to consider: Touching blocks provide maximum support and easiest installation. Small gaps allow for increased drainage and airflow behind siding. Gaps may allow more insect access behind siding. Gaps can make fastening siding more difficult. Many contractors install mounting blocks touching or with very small, 1/8-inch gaps. This provides sufficient drainage while maximizing support. Larger gaps are not necessary in most cases. How are J-Channel Mounted Over Mounting Blocks?
- 10 Can Rigid Foam Insulation Substitute for Mounting Blocks?
- 11 What Problems can Occur Without Proper Mounting Blocks?
- 12 Conclusion
What is the Purpose of a Siding Mounting Block?
Siding mounting blocks serve several important purposes:
- Create a solid nailing base – Siding needs to be securely fastened to a solid, stable surface. Mounting blocks provide this solid nailing base behind the siding.
- Provide proper spacing – There needs to be a gap between the back of the siding and the structural sheathing to allow for drainage and airflow. Mounting blocks create this necessary spacing.
- Prevent wavy or buckled siding – Fastening siding directly to studs can cause it to buckle or warp as the studs move. Mounting blocks provide continuous support to keep siding straight.
- Allow siding to expand and contract – Vinyl and other siding expands and contracts with temperature changes. Mounting blocks provide space for this movement.
- Create a rainscreen – The gap created by mounting blocks forms a rainscreen system that allows wind to flow behind the siding and moisture to drain out.
By creating a solid, consistent nailing surface and proper spacing behind the siding, mounting blocks ensure proper siding installation that will last.
Where are Mounting Blocks Used on a House?
Mounting blocks are used throughout a siding installation, but are especially important in these locations:
- Inside corners – They prevent buckling where siding meets at inside corners.
- Outside corners – They provide proper spacing and fastening surfaces for siding at outside corners.
- Around windows and doors – Mounting blocks prevent siding buckling around openings and provide solid nailing at the edges.
- Under window sills – They support siding above window and door trim.
- At seams between siding pieces – Mounting blocks allow proper spacing and fastening where siding boards butt together.
- Along the bottom course – Mounting blocks provide consistent spacing and support along the first course of siding.
In general, mounting blocks should be used every 16-24 inches across walls and 8-12 inches along corners and openings to provide optimal support and drainage.
What Materials are Used for Siding Mounting Blocks?
Siding mounting blocks are commonly made from these materials:
- Pressure-treated lumber – PT lumber is rot-resistant and provides a solid nailing base. It must be rated for ground contact.
- PVC – PVC mounting blocks are rot proof and durable. They can be cut to desired widths.
- Composite wood – Composite lumber made for exterior use makes long-lasting mounting blocks.
- Rigid foam – Extruded polystyrene foam provides spacing and some nailing support.
- Cedar shims – Rot-resistant cedar shims work well as spacers behind siding.
Pressure-treated lumber and PVC provide the most secure fastening base for siding. Composite and rigid foam blocks require additional nailing support. Cedar shims work for spacing but not nailing.
Pressure-Treated Lumber Mounting Blocks
Pressure-treated lumber is a common choice for siding mounting blocks. PT lumber is infused with preservatives that help protect it from rot and insect damage. Here are some tips for using PT lumber mounting blocks:
- Use lumber with a retention rating of 0.25 PCF or higher.
- Look for lumber stamped “Ground Contact” for maximum durability.
- Use 2×4 or 2×6 lumber for rigidity.
- Cut blocks in lengths from 12-24 inches.
- Allow PT lumber to dry out for 3-6 weeks before installing behind siding.
Properly treated PT lumber makes some of the best mounting blocks and provides secure siding installation.
PVC Mounting Blocks
PVC mounting blocks are a rot-resistant, no-maintenance option. Here are some benefits of using PVC mounting blocks:
- Impervious to moisture – won’t rot or deteriorate
- Rigid and strong
- Easy to cut to desired size
- Lightweight yet durable
- Easy to install
- Won’t attract or harbor insects
Use 1-inch thick PVC and cut blocks 12-24 inches long. Install with exterior-rated screws. PVC stands up well over time.
Composite Wood Mounting Blocks
Composite lumber made for exterior exposure also makes good mounting blocks. Benefits of composite mounting blocks include:
- Resists rot, splitting and insect damage
- Contains no wood fibers so won’t swell or warp
- Stable nailing surface
- Paintable and stainable
- Cost effective
- Cut and installs similar to wood
Composite wood is a nice choice where a wooden look is desired. Use 1-inch thick composite boards for rigidity.
How Thick Should Siding Mounting Blocks Be?
In most cases, 1-inch thick mounting blocks provide ideal support and spacing for siding. Here are some guidelines for mounting block thickness:
- Vinyl siding – 1 inch thick blocks
- Cedar lap siding – 1 inch blocks
- Stucco siding – 1 inch blocks
- Wood, fiber cement, or pressed boards – 1 inch blocks
- Thicker wood siding like shingles or shakes – 1.5-2 inch blocks
Thicker mounting blocks may be needed for heavier siding materials to prevent sagging or uneven lines. For standard vinyl, lap, panel and wood siding, 1-inch mounting blocks are usually sufficient.
What is the Optimal Size of Mounting Blocks?
Mounting blocks should be cut to lengths ranging from 12-24 inches long. Here are some guidelines on sizing mounting blocks:
- 12-16 inches – Best for shorter, more rigid blocks made from thicker wood or composite lumber.
- 16-24 inches – Recommended for most vinyl siding installations and standard 1x lumber blocks.
- Over 24 inches – Only use longer blocks if the mounting surface is completely straight and even. Long blocks conform to any dips or bumps in walls.
Using a mix of 12, 16 and 24 inch mounting blocks results in a stable, properly spaced siding installation. Keeping block lengths under 24 inches minimizes buckling or waving.
What is the Proper Spacing for Siding Mounting Blocks?
Mounting blocks should be installed every 16-24 inches horizontally and 8-12 inches vertically for optimal siding support and drainage. Here are some spacing guidelines:
- Horizontally – 16-24 inches apart across wall sections
- Vertically – 8-12 inches apart up corners and along trim
- Inside corners – One block no more than 12 inches from corner
- Outside corners – Blocks 8-12 inches apart around corner
- Under window sills – Blocks centered under sill and no more than 16 inches apart
Following these spacing recommendations ensures the siding has a solid backing surface across the entire wall area. This prevents buckling or sagging.
How are Siding Mounting Blocks Installed?
Installing mounting blocks is a key part of proper siding installation. Here is an overview of the installation process:
-
Mark stud locations – Mark the center of each stud on the tyvek or other weather barrier. This allows mounting blocks to be attached to the studs.
-
Cut blocks to size – Cut pressure-treated lumber, PVC or other mounting block material to lengths ranging from 12-24 inches.
-
Install first course blocks – Attach the first row of blocks along the bottom of the wall spaced 16-24 inches apart. This supports the starter course of siding.
-
Add corner blocks – Attach blocks 8-12 inches apart up corners and around windows and doors.
-
Fill in remaining wall areas – Continue installing rows of blocks every 16-24 inches across all wall sections.
-
Shim out as needed – Use rigid foam or cedar shims to bring mounting blocks flush if they are slightly short.
-
Nail into studs – Ensure all mounting blocks are securely nailed or screwed into a stud.
Proper mounting block installation provides the necessary support structure for long-lasting, durable siding.
How Far Should Mounting Blocks Extend Past Window Trims and Doors?
Mounting blocks should extend 6-12 inches past window and door casings on both sides. Here are some guidelines for proper mounting block placement around openings:
- At least one block no more than 12 inches from side casings.
- Additional blocks 16-24 inches apart moving out across wall.
- Blocks should extend 6-12 inches past casings.
- Do not place directly against trim or casings.
- Provide support at siding seams near openings.
This blocking pattern supports the vertical siding edges and prevents buckling, while still allowing proper drainage past the opening. Having blocks too close to casings can trap moisture.