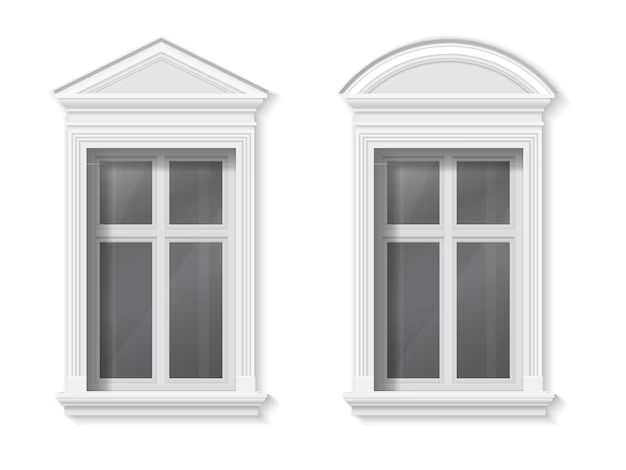
Picture frame window trim refers to decorative molding that frames windows to add visual interest and architectural detail. It creates a framed look around the windows similar to a picture frame framing artwork. Picture frame trim can completely surround a window or just accent the top and sides. It provides both form and function for windows.
Page Contents
- 1 What are the different types of picture frame window trim?
- 2 What materials is picture frame window trim made from?
- 3 What are the benefits of picture frame window trim?
- 4 What tools and materials are needed to install picture frame trim?
- 5 What are the steps to install picture frame window trim?
- 6 What are some tips for installing picture frame window trim?
- 7 What are some options for simplifying picture frame window trim?
- 8 What mistakes should be avoided when installing picture frame window trim?
- 9 What should be done to maintain picture frame window trim?
- 10 What are the costs associated with picture frame window trim?
- 11 Conclusion
What are the different types of picture frame window trim?
There are a few main types of picture frame window trim:
- Flat trim – This is a simple rectangular trim molding with a flat face and thin profile, typically 3/4″ – 1-1/2″ wide. It frames the window in a clean, understated way.
- Routed trim – This trim features decorative grooves or shapes routed into the face for added visual interest. Common routed designs include fluting, sunbursts, ogee curves, and more.
- Built-up trim – This refers to trim made up of multiple components for a layered, dimensional look. For example, a flat backband trim piece combined with applied crown molding on the top and decorative side pieces.
- Ornamental trim – This is high-relief, decorative trim featuring detailed shapes and carvings. Common ornamental window trim includes corbels, appliques, columns, and more for a elegant, custom look.
The trim profile, dimensions, and level of ornamentation can vary greatly depending on the architectural style of the home and desired aesthetic.
What materials is picture frame window trim made from?
Picture frame window trim is commonly constructed from these materials:
- Wood – Natural woods like poplar, oak, and pine are very popular for both interior and exterior window trim. Wood provides an attractive finish and can be easily worked into different profiles and shapes.
- PVC/vinyl – PVC is a common low-maintenance exterior trim material. It resists moisture, rotting, and insect damage. PVC trim can mimic the look of wood while withstanding weather exposure.
- Polyurethane – Polyurethane trim offers exceptional durability for both interior and exterior applications. It resists moisture, warping, and rotting and can be worked and painted like wood.
- Composite – Composite window trim is a blend of wood fibers, polymers, and other materials. It combines workability and paintability with increased resistance to moisture and insects.
- Fiber cement – Fiber cement contains cement, sand, and cellulose fibers. It provides increased durability over wood and can withstand moisture. Often used for siding and trim.
- Aluminum – Lightweight, low-maintenance aluminum trim installs easily. Often used for capping other trim materials on exterior windows.
The type of material determines the appearance, durability, weather resistance, and cost of the trim.
What are the benefits of picture frame window trim?
There are several benefits to adding picture frame trim to windows:
- Enhanced curb appeal – Decorative window trim provides architectural interest and style to the facade of a home, enhancing curb appeal.
- Completes the look – Trim finishes off windows for a polished, built-in appearance rather than looking like a raw opening in the wall.
- Draws attention – Picture framing makes the windows stand out as a focal point on the home’s exterior.
- Customizes style – Picture frame trim lets homeowners add their own signature style to match the home.
- Protects edges – Trim protects the vulnerable corners and edges of a window from weather damage and impact.
- Covers gaps – Trim covers any gaps between the window frames and siding or sheathing for a seamless look.
- Provides depth – The layered dimension of trim adds light and shadow lines for visual interest.
- Enhances energy efficiency – Trim seals air gaps around windows to prevent drafts and help reduce energy costs.
What tools and materials are needed to install picture frame trim?
Installing picture frame window trim involves some basic tools and materials:
- Trim boards – Pre-primed or natural wood, PVC, or other trim material with dimensions to suit the windows
- Finish nails – 2″ galvanized finish nails
- Brad nailer – Finish nail gun to easily secure trim
- Miter saw – For cutting trim boards to length at 45-degree angles
- Table saw – For ripping trim boards to width and making other cross cuts
- Carpenter’s square – For checking angles
- Level – Ensure trim boards are plumb and level
- Caulk gun – Dispenses window and door caulk
- Exterior caulk – For sealing gaps between trim and siding
- Wood putty – For filling nail holes prior to painting
- Sandpaper – For smoothing cut edges and final sanding
- Primer and paint – Match trim to existing trim color
Basic carpentry skills are also required for measuring, cutting, and installing the trim correctly.
What are the steps to install picture frame window trim?
The basic process for installing picture frame window trim is:
- Measure – Carefully measure width and height of window opening and jambs to determine trim dimensions.
- Cut trim – Cut top, bottom and side trim pieces to size with miter saw. Cut angles on ends.
- Pre-finish – Sand and prime boards before installation for best results.
- Install side trim – Nail side pieces into jambs with finish nails every 16″.
- Install top & bottom – Nail top and bottom pieces into place to frame window.
- Fill gaps – Caulk perimeter between trim and window frame and siding.
- Fill holes – Fill all nail holes with wood putty.
- Finish sand – Sand any rough edges. Wipe trim with damp cloth to remove dust.
- Paint – Apply two coats of exterior paint to finish trim.
It’s important to make sure trim boards are cut to the correct length, angles, and dimensions for a proper fit. Take time to ensure the trim is level, square, and aligned correctly around the window before nailing in place. Any gaps should be filled with caulk for a seamless look.
What are some tips for installing picture frame window trim?
Here are some helpful installation tips for picture frame window trim:
- Always test fit the trim pieces before permanently installing. Make any adjustments for proper alignment and fit.
- Shim behind trim if necessary to plumb and level the boards and prevent distorting when nailing.
- Pre-drill trim to prevent splitting, especially near the ends.
- Use galvanized or stainless steel finish nails. The narrow heads disappear into the trim.
- Nail into window jambs whenever possible, not just the framing. This provides a more secure attachment.
- Use scarf joints for longer runs. Cut ends on opposing 45-degree angles and overlap boards.
- Allow 1/8″ gaps between boards to account for expansion and contraction of wood trim.
- Caulk will adhere best if applied to trim and siding when warm and dry. Smooth with fingertip.
- Fill all nail holes for best results. Wipe excess putty from surface before it dries.
- Backprime all surfaces of trim, including ends, before installation for maximum paint adhesion and moisture protection.
What are some options for simplifying picture frame window trim?
There are ways to simplify picture frame window trim for an easier installation or more minimalist look:
- Use flat, minimal trim boards with mitered corners for a clean, square frame.
- Install trim on just the top and sides, omitting the bottom trim board.
- Use PVC or composite trim boards that can be installed without much pre-priming or painting.
- Choose smaller 1⁄2″ – 3⁄4″ trim profiles instead of wide boards.
- Install ready-made brickmould or other integrated window jamb extensions that serve as trim.
- Use corner boards only, rather than boards across the entire top and sides.
- Opt for simplified sill trim under the bottom of the window only.
- Install trim with a pneumatic brad nailer for quicker, easier attachment than hand nailing.
- Choose low-maintenance vinyl or PVC trim if minimizing future upkeep like paint touch-ups.
Focus the decorative trim on the most visible areas like the top or limited to corner boards to reduce the installation time and complexity.
What mistakes should be avoided when installing picture frame window trim?
Some common mistakes to avoid when installing picture frame window trim include:
- Not adequately measuring and cutting trim to the proper lengths and angles.
- Forcing trim boards into place resulting in gaps or misalignment.
- Not predrilling trim, causing it to split when nailed.
- Not installing trim level and plumb.
- Leaving uneven gaps between trim boards.
- Not prefinishing all sides of trim prior to installation.
- Caulking trim when wet, cold, or damp preventing proper adhesion.
- Not filling nail holes, resulting in visible imperfections.
- Not allowing proper spacing between boards for expansion and contraction.
- Not cleaning up wood putty or caulk seepage and paint drips on the glass.
Taking shortcuts or rushing through the process can result in window trim that doesn’t fit properly, looks amateurish, leaves openings for water intrusion, or requires premature repairs and maintenance.
What should be done to maintain picture frame window trim?
To keep picture frame window trim looking its best:
- Inspect trim annually for signs of damage, deterioration, gaps, or mold growth. Make repairs promptly.
- Repaint trim every 3-5 years. Look for fading or peeling paint that requires a fresh coat.
- Re-caulk perimeter gaps when needed to prevent water intrusion.
- Wash trim with mild soap and water to remove dirt and mildew accumulation.
- Consider installing trim covers or wraps over damaged trim as an alternative to full replacement.
- Seal any unfinished wood trim ends that are exposed to prevent moisture absorption.
- Keep vegetation and sprinklers from excessively wetting the trim.
- Adjust any gutter systems directing water onto the trim causing premature rotting.
Proper maintenance helps retain the appearance and performance of picture frame window trim, avoiding costly replacement and damage from neglect and decay.
What are the costs associated with picture frame window trim?
When budgeting for picture frame window trim, there are several costs to consider:
- Trim material – From $2 to $12 per lineal foot depending on type. Wood and PVC are lowest cost. Polyurethane, fiber cement, and composites range higher.
- Labor – Professional installation ranges from $3-$8 per linear foot. DIY cuts labor expenses.
- Finish materials – About $100-200 for paint, primer, caulk, nails, putty, sandpaper.
- Rental tools – $50-150 for delivery and daily rental of miter saw and other tools.
- Disposal fees – $25-50 to dispose of old trim if replacements.
Total costs for new picture frame window trim installed professionally can range from $500 to $2,000+ per window depending on window size, trim elaborateness, accessibility, and labor rates.
Conclusion
The right picture frame window trim brings together aesthetics, function, and architecture detail. With some planning, basic carpentry skills, and quality materials, it can create a finished, custom look framing out windows to enhance the home’s curb appeal and style. Attention to proper installation and regular maintenance will keep picture frame trim looking like new for years to come.