When installing molding in a home, one of the most common questions is what angle to cut the corners at. The angle required will depend on the specific type of corner molding being used. In this article, we’ll examine the most popular options for corner molding and discuss what angle each requires for a proper installation.
Whether you’re installing molding in a new construction project, remodeling an existing space, or just looking to add some decorative trim, understanding corner angles is a key factor for success. With the right angle, you’ll achieve neatly mitered corners that look sharp and professional. Get it wrong, and the result will be messy, uneven joints.
Fortunately, determining the correct miter angle doesn’t have to be complicated. We’ll break it down by looking at the three main categories of corner molding:
Page Contents
Inside Corner Molding
Inside corner molding, also sometimes called inside corner guards, are designed to protect and decorate the inside corners where two walls meet. The most common inside corner molding profiles are:
– Quarter round – Small rounded profile, usually 3/8” or 1/2”
– Cove – Rounded profile that protrudes further out from the wall
– Beadboard – Narrow board trim with a curved ridge
For standard 90 degree inside corners, these molding styles should be cut at a 45 degree miter angle. This allows the adjoining pieces to create a clean 90 degree joint. Some installers prefer to cut each piece slightly less than 45 degrees (44 or 43 degrees), which provides space for filler and prevents gaps.
If the walls form an angle other than 90 degrees, you’ll need to adjust the miter angle accordingly. For example, to match a 100 degree inside corner, cut the molding pieces to a complementary 50 degree miter. Always remember to measure the actual corner angle before cutting, since many corners deviate slightly from a perfect 90 or 100 degrees.
Outside Corner Molding
Outside corner molding, or exterior corner trim, covers the outside corners created where two adjoining walls meet. Typical options for outside corners include:
– Door/window casing – Flat, rectangular molding around openings
– Baseboard – Taller molding running along bottom of walls
– Chair rail – Decorative horizontal trim at mid-wall height
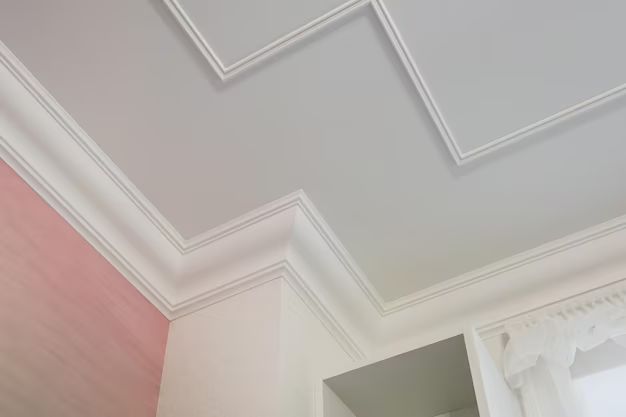
– Crown molding – Elegant molding where walls meet ceiling
For standard 90 degree outside corners, these styles of molding should be cut at a 45 degree angle on each end. Again, some carpenters prefer to undercut each piece by a degree or two.
As with inside corners, the angle may need adjustment if the walls come together at more or less than 90 degrees. Calculate the complement of the actual corner angle to determine what miter to cut the molding.
Some types of molding, such as brick mold casing around exterior doors, use a slightly different joinery technique for outside corners. Rather than mitering the ends, they are butted together and the corner is covered with a small filler piece of trim.
Three-Way Corner Molding
Where two walls join together to also meet a third wall, a three-way or “tee” corner is created. Molding these junctions requires a bit more complex cutting than a standard inside or outside corner.
For three-way corners with all walls at 90 degree angles, cut the first piece of molding at 33.9 degrees or as close as possible to 34 degrees. The second piece should be cut at 31.6 degrees or roughly 32 degrees. Again, the exact cuts depend on the specific angles involved, so take measurements to find the right complementary miter cuts.
In addition to the two wall angle pieces, a filler wedge is usually installed at the point where all three walls converge. This small mitered wedge piece completes the triangular three-way junction.
Factors that Determine Corner Molding Angles
Now that we’ve gone through the most common corner molding applications, let’s look at some of the key factors that determine the angle needed:
Type of Molding
As discussed previously, the type of molding makes a major difference in choosing the right miter angles. Inside corner pieces need to be cut opposing each other at the same angle, usually 45 degrees. Outside corners join together with opposing 45 degree bevels. And three-way corners require compound miters.
Angle of Walls/Corners
While most corners are close to 90 or 100 degrees, the actual measurement of the walls’ angle is crucial. Even a few degrees of deviation from a perfect right angle will result in mismatched joints if you cut the molding at an inaccurate miter.
Direction of Molding
Pay attention to the direction the molding will be installed. Horizontal pieces, like chair rail and baseboard, often use different miters than vertical trim like door casing. Some types combine horizontal and vertical elements. Understanding the layout will inform the correct cut angles.
Type of Joint
As mentioned, certain profiles like brick mold use a butted corner joint rather than a mitered seam. Trim on curved walls also requires special joining techniques. Be sure to select the right joint for the specific molding.
Number of Walls Joining
Simple inside and outside corners only have to join two walls. But three-way and other complex junctions involve calculating the interface of multiple walls. More walls equal more tricky angles to factor.
Cutting Techniques for Corner Molding
To achieve clean, tight-fitting joints, cutting the molding properly is just as important as determining the right angles. Here are some tips for dialing in perfect miters:
Measure Carefully
Accurately measuring and marking the molding piece to be cut is crucial. Don’t assume every corner is a perfect 90 or 45 degrees. Mistakes here will throw off the entire angle.
Use the Right Saw
A quality miter saw, also called a chop saw, is the best tool for the job. Most allow angle adjustments in precise 1/10th degree increments. Set the saw to the exact desired angle rather than guessing close by eye.
Cut Slowly and Smoothly
Rushing through cuts can cause binding, tear-out, or inaccurate angles. Allow the saw blade to gradually cut through the material for the cleanest edge.
Use a Backer Block
Holding the trim flat on the saw table can lead to splintering on the bottom where it exits the cut. Using an auxiliary backer block prevents this.
Check Fit Before Assembly
Dry fit the cut pieces together before installing to ensure an accurate miter. Make minor tune-ups with sandpaper or a file rather than recutting if possible.
Allow Space for Filler
Leaving a slight gap (1/16” or so) will give room for caulk, putty, or wood filler to create seamless joints. Avoid cutting miters too tight or they won’t close fully.
Use Adhesive and Fasteners
In addition to filler products, glue and nails/screws help create lasting corner joints. Follow the molding manufacturer’s directions for proper installation.
FAQs
Here are answers to some frequently asked questions about determining angles for corner molding:
What is a miter angle?
A miter angle is an angled corner cut to allow two pieces of molding to join cleanly at an angle, usually 45 degrees. The miter matches the complementary angle where two walls meet.
How do I measure the corner angle?
Use an adjustable protractor or angle finder tool. Place it into the corner to measure the angle between the walls. Subtract this number from 90 degrees to find the required miter.
What if my walls aren’t perfectly square?
Many corners deviate slightly from a 90 or 45 degree angle. Always measure the true angle rather than assuming it’s perfect before cutting molding.
Can I just cut the molding at 45 degrees for every corner?
You can usually get away with this for inside 90 degree corners. But for all other situations – outside corners, non-90 degree joints, etc. – 45 degrees won’t give proper results.
What tools do I need to cut molding miters?
A miter saw is ideal, but a standard miter box, bar clamps, and a backsaw will also get the job done. Use a miter gauge to set the saw to the needed angle.
Conclusion
While it may seem intimidating, determining the correct miter angles for cutting corner molding simply comes down to:
1. Identifying the type of corner – inside, outside, or where multiple walls meet.
2. Measuring the true angle where the walls join.
3. Calculating the complementary angle required to cut the molding so the pieces fit together neatly.
With practice and by following the techniques outlined here, you can master the formulas and start cutting perfect miters for flawless looking corners. Accurate angles and precision cutting are the keys to success. Understanding how to find those angles is a crucial first step to professionally installing any type of corner molding.
| Molding Type | Standard Corner Angle | Miter Cut Angle |
|---|---|---|
| Inside Corner | 90 degrees | 45 degrees |
| Outside Corner | 90 degrees | 45 degrees |
| Three-Way Corner | 90 degrees | Piece 1: 34 degrees Piece 2: 32 degrees |