Having clear and bright headlights is essential for safe driving, as they allow you to see the road ahead clearly at night. However, over time headlights can become cloudy and develop a yellow film which reduces visibility. This film is caused by oxidation, UV exposure, dirt, and normal wear and tear. While you can always replace your headlights, this can be expensive. A more cost-effective solution is to use a headlight restoration product to remove the yellow film and restore clarity.
Page Contents
- 1 What causes headlight fogging and yellowing?
- 2 Should you restore or replace your headlights?
- 3 How to restore headlights in 3 steps
- 4 5 best headlight restoration products
- 5 Tips for restoring extreme fogginess and yellowing
- 6 How long does headlight restoration last?
- 7 Professional vs DIY headlight restoration
- 8 FAQs about headlight restoration
- 9 Conclusion
What causes headlight fogging and yellowing?
There are a few key culprits that cause headlights to become foggy and discolored over time:
- UV exposure – Constant exposure to sunlight’s ultraviolet rays slowly damages the plastic lens cover material, causing it to become cloudy.
- Oxidation – Oxygen in the air reacts with the lens material, resulting in a chemical process that leaves behind a yellow film.
- Road debris and dirt – Bugs, tar, dirt, and road grime can bake onto the lens covers, leaving behind a stubborn film.
- Normal wear and tear – Over years of use, the plastic lenses undergo subtle damage from rocks and weathering.
While some fogginess is inevitable as headlights age, the right restoration products can effectively remove built-up grime and oxidation to restore clarity and safe visibility.
Should you restore or replace your headlights?
Once your headlights have become severely foggy or yellowed, you have two options – restore or replace them. Here are some key considerations when deciding between headlight restoration vs replacement:
Restoration pros:
- Far more affordable than replacement
- Quick and easy for DIYers to complete
- No need to remove headlights from vehicle
- Restores clarity and light output
Restoration cons:
- Doesn’t address any internal damage or wear
- Results may not last as long as new headlights
- Can’t restore badly cracked or damaged lenses
Replacement pros:
- New headlights have maximum light output
- No existing wear or damage
- Typically comes with manufactuer warranty
- Long-lasting results
Replacement cons:
- Very expensive – cost hundreds of dollars
- Requires professional installation
- Existing headlights must be removed and replaced
- Still subject to wear and fogging over time
For headlights that are still largely intact but suffer from clouding and yellowing, restoration is typically the better value. But for severely worn or cracked lenses, full replacement may be the only option.
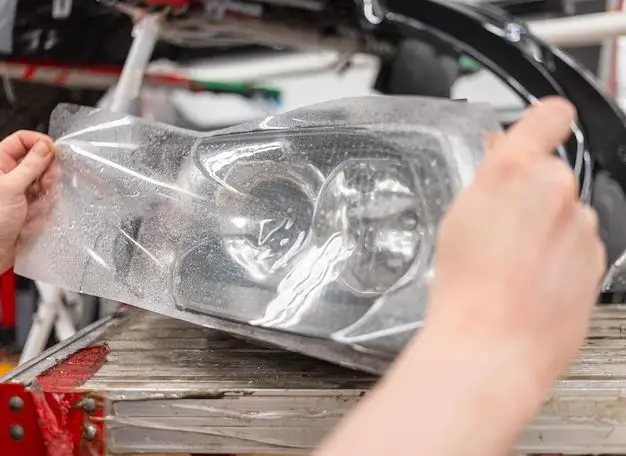
How to restore headlights in 3 steps
Headlight restoration is a relatively straightforward DIY project that can be completed in a few steps:
Step 1 – Clean:
- Wash headlights with soap and water to remove surface dirt and grime
- Use a clay bar to remove stuck-on contaminants
- Dry the headlights thoroughly with a microfiber towel
Step 2 – Sand/Polish:
- Use progressively finer grit sandpaper to wet sand the lenses, starting with 600 grit up to 2000 grit
- Smooth away sanding marks and haze with a polishing compound on a buffing pad
Step 3 – Protect:
- Apply headlight sealant or clear coat to protect the lenses from re-oxidation
- Sealants typically last 6 months to 1 year
Some key tips for best results:
- Work in a shaded area out of direct sunlight
- Tape off any paint around the headlights to avoid overspray
- Wear gloves to avoid transferring oils from skin to the lenses
- Work evenly over the entire lens surface
Overall, the process takes 30-60 minutes per headlight. With the right products and techniques, you can achieve dramatically improved clarity and light output.
5 best headlight restoration products
When shopping for a headlight restoration kit, look for options that provide everything needed for a complete renewal process. Here are 5 top-rated choices:
| Product | Key Features |
|---|---|
| Meguiar’s Headlight Restoration Kit | Complete kit from a trusted auto brand. Includes sanding pads, polishing compound, sealant, and applicators. |
| 3M Headlight Restoration System | Professional-grade abrasives from 3M. Features adjustable handle for easy use. Sealer lasts up to 12 months. |
| Turtle Wax Headlight Restorer Kit | Affordable and user-friendly option. Contains disposable sanding pads to simplify process. |
| SYLVANIA Headlight Restoration Kit | Tried-and-true kit with large sanding pads and clear coat sealant. |
| Rain-X Headlight Restoration Kit | Claims to remove yellow haze and restore optical clarity. Includes sealant for ongoing protection. |
When comparing kits, look for ones that provide multiple grades of sandpaper for thorough lens renewal. An ergonomic handle can make sanding easier. And be sure to apply the included sealant properly so results last.
Tips for restoring extreme fogginess and yellowing
Severely degraded headlights with deep cloudiness or discoloration can be more stubborn to restore. Here are some tips if you’re dealing with extreme fogginess or yellowing:
- May need to start sanding with a courser 400 grit sandpaper
- Soak lenses with lens cleaner before sanding to soften surface grime
- Use a brightener or polishing compound after sanding to enhance clarity
- Apply 2-3 coats of sealant for maximum protection
- Consider applying a clear bra over lenses to extend restoration
- If still not clear enough, may need to replace lenses altogether
While home restoration has limits, taking your time and using quality abrasives can still significantly improve even badly degraded headlights. But avoid pushing too far to avoid wearing away too much material.
How long does headlight restoration last?
How long your headlight restoration results last depends on a few factors:
- The severity of fogging and oxidation – Worse initial condition means faster re-degradation
- Quality of restoration process – Proper sanding and sealant application maximizes longevity
- Ongoing maintenance and re-application of sealant – Periodic touch-ups prolong clarity
- Driving conditions – Lots of sun exposure and road debris accelerates wear
Under optimal conditions, a high-quality DIY restoration can last 1-2 years or longer. But degraded lights may start losing clarity again in as little as 6 months. To maximize longevity:
- Use quality sandpaper, compounds, and sealant
- Apply sealant strictly according to directions
- Park in garages or shaded areas when possible
- Re-apply sealant every 6-12 months
- Clean lenses periodically to remove stuck-on grime
With proper maintenance, restored headlights can stay clear for multiple years before needing a touch up. But be prepared to restore them again eventually as no fix is permanent.
Professional vs DIY headlight restoration
You have two options for restoring your foggy headlights – DIY kits or professional services. Here’s how they compare:
DIY Kits
- Cost – $15-$50 for materials, affordable option
- Convenience – Complete at home on your schedule
- Process – Follow included instructions, typically straightforward
- Results – Vary depending on user’s skill, 1-2 years longevity
Professional Services
- Cost – $100-$300 or more for labor and materials
- Convenience – Drop off your vehicle, technicians handle the work
- Process – Advanced techniques and equipment used
- Results – Professionally restored clarity, may last 2+ years
DIY kits provide an affordable, convenient option for most foggy headlight situations. But for extremely degraded or oxidized lights, a professional service may yield longer-lasting clarity, if you can justify the extra cost.
FAQs about headlight restoration
Does toothpaste actually work to restore headlights?
Toothpaste contains mild abrasives for polishing teeth. In theory, these could also polish and clear cloudy headlight lenses. However, toothpaste is not formulated for use on plastics. Headlight kits contain more appropriate abrasive compounds engineered specifically for automotive lenses. So while toothpaste may provide a quick fix, a purpose-made restoration kit will deliver much better, longer-lasting clarity.
Can you use wet sandpaper to restore headlights?
Yes, wet sanding with progressive grit sandpaper is recommended during the sanding/polishing step. The water prevents the sandpaper from creating scratches and provides lubrication for a smooth finish. Start with 600 grit and work up to 2000 grit wet paper for best results.
Should UV protection be reapplied after headlight restoration?
Yes, UV protection is a key step after completing the sanding and polishing stages. Specialty UV-blocking sealants help prevent the plastic lenses from oxidizing and yellowing again. Reapply this UV protection every 6-12 months to maintain clarity. Some kits also include adhesive clear bras for added UV protection between sealant applications.
Can you use a power drill for headlight restoration?
You can use a power drill with certain headlight restoration kits for the sanding steps, provided the kit includes drill attachments. This can save considerable time and effort vs hand sanding. However, take caution when drill-sanding, using a low speed setting and light pressure to avoid removing too much material. Slow, even hand sanding is generally the safest approach.
Is sanding necessary or can you just use polish/sealant?
For cloudy, oxidized headlights, sanding is an essential first step before polishing and sealing. The abrasives in sandpaper remove the top layer of damaged lens material so polish and sealants can properly bond. Polish on its own won’t penetrate and fix severe fogginess. But sandpaper provides the deep cleaning action needed for full clarity restoration.
Conclusion
Restoring faded, yellowed headlights is a relatively quick and inexpensive way to improve the safety and appearance of your vehicle. DIY kits provide all the abrasives, polishes, and sealants needed to remove oxidation and restore like-new clarity to your headlights within an afternoon. Look for kits that include everything needed for a complete restoration process. And be diligent about re-applying protective sealants to maximize the longevity of your renewed headlights.