Applying a fresh coat of driveway sealer can extend the life of your asphalt or concrete driveway while also improving its appearance. Driveway sealer fills small cracks and holes while providing a protective coating that helps prevent deterioration from weather, sunlight, gas, oil and other chemicals. Choosing the right sealer and applying it properly are key to getting great results. This article provides a step-by-step guide to prepping and sealing your driveway correctly so you can get a driveway surface that looks great and lasts for years.
Page Contents
- 1 What is driveway sealer?
- 2 Benefits of sealing your driveway
- 3 When to apply driveway sealer
- 4 How often to seal your driveway
- 5 What you’ll need
- 6 Step 1: Inspect and repair cracks
- 7 Step 2: Clean the surface
- 8 Step 3: Mask off areas
- 9 Step 4: Add sealer to applicator
- 10 Step 5: Apply sealer across driveway
- 11 Step 6: Allow sealer to dry
- 12 Step 7: Apply second coat if needed
- 13 Step 8: Remove masking and clean up
- 14 Tips for applying driveway sealer
- 15 Common problems when sealing driveways
- 16 FAQs about sealing driveways
- 17 Conclusion
What is driveway sealer?
Driveway sealer is a protective coating formulated for asphalt and concrete driveways. It comes in two main types:
Asphalt-based driveway sealer – Made with asphalt emulsions, water, fillers and additives. Asphalt-based sealers are best for asphalt driveways.
Acrylic-based driveway sealer – Made with acrylic polymers, fillers, water and additives. Works on both asphalt and concrete driveways.
Both types fill minor cracks and pores to create a protective barrier. Acrylic sealers usually last 1-4 years while asphalt sealers last 4-6 years. Some acrylic sealers contain latex polymers, silicones or epoxies for added durability. Solvent-based sealers are also available but melt asphalt quicker than water-based.
Benefits of sealing your driveway
Here are some of the benefits you’ll get from regularly sealing your driveway:
– Protects pavement – Sealing fills small voids and cracks, preventing water penetration that leads to damage from freeze-thaw cycles.
– Prevents deterioration – The coating shields pavement from UV rays, chemical spills, gas, oil and melting effects of deicers.
– Improves appearance – Sealer gives old, faded driveways a fresh, uniform, “new” look. Can hide previous oil stains.
– Potentially cheaper than repaving – Sealing extends pavement life, delaying the need for expensive repaving.
– Increases pavement friction – Sealer fills tiny pores to create better traction and prevent skidding.
– Adds value – An attractive, well-maintained driveway can increase resale value.
When to apply driveway sealer
The best time to seal your driveway is during dry weather when daytime temperatures stay above 50°F for 24 hours. Cooler fall days are ideal in many regions, but sealing can usually be done in spring through fall as long as temperatures meet the 50° threshold. Avoid sealing after rains or if rain is expected within 24 hours after application.
How often to seal your driveway
How often you’ll need to reseal depends on several factors:
– Climate – More frequent sealing is needed in regions with extreme temperature swings. 2-3 years in freeze/thaw climates.
– Sun exposure – Southern, sunnier climates require sealing every 1-2 years.
– Pavement material – Asphalt driveways usually need resealing every 2-4 years. Concrete, 4-6 years.
– Traffic – High-traffic driveways may need sealing yearly. Low-traffic every 4-6 years.
– Pavement condition – Seal more often if cracks exceed 1⁄4 inch.
– Sealer type – Acrylic sealers last 1-4 years. Asphalt 4-6 years.
So for many driveways, sealing every 2-4 years is recommended. Inspect annually and seal if needed.
What you’ll need
Here are the basic supplies needed:
– Driveway sealer – Choose asphalt-based for asphalt driveways, acrylic-based for concrete or asphalt. Get the right amount for your driveway size.
– Sealer applicator – Use a brush, squeegee or sprayer. Brushes work for small driveways. Squeegees or sprayers are faster for big driveways.
– Stiff bristle broom – To scrub surface clean prior to sealing. Avoid sweeping oils into cracks.
– Garden hose & nozzle – To rinse pavement after degreasing cleaner applied.
– Safety gear – Gloves, goggles, dust mask, protective clothing, etc. Driveway sealer is acidic.
– Rags – For cleanup and sealing trickles at end of job. Paper towels also work.
Optional handy items:
– Caulk or crack filler for patching cracks
– Degreasing cleaner if oil stains need attention
– Roller covers and roller handle to smooth sealer after applying
– Duct tape to mask off adjacent surfaces like house walls
Step 1: Inspect and repair cracks
Before sealing, walk your driveway and look closely for any cracks or damaged areas. Using caulk or crack filler, patch any cracks wider than 1⁄4 inch to prevent water penetration after sealing. For best results, use concrete or asphalt patch compound specifically made for driveway repairs.
If you notice alligator cracking (interconnecting cracks resembling reptile skin), significant chunks missing, large heaves or sunken areas, your driveway likely needs more extensive repairs prior to sealing. Contact a paving company for repairs in this case.
Step 2: Clean the surface
Thoroughly clean your driveway’s surface prior to sealing. Sweep away any loose debris using a stiff broom. For accumulated dirt or grime, use a concentrated degreasing cleaner made for driveways and let it soak 5-10 minutes before scrubbing with a stiff broom.
Rinse well to avoid detergent interacting with sealer. A pressure washer set to under 2000 psi can help remove stubborn grime. But take care around edges, which pressure washing can damage.
Remove oil or grease stains using degreaser if needed. Avoid any sweeping or power washing methods that push stains deeper into the pores.
After cleaning, let the driveway dry completely. Check for any remaining glossy spots and reclean if necessary.
Step 3: Mask off areas
Use duct tape, plastic sheeting or cardboard secured with weights to mask off any areas you want to protect from drips or splatter. Cover adjacent structures like house walls, landscaping, fences or decorative borders. You may also want to mask sections off to create a decorative pattern.
Step 4: Add sealer to applicator
Pour your driveway sealer into your applicator tool – whether that’s a brush, squeegee or sprayer. Don’t pour out the whole 5-gallon pail at once. Start with an amount you can quickly apply before the sealer starts drying.
If using a sprayer, avoid over-filling it to prevent heavy splatter. Add sealer in manageable batches as you go.
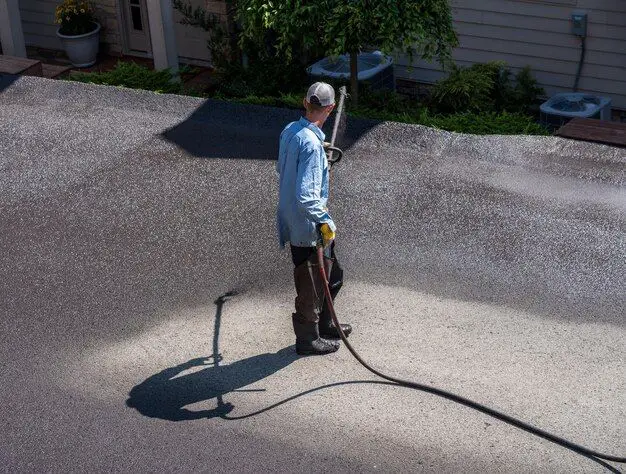
Step 5: Apply sealer across driveway
Apply sealer lengthwise across the driveway using long, even strokes with your applicator. Maintain a steady motion to coat the surface evenly without thick buildup or bare spots.
Work in 2-3 foot sections. For sprayers, use an overlapping spray pattern to ensure even coverage. With brushes, lightly feather out edges where sections meet.
Asphalt driveways – Brush sealer perpendicular to any slight ridges or textures in the asphalt surface to thoroughly fill voids.
Concrete driveways – Push sealer firmly into the pores for good adherence. Avoid creating bubbles.
Step 6: Allow sealer to dry
Let your newly sealed driveway sit undisturbed as the sealer dries. This usually takes 4-12 hours depending on temperature and humidity. The surface can be walked on with care after 6-8 hours if needed. But no driving or parking for 24-48 hours.
Drying time gives the water in the sealer time to evaporate, allowing the remaining solids to bond tightly together and adhere to the pavement. If disrupted, you can get tracking or peeling.
Step 7: Apply second coat if needed
For the longest-lasting protection, a second coat of sealer is recommended after the first coat fully cures, usually within 30 days. One coat suffices for driveways in good shape, but two coats provides extra protection for worn or porous surfaces. Simply repeat the application process to add a second coat.
Step 8: Remove masking and clean up
Once fully dry, carefully remove any masking materials you applied to protect adjacent surfaces. Use rags or paper towels to wipe up any minor sealer drips before they dry.
Quickly clean up brushes, rollers, spray tips and other tools using warm soapy water before sealer residue dries and hardens on them. Avoid any spills on concrete or asphalt, which can leave permanent stains unless cleaned immediately.
Tips for applying driveway sealer
Follow these tips as you seal your driveway for best results:
– Only apply in dry weather with no rain expected for 24-48 hours.
– Mask off vegetation and areas you want to protect from overspray.
– Stir sealer thoroughly before/during use to keep solids suspended evenly.
– Pour manageable amounts into applicator to prevent thick buildup and drips.
– Work in smaller sections for smoothest coverage. Feather out edges where sections meet.
– With sprayers, use an overlapping spray pattern and check for gaps in coverage.
– Backbrush with a roller or broom to even out thick areas before drying.
– Work quickly to maintain a wet edge between sections for uniform appearance.
– Watch for drips and wipe up any that occur before drying.
– Allow proper drying time before walking or parking on the driveway.
– Cleanup tools immediately after finishing to prevent residue buildup.
– Read and follow all manufacturer’s instructions for best results.
Common problems when sealing driveways
Here are some common driveway sealing problems and how to avoid them:
Uneven color – Caused by inconsistent application, working in hot sun or allowing sealer to start drying between sections. Work quickly in shade and feather out edges.
Peeling or flaking – Usually due to excess moisture getting under coating before fully cured. Don’t seal in cool, humid weather.
Washout – Occurs when sealing over damp concrete or rinsing too soon after application. Ensure surface is fully dry before sealing.
Tracking – Footprints or tire tracks pressed into uncured sealer. Don’t walk or park on it for 24-48 hours after sealing.
Bubbling – From shaking applicator, over-brushing or sealing over damp surfaces. Apply gently in thin coats.
Stiffness – Can occur when too much sealer is applied at once. Use thin even coats and backroll.
Correct timing, prepping properly and applying in thin, even coats minimizes issues. Test small sections first to ensure good adherence and overall appearance before sealing the whole driveway.
FAQs about sealing driveways
Does sealer make a driveway slippery?
Properly applied thin films of quality sealer create minimal change in surface traction. Thick applications could cause slipperiness until fully cured.
Can you seal a driveway in hot or humid weather?
It’s best to seal in dry weather between 50-90°F. Avoid sealing when rain is likely within 24-48 hours or on extremely hot days over 90°F.
How long does driveway sealer last?
On average, asphalt sealers last 4-6 years and acrylics 1-4 years before needing reapplication. Frequency depends on climate, traffic and pavement condition.
What color should driveway sealer be?
Sealers come in black, brown and gray. Match the original color of your pavement. Clear sealers maintain the surface color unchanged.
Can you seal a cracked driveway?
Yes, but first fill any cracks wider than 1⁄4 inch with crack filler to prevent water intrusion after sealing. Severely cracked driveways need repairs before sealing.
How long after sealing before it rains?
Ideally 24-48 hours. But after 6-12 hours, light rain or dew won’t significantly impact curing. Avoid heavy rains.
What is the fastest way to seal a driveway?
For speed, use a sprayer rather than manually brushing or rolling. But be cautious of overspray and make sure coverage is thorough.
Conclusion
Applying driveway sealer can refresh the look of worn driveways while providing vital protection from the elements. With the right supplies, proper cleaning and prep, careful application, and adequate cure time, you can create a driveway surface that performs well for years before needing resealed. Pay attention to important details like weather timing, masking off surfaces and working efficiently. And be sure to use compatible sealer for your pavement type. Follow the steps covered here to seal your driveway like a pro.