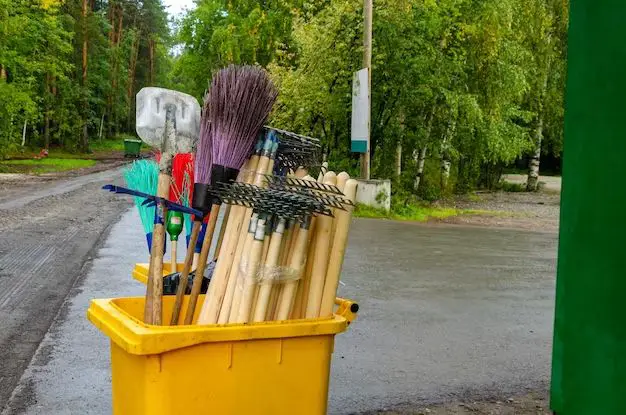
Having a clean garbage can outside your home is important for several reasons. A smelly, dirty garbage can will attract flies, rodents, and other pests. It can also create an unpleasant odor in your yard. Taking the time to properly clean and deodorize your outdoor garbage cans regularly will help keep them fresh and extend their lifespan.
Page Contents
- 1 How often should you clean the outside garbage can?
- 2 Supplies needed
- 3 Step-by-Step Cleaning Process
- 4 Tips for Preventing Dirty Garbage Cans
- 5 Cleaning Solutions to Avoid
- 6 Cleaning Different Garbage Can Materials
- 7 Disinfecting Garbage Cans
- 8 Deodorizing Trash Can Odors
- 9 When to Replace a Garbage Can
- 10 Best Garbage Can Features
- 11 Keeping Other Areas Clean
- 12 Conclusion
How often should you clean the outside garbage can?
Most experts recommend giving your outdoor garbage cans a thorough cleaning at least once a month. However, the frequency will depend on several factors:
- How often is the garbage can used – Cans that get heavy use daily or weekly will need more frequent cleaning than those used minimally.
- What type of garbage goes into the can – Food waste will make a garbage can dirtier and smellier than paper or dry trash.
- Weather conditions – Cans in hot, humid environments or exposed to the elements will need more frequent washings.
- Signs of dirt – Wash cans immediately if you notice stains, caked-on debris, visible mold, or a bad odor.
A good rule of thumb is to check cans at least weekly and clean any time you notice debris, sticky residue, or foul smells. At minimum, do a monthly deep clean to keep cans fresh.
Supplies needed
Cleaning the garbage can doesn’t require any special tools. Here are the basic supplies you’ll need:
- Garbage bags – Have fresh bags ready to line the garbage cans after washing.
- Rubber gloves – Protect your hands from dirt, grime, and any leaked garbage juices.
- Old clothes – Wear clothes you don’t mind getting messy.
- Paper towels or rags
- Mild detergent or all-purpose cleaner – Avoid harsh chemicals that could interact with garbage residue.
- Baking soda – Helps deodorize the can.
- Vinegar or bleach (optional) – For extra disinfecting power on very dirty cans.
- Scrub brush or sponge – For scrubbing off caked-on debris.
- Garden hose – For rinsing out the clean garbage can.
Step-by-Step Cleaning Process
Follow these steps to thoroughly clean and deodorize your outdoor garbage cans:
- Remove the garbage bags – Take out all trash bags so you can access the empty garbage can.
- Rinse with water – Use a garden hose to spray away any loose debris or liquids.
- Make a cleaning solution – In a bucket, mix a few tablespoons of detergent with some hot water. For tough stains, add 1/2 cup vinegar or bleach.
- Scrub the inside – Use a scrub brush and the cleaning solution to scrub away any stuck-on food, grime, or other residues from the bottom and sides.
- Scrub the outside – Clean all exterior surfaces of the garbage can too.
- Rinse again – Thoroughly rinse away all soap with clean water.
- Deodorize with baking soda – Sprinkle baking soda liberally over the bottom and lower sides of the empty can. Let sit for 5-10 minutes before rinsing away.
- Dry completely – Allow cans to fully air dry before putting in new bags. Consider leaving lids off to speed drying.
- Absorb odors with newspaper – Crumple newspaper and leave in the bottom of the clean, dry garbage can to help absorb odors.
- Line with fresh bags – Put new, unused garbage bags in the can before filling with trash again.
Tips for Preventing Dirty Garbage Cans
Regular cleaning will keep odors and leaks at bay, but you can also be proactive to avoid extra dirty garbage cans:
- Empty cans frequently so garbage and liquids don’t accumulate at the bottom.
- Use trash bags that are sized to properly fit your garbage cans with no overhang.
- Tie or seal trash bags tightly before putting in outdoor cans.
- Line the bottom with layers of newspaper, absorbing sheets, or rags to prevent leaks.
- Keep lids closed tightly to keep pests out.
- Quickly clean any spills or messes that get on the exterior.
- Keep cans in shaded spots to minimize sun exposure and odor.
Cleaning Solutions to Avoid
Some cleaners and solvents can actually damage your garbage cans or create hazardous fumes. Avoid these options when cleaning garbage cans:
- Ammonia – Can produce toxic fumes when mixed with bleach or other chemicals that may be present.
- Abrasive cleaners – Brillo pads or other abrasives could scratch the garbage can surface.
- Acetone – Can dissolve or damage plastic garbage cans.
- Citrus-based cleaners – May degrade plastic garbage cans over time.
For metal or plastic outdoor garbage cans, your safest bet is to stick to mild detergent, water, baking soda and vinegar as needed.
Cleaning Different Garbage Can Materials
Garbage cans come in various materials like plastic, galvanized steel, aluminum, or specialized outdoor resins. The cleaning process is mostly the same, but here are some material-specific tips:
Plastic Cans
- Use non-abrasive scrub brushes to avoid scratching the plastic.
- Stick to mild dish soap instead of tougher degreasers.
- Skip the bleach – it can discolor plastic over time.
- Avoid metal scouring pads.
- Apply car wax occasionally to protect the exterior.
Metal Cans
- Clean metal with baking soda and vinegar to remove grime and residue.
- Use aluminum foil or metal polishing paste to make metal garbage cans shine.
- Season new galvanized steel cans by filling with water and a little vinegar, letting soak overnight, then dump and rinse.
- Avoid submerging metal cans entirely in water to prevent rusting.
Wooden Cans
- Use mild dish soap and warm water, avoiding harsh chemicals inside.
- Let wood cans dry thoroughly before replacing bags.
- Water seal the exterior regularly to protect the wood from elements.
- Consider lining wooden cans with plastic garbage bags for easier cleaning.
Disinfecting Garbage Cans
For a deeper clean, you may want to periodically disinfect your outdoor garbage cans. This helps kill bacteria, viruses, mold, and other germs. Useful disinfectants include:
- Bleach – Add 1/2 cup bleach to a gallon of water. Scrub cans with this solution. Rinse thoroughly.
- Borax – Dissolve 4 tablespoons Borax powder into 2 liters of hot water for a natural disinfecting solution.
- White vinegar – Straight vinegar naturally kills many germs and has a deodorizing effect.
- Baking soda – Sprinkle soda directly on bins and let sit before rinsing – also deodorizes.
- Hydrogen peroxide – Spray or wipe diluted peroxide inside cans to sanitize them.
Remember to thoroughly rinse disinfectants away before putting trash bags back in the garbage can.
Deodorizing Trash Can Odors
If your garbage cans have persistent bad odors even after cleaning, try these tricks to deodorize them:
- Air cans out in the sun – the UV rays have a deodorizing effect.
- Sprinkle baking soda or borax powder in the empty can. Leave for 12-24 hours before rinsing.
- Spray vinegar inside then let cans dry entirely before reuse.
- Use charcoal briquettes – put some chunks in the bottom of the can to absorb odors.
- Fill with crumpled newspaper overnight – absorbs smells before removing.
- Use a few drops of essential oils – citrus, lavender, peppermint oils counteract smells.
When to Replace a Garbage Can
With consistent cleaning and care, garbage cans can last for years. But it’s time to replace your outdoor trash bin if you notice:
- Cracks, dents, or damage that make the can unstable
- Warping or melting damage, especially on plastic cans
- Rust or corrosion eating away at metal cans
- Oversized bags no longer fitting (misshapen can)
- Leaky bottoms or lids that won’t seal tightly
- Consistent foul odors that reappear quickly after cleaning
Shop around for replacement cans whenever you notice these issues. Look for durable materials suitable for outdoor use.
Best Garbage Can Features
When purchasing new outdoor garbage cans, look for useful features that make the cans more functional and easier to clean:
| Feature | Benefit |
|---|---|
| Two wheels and a handle | Makes taking cans to the curb and back easier |
| Detachable lid | Allows full access to the can interior for cleaning |
| Steel construction with coatings | Adds durability and prevents rusting |
| Tight-sealing lid | Locks in odors and keeps pests out |
| Liner hooks | Keep trash bags tucked in place |
| Double layer wall design | Insulates to minimize odor leaks |
Look for garbage cans with useful add-ons like the above features to get the most value from your outdoor containers.
Keeping Other Areas Clean
In addition to the garbage cans themselves, keeping surrounding areas clean is important too:
- Pick up any litter that scatters near the cans immediately.
- Use fly traps, mint leaves, or natural repellents to keep nearby pests away.
- Eliminate food sources – wipe spills on the garage floor near cans.
- Remove garbage frequently so it doesn’t overflow onto the ground.
- Keep cans in shaded areas away from direct sun exposure.
Conclusion
Regularly cleaning and deodorizing your outdoor garbage cans prevents foul odors and leakage that attracts pests. A monthly deep clean or anytime odors arise keeps cans fresh. While cleaning is simple with typical household supplies, replacing damaged bins keeps everything functioning properly for years. With the right maintenance, your outdoor garbage cans will stay clean, tidy, and odor-free.