Crown molding is an elegant way to add visual interest and architectural detail to a room. However, it can also be an expensive project due to the material and labor costs involved. For budget-conscious homeowners looking to add crown molding affordably, there are some tips and tricks to keep in mind.
Page Contents
What is crown molding?
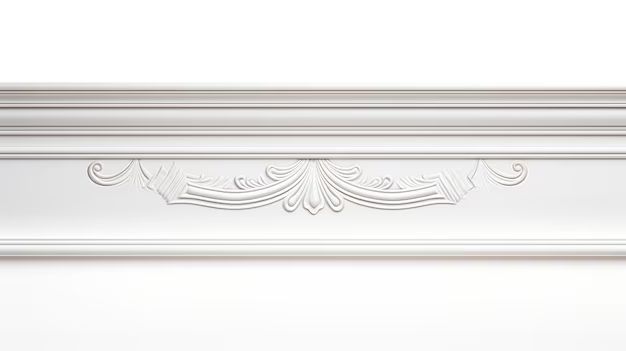
Crown molding refers to decorative molding that is installed where a wall meets the ceiling. It serves both form and function – adding style while concealing the angle where the wall and ceiling join. Crown molding typically projects downward from the ceiling at a 45 degree angle.
Crown molding helps define the proportions of a room through visual weight and lines. It can make rooms feel grander and more finished. The projection of crown molding from the ceiling also creates shadow lines that can make rooms feel taller.
In addition to the aesthetic benefits, crown molding can also help hide imperfections like uneven ceilings or walls. It provides a smooth transition between wall and ceiling.
Why is crown molding expensive?
While beautiful, crown molding comes at a cost. Here are some of the factors that make it a pricey home upgrade:
- Material – Crown molding is traditionally made from solid wood, which is more expensive than other building materials. Hardwoods like oak, cherry, maple and hickory are commonly used. Wood is prone to shrinking and swelling with changes in temperature and humidity, so it must be properly acclimated and installed to prevent issues.
- Custom sizing and installation – In order to properly fit a room, the crown molding typically needs to be custom cut and mitered. The installation process is labor intensive, requiring meticulous measuring, cutting, fitting and nailing/gluing of the molding.
- Complex angles – Crown molding highlights the corners where walls meet angled ceilings. These complex intersections require skilled carpentry work to cut the molding and join properly.
- Scaffolding or lifts – To reach the top of walls and angle the molding correctly, installers often need scaffolding or lifts, which adds to the labor costs.
- Priming and painting – unfinished crown molding requires multiple coats of primer and paint, adding time and material expenses.
With the combination of specialty materials, custom fitting, complex carpentry work and finishing, it’s easy to see why professionally installing crown molding is an expensive endeavor.
How to save money on crown molding
For homeowners on a tight budget, here are some tips on installing crown molding affordably:
Use lightweight materials
Rather than solid wood, consider using light density fiberboard (LDF), polyurethane or polystyrene foam. These materials are molded into crown molding shapes and far lighter than wood. They don’t require the same level of precision in installation and are paintable to achieve a finished look. The tradeoff is they don’t have the same longevity as real wood.
Choose stock sizes
Instead of custom molding, choose stock sizes that are readily available at home improvement stores. This eliminates the custom milling fees. Opt for shorter crown molding lengths that are easier to transport and fit in stock sizes. Piecing together stock lengths takes more time but saves on cost.
Mitre joints yourself
With some practice and the right tools – like a chop saw, mitre box or mitre saw – you can learn to cut crown molding mitre joints yourself. This avoids paying markups for pre-cut molding. A mitre saw with a compound blade makes it easier to achieve the proper angled crown molding cuts.
Use decorative trim
For a simpler installation, use decorative trim like cove or quarter-round moldings where the wall meets ceiling. This gives a subtle accent rather than a bolder crown molding look. Decorative trim is affordable and easy to install using basic tools and nail guns or adhesives.
DIY the installation
Doing it yourself rather than hiring professionals can lead to major cost savings. With proper planning, tools and patience, crown molding installation can be a doable DIY project. Watch online tutorials to learn the techniques. Rent or borrow any specialty tools needed. Take your time and don’t be afraid to make some mistakes – you can patch and paint them later.
Only install in key rooms
To save on costs, be selective about which rooms to install crown molding in. Focus on main living spaces and skip the bathrooms, laundry room or closets. The bedrooms, living room, dining room and kitchen will get the most visual impact from crown molding.
Budget-friendly crown molding ideas
Here are some specific crown molding options and ideas that won’t break the bank:
Foam crown molding
Foam crown molding costs between $1-3 per linear foot, compared to $4-8 for wood. It’s lightweight, easy to cut and install. Use adhesive to attach it to the wall and ceiling. Then fill gaps and paint for a seamless look. It provides an affordable crown molding alternative.
MDF crown molding
Medium density fiberboard (MDF) is an engineered wood product that machines well and has a smooth finish when painted. MDF crown molding costs about $2-4 per linear foot. It’s heavier than foam but still DIY-friendly. Look for primed MDF to avoid steps later.
Urethane or PVC moldings
For bathrooms and kitchens, consider urethane or PVC moldings which resist moisture and humidity. They cost around $2-5 per foot and come pre-primed. Fill, caulk and paint for a water-resistant, inexpensive crown option.
Thin profile moldings
Thin crown molding profiles take less material to cover the same space. Opt for a 3-1/2″ or 5-1/2″ profile rather than a beefier 9″ crown. The thinner style costs less in materials and requires less time and skill to install.
Scrap moldings
Check for crown molding scraps or off-cuts at lumber yards, Habitat for Humanity ReStores and salvage warehouses. As long as the lengths are over 2 feet, the scrap pieces can be utilized. Get creative patching them together for an eclectic, budget-friendly look.
Door and window trim
Use decorative door and window trim boards mounted at the ceiling-wall joint instead of traditional crown. This slim molding is inexpensive and sold at home stores. Get creative with different widths and patterns.
How much does budget crown molding cost?
Here is a comparison of average per linear foot costs for different budget-friendly crown molding options:
| Crown Molding Material | Cost Per Linear Foot |
|---|---|
| Foam | $1 – $3 |
| MDF | $2 – $4 |
| PVC/Urethane | $2 – $5 |
| Thin Wood Profile | $3 – $6 |
| Door/Window Trim | $1 – $3 |
For a 10×12 foot room, you would need approximately 40 linear feet of crown molding. Based on these prices, a budget DIY install would cost between $40-$160 for materials. Compare that to $160-$320 for basic wood crown from a contractor.
The tradeoff for the lower cost is these budget materials won’t have the longevity of real wood. But they can still transform a room by adding elegance and architectural detail.
Tips for installing budget crown molding
Here are some tips to help your affordable crown molding project go smoothly:
Measure carefully
Precisely measuring the room is crucial for cutting the molding lengths correctly. Consider using a digital measuring laser tool for accuracy.
Cut backing boards
Cut lengths of wood to act as backing along the ceiling and top of the walls. This gives the molding an even surface to mount flush against.
Pre-finish molding
Save time by pre-priming and painting the molding pieces before installing them. This avoids the hassle of taping and covering the room.
Fill gaps
Use paintable caulk and wood filler to cover any gaps, seams or imperfect mitre joints.
Take your time
Work slowly and carefully for best results. Crown molding alignment errors get magnified once everything is pieced together.
Start in corners
Cut and install the corner pieces first, then work outwards to finish the runs.
Use adhesives
In addition to nails, use construction adhesives to firmly adhere the molding to the backing boards and ceiling.
Sand lightly between coats
Lightly sand the molding between paint coats for a smooth professional finish.
Conclusion
Installing crown molding can take a room from boring to beautiful. While solid wood crown molding installed professionally is expensive, there are many budget options for cost-conscious DIYers. With smart planning, creativity and elbow grease, you can add elegant architectural details at a fraction of the cost.
Opt for readily available foam, MDF or synthetic moldings rather than costly hardwood. Simplify the installation by using thinner profiles and stock dimensions. Put in the work to carefully measure, cut and install the molding yourself. Focus on installing molding in the most visible areas rather than the entire home. And don’t be afraid to get creative mixing materials, trim pieces and unfinished scraps.
With some compromises on longevity and aesthetics, it’s possible to add beautiful, budget-friendly crown molding details to your home. Take your time, do your research and don’t be intimidated. The results will transform your rooms and add a touch of luxury without breaking the bank.