Planting a tree can be a rewarding experience that adds beauty and value to your property. Properly preparing the planting hole is one of the most important steps for tree health and establishment. The key is digging a hole that is wide and deep enough to give the tree room to spread its roots and grow. This article will walk through the basics of how to easily dig the perfect planting hole for your new tree.
Page Contents
- 1 What size hole do I need to plant a tree?
- 2 Where should I dig the tree planting hole?
- 3 How deep should I dig the tree planting hole?
- 4 What tools are best for digging a tree planting hole?
- 5 How can I make digging easier in hard or compacted soil?
- 6 What should I do with the soil removed from digging the hole?
- 7 Should I amend the native soil removed from the hole?
- 8 What is the proper way to backfill the hole after planting?
- 9 How can I determine if the tree hole needs drainage?
- 10 Conclusion
What size hole do I need to plant a tree?
As a general rule of thumb, you should dig a hole that is 2-3 times wider than the tree’s root ball or container size. Most containerized and balled-and-burlapped trees will require a hole that is approximately twice as wide as the root ball. The depth of the hole should be slightly shallower than the height of the root ball, with the top 1-2 inches of the root ball sitting above the surrounding soil level. This will help prevent the tree from sinking and settling too deeply into the ground after planting.
Here are some more specific hole size guidelines based on the type and size of tree you are planting:
| Tree Type | Recommended Minimum Hole Width | Recommended Minimum Hole Depth |
|---|---|---|
| Bare root tree up to 1 inch trunk diameter | 18-24 inches | 12-18 inches |
| Bare root or containerized tree 1-2 inches trunk diameter | 24-36 inches | 18-24 inches |
| Containerized tree up to 5 gallon size | 18-24 inches | Slightly less than root ball height |
| Containerized tree 7-15 gallon size | 24-36 inches | Slightly less than root ball height |
| Balled and burlapped tree up to 2 inch trunk diameter | 24-36 inches | Slightly less than root ball height |
| Balled and burlapped tree 2-4 inches trunk diameter | 36-48 inches | Slightly less than root ball height |
The most important thing is ensuring the hole is wide enough for the tree’s root system. A hole too narrow can cause roots to become crowded, girdled, and stunted as the tree grows. The extra width provides needed space for roots to fully expand over time.
Where should I dig the tree planting hole?
Choosing the right spot to dig is critical for your tree’s success. Here are some tips for picking an optimal hole location:
- Dig the hole near the center of your desired planting area to allow even root spread and growth.
- Ensure there is adequate space from buildings, sidewalks, driveways, and utilities for future growth – check recommended spacing for your tree species.
- Choose a spot with good drainage – avoid low, consistently wet areas.
- Select a location that provides enough sunlight for that variety of tree.
- Stay away from areas near eaves and gutters to prevent root interference.
- Avoid digging too close to other existing trees or shrubs.
Take time to think about how big the tree will eventually get, both above and below ground. This will help you identify the right place to dig where your tree can thrive for its whole lifespan.
How deep should I dig the tree planting hole?
Digging to the proper depth is also very important. A hole that is too shallow can cause trees to become root-bound and stunted. Digging too deeply can lead to settling issues and place the root flare and trunk below grade. Follow these guidelines for optimal depth:
- The bottom of the hole should be 2-4 inches shallower than the height of the root ball.
- This will allow the root flare and top of the root system to sit slightly proud of the surrounding soil level.
- For balled-and-burlapped and containerized stock, remove excess soil from the top of the root ball if needed to properly expose the flare.
- The top roots and start of the trunk should be at or slightly above ground level when planted.
Checking the depth frequently as you dig and using the root ball as a depth guide will help ensure proper planting depth. Having the root flare visible and above grade is critical for the tree’s health.
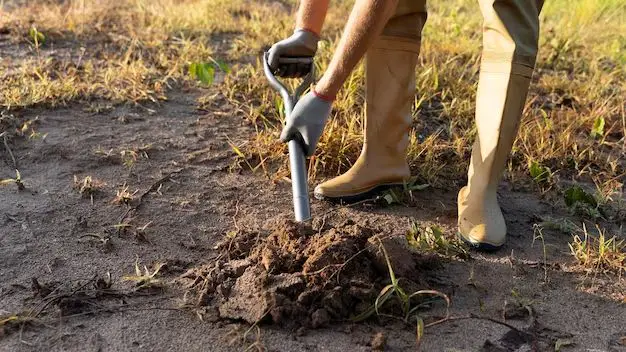
What tools are best for digging a tree planting hole?
You can dig a hole for a small to medium-sized tree by hand using these common digging tools:
- Shovel – A standard long-handled round or square shovel is useful for breaking up and scooping out soil.
- Garden spade – A sturdy spade can efficiently carve into turf and soil with its sharp edges.
- Post hole digger – This long-handled tool with scoop or auger attachments is ideal for making wider holes.
- Hand cultivator – A 3 to 5-prong cultivator helps loosen and turn soil at the bottom of a hole.
For larger trees or more difficult soils, consider using power tools such as:
- Gas-powered auger or drill – Makes quick work of digging large, deep holes in any soil type.
- Backhoe or mini excavator – Useful for extremely large trees or planting multiples.
- Power tiller – Rototillers till up soil and can dig sizable holes.
Whichever tool you use, make sure to dig the hole with vertical sides at least in the top 12 inches. Tapering or sloping the sides can make proper planting difficult.
How can I make digging easier in hard or compacted soil?
Dense clay soils and compacted urban soils can make planting hole excavation physically exhausting. Here are some tips to make digging easier:
- Loosen the soil before digging using a power tiller or by hand with a shovel or garden fork.
- Water the site thoroughly 1-2 days prior to digging – moist soils are easier to excavate.
- Mix compost, peat moss, or rotted manure into the soil to improve texture.
- Hand turn and break up compacted chunks at the hole bottom.
- Use a power auger, which can drill through tightly packed soil with ease.
- Narrow the shovel blade or post hole digger to cut through tough soils.
- Take frequent breaks and switch off diggers to avoid fatigue.
Improving the soil structure and moisture content before digging makes a big difference. Power tools are also key for efficient excavation in dense, rocky, or clay-based soils.
What should I do with the soil removed from digging the hole?
It is best to keep the soil from digging the hole nearby so it can be used later during the planting process. Here are some tips for managing the soil:
- Pile the soil around the perimeter of the hole as you dig.
- Break up any large clumps to make filling back in easier.
- Cover or containerize the soil if rain is expected prior to planting.
- Mix in any soil amendments meant for backfilling while the soil is accessible.
- Move a portion of the soil to a wheelbarrow or tarp if space is limited around the hole.
Retaining the native soil removed from the hole makes the planting job much simpler. It can be challenging to bring in sufficient outside soil to properly fill a large planting hole, so reuse what you remove if possible.
Should I amend the native soil removed from the hole?
Amending the excavated soil is generally only recommended if you have extremely dense clay or very sandy soil. Otherwise, native soil usually works well for backfilling. Some options for amending poor soil include:
- Mixing 25-50% compost or quality topsoil to improve texture
- Adding a 2-4 inch layer of compost, peat moss, rotted manure, or native forest soil to the bottom of the hole
- Incorporating a low-phosphorus fertilizer if soil fertility is lacking
- Adding organic matter like peat, coir, or wood chips up to 20-30% of total volume
- Thoroughly blending amendments into the soil – no soil pockets
Too much amendment can create drainage issues. The goal is to create loose, fertile soil for roots to easily expand into. Most trees do fine with no amendments at all to native soil.
What is the proper way to backfill the hole after planting?
Carefully backfilling the hole is crucial to ensure no air pockets develop and roots make proper contact with surrounding soil. Here is the proper process:
- Partially backfill 1/3 of the depth around the root ball keeping the tree straight.
- Water thoroughly before backfilling further to settle the soil.
- Continue adding remaining soil, tamping down with foot pressure as you go.
- Ensure the root flare remains visible at the soil surface.
- Form a shallow bowl shape with a berm around the rim to help retain water.
- Add 2-4 inches of wood mulch but avoid contact with the trunk.
- Water deeply again to soak backfill soil and eliminate any remaining air pockets.
Proper watering while backfilling and tamping the soil minimizes settling issues. Backfilled soil should be damp but not muddy or waterlogged. Take time filling carefully to prevent problems down the road.
How can I determine if the tree hole needs drainage?
Most trees do fine without drainage systems, but you may need to add gravel, sand, or drain tile if:
- The site has poorly drained, clay-based soils.
- The tree will be planted in low, frequently wet locations.
- You observe standing water or soggy soil in the hole during heavy rain.
- The water table is naturally high in your area.
- Surrounding hardscape sheds runoff directly into the hole.
Monitor the hole after heavy precipitation both before and after planting. If water sits for more than 12-24 hours, take steps to improve drainage. Proper drainage helps oxygen reach roots and prevents waterlogging.
Options for Improving Hole Drainage
- Add a 4-6 inch layer of gravel, sand, or wood chips at the base to promote drainage.
- Install agricultural drain tile or a French drain system if water tables are high.
- Build a berm around the edge to divert excess stormwater runoff.
- Amend native soil with compost or sand to improve percolation.
- Plant the tree on a 1-2 foot raised mound if the site stays wet.
In areas with flooding or continually soggy soil, creating a proper drainage system may make the difference between a thriving or dying tree.
Conclusion
Digging an appropriately sized, properly located tree planting hole is one of the most vital parts of establishing trees. Taking time to excavate a hole that gives young roots ample room to expand helps set trees up for healthy, vigorous growth. Follow these guidelines on width, depth, location, amendments, and backfilling for trouble-free digging and planting success.