Patching a hole in your carpet can seem like a daunting task, but it doesn’t have to be. With the right materials and techniques, you can easily repair minor carpet damage and restore your floors to their original appearance. Here’s a step-by-step guide to the easiest way to patch carpet holes.
Page Contents
Assess the Damage
First, take a close look at the hole and identify what caused it. Common culprits include furniture legs, pets, falling objects, and burns. Also check the size of the hole – small holes or tears under 1 inch can usually be repaired fairly easily, while larger holes may require more work. Thoroughly vacuum the area to remove any dirt or debris before starting repairs.
Gather Your Materials
You’ll need the following supplies to patch carpet holes:
- Carpet scraps – Collect leftover pieces or samples of carpet in the same color/material as your damaged carpet.
- Razor blade – Use a sharp razor to trim carpet patches to size.
- Seam adhesive – Look for adhesive specifically formulated for carpet.
- Trowel – Opt for one with notched edges to spread adhesive evenly.
- Scissors
- Measuring tape
- Metal spoon – Use the back side to flatten glued carpet pieces.
- Wax paper – Prevents adhesive sticking before carpet is positioned.
- Warm iron – Helps heat and seal carpet edges.
- Heavy books – Also used to weigh down carpet patches while glue dries.
Purchase supplies designed specifically for carpeting whenever possible. Avoid liquid “glue” options which can seep through and stain carpet backing. A seam adhesive formulated for carpet repairs will dry clear and flexible.
Prepare the Carpet Patch
Cut a patch out of your extra carpet scraps that’s at least 2 inches wider and longer than the hole. Make sure the carpet nap runs in the same direction as the damaged carpeting. Use sharp scissors or a razor blade to neatly trim the patch to size.
Next, place the carpet patch glue-side down onto a piece of wax paper. This prevents it from sticking prematurely before you’re ready to attach it. Have your trowel and seam adhesive handy.
Apply the Adhesive
Using a notched trowel, spread a thin, even layer of carpet seam adhesive over the underside of the carpet patch. Apply the glue all the way to the edges. You only need a thin coat – too much adhesive can seep through the carpet backing and cause visible staining.
Quickly flip the carpet patch glue-side up onto another piece of wax paper. Don’t let it touch anything yet. Next, spread a thin layer of adhesive on the carpet around the hole, overlapping the damaged area by about 2 inches on all sides. Again, don’t apply more adhesive than necessary.
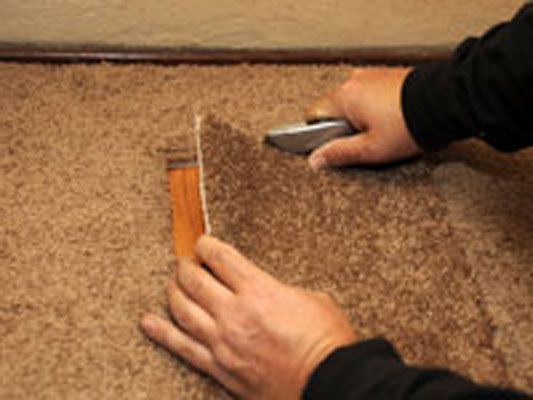
Position the Patch
Carefully lay the carpet patch into place over the hole, lining up the nap and pattern. Make sure it lays flat with no buckles or wrinkles. Use the back of a metal spoon to gently flatten the patch and press it into the adhesive beneath.
As you work, check that no adhesive is oozing out around the edges. Use a damp cloth to quickly wipe away any excess.
Seal the Edges
Once the patch is fully positioned, place several heavy books or other weights on top to hold it in place as the adhesive dries. You can also use a warm iron to heat seal the edges of the patch into the surrounding carpet.
Leave the books and weights for at least 24 hours as the glue fully sets. The patch may seem secure before that, but the bond will get stronger over time. After a full day, remove the weights and see how your patch looks.
Blend Seam Edges
If you notice a visible seam line around the edges of the patch, there are a few tricks for blending it in:
- Use sharp scissors to carefully trim any excess patch material so it lays flat.
- Apply seam sealer adhesive in a thin line around the patch perimeter.
- Gently tease the carpet nap around the edges with a comb.
- Press the area with a warm iron covered in a cloth.
With some minor trimming and touch-ups, you can make a patched carpet hole practically invisible.
Patch Larger Holes
For holes larger than 3 inches or in high-traffic areas, cut an oval or rectangular patch instead of a square one. Oval shapes blend best. Make sure to overlap the damaged spot by about 2 inches on all sides.
Prior to gluing, use sharp scissors to cut A-shaped wedges out of the patch backing along the outer edges. This helps prevent visible seams from developing as carpet traffic passes over the area. Follow the same steps to glue and seal the patch as with a small hole.
Replace Sections for Big Holes
For carpet holes over 12 inches or those with complex patterns, it may be best to completely replace the damaged section. Cut out a rectangular piece centered over the hole and extending at least 6 inches beyond it. When inserting the replacement piece, leave a 1/2 inch gap between it and the surrounding carpet to avoid visible seams.
Conclusion
Patching small carpet holes is a relatively easy DIY project. With some basic materials and techniques, you can repair any minor damage and restore your carpet to like-new condition. For best results, always use carpet-specific adhesive and press patches firmly into place. Let the glue dry thoroughly before removing weights and walking on the area. With a little care and patience, your homemade carpet patch can be practically undetectable.