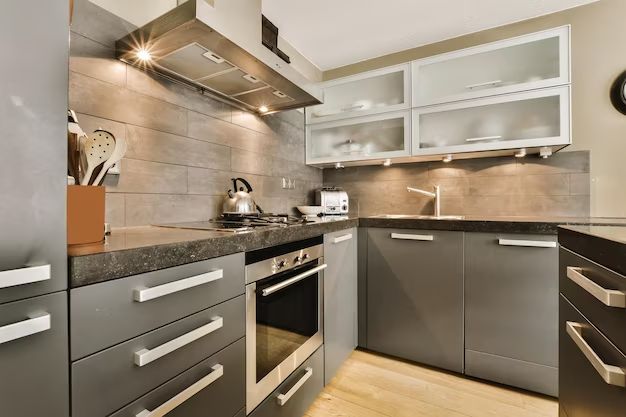
The molding trim along the top of kitchen cabinets serves both decorative and functional purposes. Often referred to as crown molding, this trim helps define the top edges of the cabinetry while adding visual interest to the kitchen. Crown molding comes in various shapes, sizes, and styles to suit the overall design of the kitchen.
Page Contents
Purpose of Crown Molding
Crown molding serves several key purposes in kitchen design:
- It defines the top edges of the cabinetry and differentiates the cabinets from the walls and ceiling.
- It conceals the gap between the tops of the cabinets and the ceiling, creating a more seamless look.
- It adds a decorative touch and visual appeal to the tops of the utilitarian cabinet boxes.
- It creates attractive shadow lines for visual interest and depth.
Essentially, crown molding helps transition between the vertical lines of the cabinets and the horizontal planes of the walls and ceiling. Visually, it pulls the elements of the kitchen together in a cohesive, aesthetically-pleasing way.
Types of Crown Molding
Crown molding comes in several different profiles or shapes. The type of molding selected will impact the overall visual effect. Common types of crown molding include:
Decorative Crown Molding
- Dentil – Rectangular blocks set in a row, similar to teeth. Provides a classical, elegant look.
- Egg and Dart – Decorated with egg shapes alternating with dart or arrow shapes. Traditionally used in classical architecture.
Ornamental Crown Molding
- Crosshead – Decorated with intersecting trapezoidal or triangular shapes. Provides a more intricate, ornate appearance.
- Modillion – Features repeating scroll shapes spaced at regular intervals. Inspired by classical architecture.
Structural Crown Molding
- Flat – Simple, flat trim piece with a straight bottom edge. Offers clean lines and minimal ornamentation.
- Bevel – Angled along the top outer edge. The beveled edge creates a graduated shadow line.
- Rope – Twisting, rope-like detail along the bottom edge. Provides a unique, nautical-inspired look.
The profile and size of the molding should be selected based on the architectural style of the kitchen. More ornate kitchens may suit more elaborate crown moldings, while modern or contemporary kitchens often use simple, clean-lined molding.
Materials for Crown Molding
Crown molding is typically crafted from wood, but can also be made of polyurethane, polystyrene, or gypsum. Each material offers its own advantages and disadvantages:
| Material | Benefits | Drawbacks |
|---|---|---|
| Wood |
|
|
| Polyurethane |
|
|
| Polystyrene |
|
|
| Gypsum |
|
|
The choice often comes down to the right combination of visual appeal, durability, and budget. For many homeowners, wood provides the best mix of aesthetics, longevity, and value over time.
Standard Dimensions
While crown molding comes in a huge variety of specific profiles and dimensions, there are some standard measurements for common types:
- 3 1/2 inches is a very common width for classic crown molding. This provides adequate ornamental detail without overpowering the space.
- 5 1/4 inches wide is considered a medium or moderate width. It offers more presence than 3 1/2 inch molding.
- 6 inches wide makes a bolder statement for more dramatic spaces, but can look heavy in smaller rooms.
- 3/4 inch thick is typical for solid wood crown molding. Thinner 3/8 inch is common for engineered woods and synthetics.
- Projection from the wall is generally 1 1/2 to 3 inches. Less than 1 1/2 inches lacks design impact, while over 3 inches starts to encroach into the room.
Installation height can range from just above the cabinet tops to nearly touching the ceiling. The goal is typically to integrate the molding into the architectural details of the space rather than leaving an awkward gap at the top.
Installing Crown Molding
Installing crown molding requires careful planning, precise cutting, and expert coping skills to properly join the seamless corners. There are a few common techniques:
- Mitered corners – The molding is cut at a 45 degree angle at the corners and joined. Mitering is tricky and the joints are prone to separation.
- Coped joints – The top piece is cut to overlap the bottom piece at the corner and shaped to match the profile. This achieves a tighter fit.
- Butt joints – The molding ends are cut square and simply butted against each other in the corner. The seam is filled with caulk.
- Spline joints – A small spline or tongue is inserted into a groove in the mitered end of each piece to strengthen the joint.
Professional carpenters have the experience and tools to cut crown molding accurately and manage the intricate joints. Most homeowners find that hiring a carpenter is worth the expense for superior results.
Cost of Crown Molding
The costs of installing crown molding will depend on several factors:
- Type of material – Real wood is more expensive than engineered woods or synthetics.
- Complexity of the profile – More ornate, decorative molding costs more than simple trim.
- Amount of molding needed – More linear feet of molding will increase the budget.
- Height of the ceilings – Taller walls require longer pieces of molding.
- Labor – Hiring a professional carpenter is advisable for proper installation.
As a general guideline for materials and professional installation in an average 10′ x 12′ kitchen, expect costs between $500 and $1500. The final price will vary based on the factors above. Luxury molding, intricate detail work, and larger kitchens will fall at the higher end of the price range.
| Kitchen Size | Estimated Installation Cost |
|---|---|
| 10′ x 10′ | $800 – $1200 |
| 12′ x 15′ | $1200 – $2000 |
| 15′ x 20′ | $2000 – $3500 |
Advantages of Crown Molding
Despite the higher cost, crown molding offers several advantages that make it a smart investment:
- Adds elegance and visual appeal to ordinary cabinetry
- Finishes off the tops of the cabinets for a built-in custom look
- Enhances the architectural style of the kitchen
- Increases the perceived value and resale value of the home
- Conceals cracks, gaps, or uneven walls
- Provides texture and dimension through shadows and detailing
- Serves as a transition between the vertical and horizontal surfaces
- Available in a wide range of materials, profiles, and price points
The aesthetics and added value provided by crown molding make it a worthwhile upgrade in most kitchen remodels. Homeowners should consider it an investment in their home’s beauty and function.
Crown Molding vs. Other Cabinet Trim
While crown molding is the most popular treatment for topping kitchen cabinets, there are other options as well. Some popular alternatives include:
Picture Rail Molding
- Thin ledge-like trim mounted just below the ceiling
- Provides a subtle border while protecting the wall from chair rail damage
- Ideal for displaying plates or artwork
- More discreet look than full crown molding
Wallpaper Border
- Strip of decorative wallpaper applied right above the cabinets
- Wide range of patterns and designs available
- More affordable alternative to pricier molding
- Challenging to apply properly, with risk of peeling or bubbling
Cabinet Top Decor
- Accent pieces like glass or metal applied directly to cabinet tops
- Options like tile, stone, or stained glass
- Add color or texture without visual weight
- Placement limits utilization of cabinet tops
For most kitchens, full crown molding offers the best blend of aesthetics, function, and added property value. However, for certain contemporary or minimalist designs, one of these alternative treatments may suit the decor better.
Incorporating Crown Molding into Kitchen Design
To maximize the impact of crown molding, it helps to plan for it as part of the overall kitchen design. Here are some tips:
- Select molding width and projection best suited to the room size. Allow adequate clearance from ceilings and windows.
- Match the style and ornamentation of the molding to the kitchen’s architectural character. Consider historic details like egg and dart for traditional spaces.
- Use thicker, more substantial molding profiles in larger, open concept kitchens. Thinner molding can look insignificant in big spaces.
- Choose simpler, unadorned molding for contemporary, modern, or minimalist kitchen styles. Avoid ornate carved moldings.
- Coordinate molding color with cabinet stain or paint selections for an integrated look. Contrasting colors can also be striking.
- Include adequate lighting above the cabinets to highlight the shadows and detailing of the molding.
- Plan for extra molding height above peninsulas or islands to define the shapes. Extend molding fully around hoods over ranges or cooktops.
With smart planning and careful execution, crown molding can take kitchen cabinetry from basic to beautiful. This classic trim has remained a hallmark of elegant kitchen design for generations, and will continue to add style, sophistication, and value for years to come.