The rough in for a bathtub drain refers to the plumbing that is installed behind the walls to accommodate the drain assembly. This includes installing the drain pipe, connecting it to the main waste line, and providing an opening in the subfloor for the drain. Properly roughing in the bathtub drain is an important step that allows the visible drain assembly to be installed later.
Page Contents
- 1 Drain Location
- 2 Drain Pipe Size
- 3 Drain Pipe Material
- 4 Drain Pipe Installation
- 5 Subfloor Preparation
- 6 Testing the Drain
- 7 Conclusion
- 8 Frequently Asked Questions
- 9 Drain Installation Requirements by Location
- 10 Typical Bathtub Drain Assembly
- 11 Bathtub Drain Installation Step-by-Step
- 12 Troubleshooting Bathtub Drain Problems
- 13 Hiring a Plumber
- 14 Conclusion
Drain Location
The first consideration when roughing in a bathtub drain is identifying where the drain will be located. Most bathtubs have the drain installed at the same end as the overflow outlet. Typically, this is located about 12-18 inches from the end of the tub, centered from side-to-side.
Having the drain at this location allows the trap to conveniently tie in to the main waste line running under the floor. It also provides enough room for the p-trap and drain connections. Make sure to follow the tub manufacturer’s rough-in instructions for the exact drain location.
Drain Pipe Size
The drain pipe size must be large enough to handle the flow of water when the tub is drained. Most building codes require a minimum 1.5 inch drain pipe for bathtubs. However, some tub styles with very large capacity may require a larger 2 inch drain. Check your local plumbing code for the minimum drain pipe size required.
In addition to the drain pipe size, the p-trap and connections must also be 1.5 inches or larger. The p-trap is installed after the drain pipe to hold water and prevent sewer gases from coming back up the pipe. All segments must be sized to prevent drain blockages.
Drain Pipe Material
The drain pipe running behind the wall is typically made from PVC or ABS plastic. These rigid pipe materials are readily available and easy to install compared to copper or galvanized steel. Plastic drain pipes are permitted by the major plumbing codes.
Make sure the plastic pipe is installed according to the manufacturer’s specifications. This includes properly measuring, cutting, deburring, cleaning, and solvent welding the joints. Proper assembly ensures leak-free operation and maximum flow capacity.
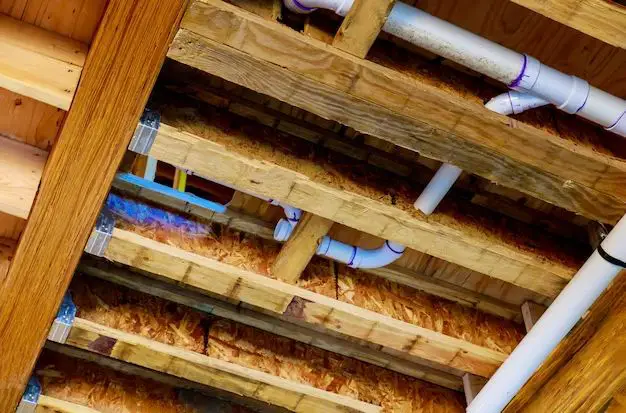
Drain Pipe Installation
Installing the drain pipe correctly is key to a trouble-free bath drain. Here are some tips:
- Run the drain pipe on a downward slope of at least 1/4 inch per foot. This allows waste water to flow freely through the pipe.
- Install cleanouts at intervals if there are multiple bends or long runs. This allows access to clear clogs.
- Support the pipe with hangers attached to studs every 4-5 feet. This prevents sagging and maintains the proper slope.
- Install insulation wrap if running pipe in exterior walls or below a tub in cold climates. This reduces condensation buildup.
Proper p-trap installation is also very important:
- Outlet of the p-trap should be 18-30 inches above the floor where it connects to the branch drain line.
- The p-trap should be connected with smooth swept fittings to allow waste to flow freely.
- Anchor the p-trap to prevent movement and disconnection.
Subfloor Preparation
The subfloor must be prepared to receive the drain by cutting an opening for the drain pipe. Most tubs have the drain at the same end as the overflow outlet, so the opening should line up with the tub drain location.
Cut a hole approximately 5 inches square directly below where the drain will go. The drain pipe should align in the center of this opening. The edges of the hole should be smooth and free from sharp edges or material that could cut the underside of the tub.
Testing the Drain
Once the drain pipe, p-trap, and subfloor opening are complete, the system should be pressure tested. This verifies there are no leaks before closing up the walls.
Plug the opening in the subfloor and pressurize the drain pipe to the maximum expected pressure. Spray the joints with soap solution and look for bubbles, which indicate leaks. Fix any leaks before moving on.
Finally, run water down the drain pipe while inspecting the underside of the subfloor. Look for water droplets that could indicate leaks at joints or connections. Only proceed with finishing the walls once the drain system passes pressure testing.
Conclusion
Properly roughing in the bathtub drain includes running the correctly sized drain pipe on the proper slope, installing a p-trap, and cutting an opening in the subfloor. Following code requirements and manufacturer specifications for sizing and location ensures a working drain. Testing for leaks verifies water will flow as intended without ruining walls or subfloor.
With the plumbing infrastructure in place behind the walls, installing the decorative drain assembly can be completed once the tub and finished walls are in place. This provides a neatly concealed bath drain that operates reliably for the life of the tub.
Frequently Asked Questions
What size drain pipe is needed for a bathtub?
Most building codes require a minimum 1.5 inch drain pipe for bathtubs. Larger tubs may need 2 inch pipe. Check local plumbing code for minimum size.
Where should the drain be located on a bathtub?
The drain is typically centered 12-18 inches from the end of the tub, on the same end as the overflow outlet.
How far above the floor should the bathtub drain tie in?
The drain should tie in 18-30 inches above the floor to connect to the branch drain line.
Can PVC pipe be used for a bathtub drain line?
Yes, PVC is permitted by code and commonly used for bathtub drain lines behind the wall.
Does the bathtub drain line require any special slope?
The drain line should slope at least 1/4 inch per foot to allow water to drain freely.
Drain Installation Requirements by Location
Plumbing drain requirements can vary slightly depending on your geographic location. Here are some specifics on bathtub drain rough-in requirements for major regions:
| Location | Drain Pipe Material | Minimum Pipe Size |
|---|---|---|
| Southern California | ABS, PVC, cast iron | 1.5 inches |
| Northern California | ABS, PVC, cast iron | 1.5 inches |
| Florida | PVC | 1.5 inches |
| Texas | PVC, ABS | 1.5 inches |
| New York | PVC, ABS, cast iron | 1.5 inches |
| Massachusetts | PVC, ABS | 1.5 inches |
| Washington | ABS, PVC, cast iron | 1.5 inches |
| Oregon | ABS, PVC | 1.5 inches |
| Colorado | PVC, cast iron | 1.5 inches |
| Pennsylvania | PVC, ABS, cast iron | 1.5 inches |
Be sure to consult your local plumbing code for any additional bathtub drain requirements that apply in your area.
Typical Bathtub Drain Assembly
Once the plumbing is roughed-in behind the walls, installing the visible drain assembly can be completed. A typical bathtub drain assembly consists of:
- Drain strainer – Decorative strainer that covers the drain opening and prevents hair from entering the pipe.
- Drain body – Threaded tailpiece that extends down through the subfloor to connect to the drain pipe.
- Rubber gasket – Seals between drain body and tub.
- Locknut – Secures and tightens the drain body.
- Overflow plate – Covers the overflow outlet hole.
- Trip lever or toe-tap – Linked to stopper to open/close the drain.
By properly roughing in the drain line behind the walls, you can ensure all components of the decorative drain assembly will fit and operate properly. Paying attention to code requirements and manufacturer specs during the rough-in phase prevents headaches later.
Bathtub Drain Installation Step-by-Step
While a professional plumber typically handles the rough-in work, a DIYer can usually tackle installing the decorative drain assembly. Here is a step-by-step guide:
- Remove old drain strainer and linkage if replacing an existing tub.
- Apply plumber’s putty around the drain hole and place the drain strainer in the hole. Press firmly to seal putty.
- From below, feed the threaded tailpiece up through the hole. Ensure at least 1/2″ extends above the tub.
- Slide the rubber gasket over the tailpiece then screw on the locking nut. Tighten hand-tight.
- Apply putty on the overflow hole. Install the overflow plate and tighten the screws.
- Connect the trip lever or toe-tap stopper mechanism following manufacturer instructions.
- Apply caulk around the strainer edge and overflow for a water tight seal.
- Run water in the tub and check for leaks at connections.
With good access and the proper drain rough-in already completed, the drain installation should go smoothly. Take care not to overtighten connections or damage components.
Troubleshooting Bathtub Drain Problems
Even when properly installed, bathtub drains can sometimes develop problems. Here are some common issues and remedies:
Drain Clogs
Clogs in the drain line or stopper mechanism slow water from emptying the tub. Try using a zip-it style drain cleaner, plunger, or remove the stopper mechanism and clear debris.
Leaky Connections
Leaks at the drain strainer connections allow water to drip under the tub. Disassemble and clean surfaces thoroughly before re-applying fresh plumber’s putty and re-tightening.
Noisy Pipes
Water flowing down the drain can cause gurgling sounds if drain pipes have improper slopes. A professional may need to inspect and adjust pipe slopes.
Backflow of Sewer Gas
If the p-trap is too far above the floor or has dried out, sewer gases can back up. A plumber should inspect and reconnect the p-trap per code.
Slow Water Removal
A partial blockage or inadequate pipe slope prevents water from draining at full speed. Use a drain auger or call a plumber to improve flow.
Catching and fixing bathtub drain problems early is important to prevent water damage behind walls or under floors. Routinely clean the drain strainer and monitor for any flow issues.
Hiring a Plumber
While a dedicated DIYer can potentially install their own bathtub drain, the rough-in work should be handled by a professional plumber in most cases. Here are some benefits to hiring a plumber:
- Knowledge of local plumbing codes for proper drain line size and materials.
- Experience accurately measuring and sloping drain lines.
- Right tools and materials to work behind walls and under the subfloor.
- Ability to make adjustments if unexpected issues are uncovered.
- Professional equipment to pressure test for leaks.
- Licenses and permits often required for drain installation.
Hiring a qualified plumber ensures your drain rough-in is handled expertly and by the book. Most plumbers can also install the decorative drain assembly at the end. Be sure to get an itemized estimate and check reviews before choosing a plumber.
Conclusion
Roughing in a bathtub drain properly is an important first step to create a functional bath. Following manufacturer specifications and meeting code requirements for drain line size, slope, and placement avoids problems down the road. With proper drainage infrastructure in place behind the walls, installing the decorative drain strainer and assembly can be a fairly straightforward process. Paying a professional plumber handles the rough-in work provides peace of mind that your new bathtub drain will work reliably for years.