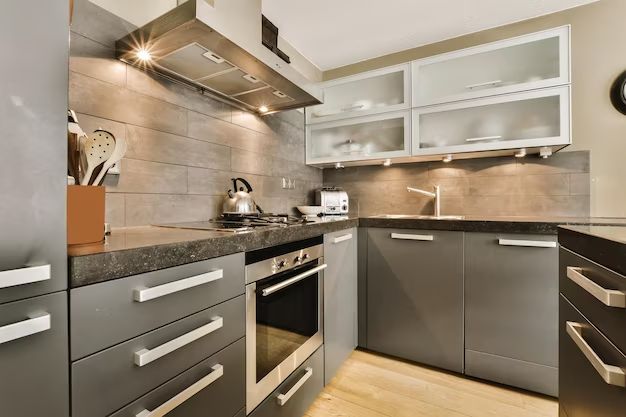
The trim around kitchen cabinets is commonly referred to as molding or cabinet trim. Molding serves both decorative and functional purposes, providing an attractive border around cabinetry while also concealing gaps and creating a finished look. There are several types of molding used in kitchens, with the most common being crown molding, light rail, and quarter round.
Page Contents
- 1 What is Crown Molding?
- 2 What is Light Rail Molding?
- 3 What is Quarter Round Molding?
- 4 What Materials are Used for Cabinet Trim?
- 5 How Much Does Cabinet Trim Cost?
- 6 What Tools are Needed to Install Cabinet Molding?
- 7 What is the Best Way to Cut and Install Cabinet Molding?
- 8 DIY Tips for Installing Cabinet Molding
- 9 Conclusion
What is Crown Molding?
Crown molding is the most ornate type of cabinet trim. Installed near the top of kitchen cabinets, it adds an elegant, finished look to the room. Crown molding is triangular in shape, with the two equal angles meant to fit into the 90 degree corner where the wall meets the ceiling. The unequal third angle at the bottom overlaps the cabinet.
Crown molding is typically made of wood, though foam and polyurethane varieties are also available. It comes in different styles, with ogee, dentil, and stepped profiles being some of the most popular. The profile refers to the shape of the molding’s decorative front edge. Elaborate, intricate profiles create a formal, stylized look. Simpler profiles have a more casual, understated appearance.
Benefits of Crown Molding
– Visually expands space – Drawing the eye upwards makes the room feel taller and more open
– Provides architectural detail – An elegant, finished look with traditional appeal
– Conceals gaps and imperfections – Covers cracks, uneven walls, and spaces between cabinets and ceiling
– Completes kitchen design – Brings together all elements for a cohesive, polished aesthetic
What is Light Rail Molding?
Light rail molding, also called cove molding, is installed directly underneath wall mounted kitchen cabinets. It consists of a stylized lip or “rail” protruding from the bottom edge of the cabinet. Light rail molding creates a transition between the cabinet and the wall, covering the gap that would otherwise be visible. It adds a subtle touch of decoration that enhances the overall look.
Light rail molding has a more simple, streamlined profile compared to crown molding. The lip is generally about 1-3 inches deep. Deeper lips create more of a shadow line and definition. Shallower lips have a more understated look.
Benefits of Light Rail Molding
– Visually balances proportions – Draws attention towards the bottom to even out visual weight
– Transitions cabinet to wall – Covers gap, providing a flush, cohesive appearance
– Decorative accent – Enhances style with its shapely lip adding interest
– Conservatively ornate – More understated than crown molding but still decoratively styled
– Modern, clean look – Sleek and contemporary, well-suited for minimalist kitchens
What is Quarter Round Molding?
Quarter round molding is trim with a rounded L-shaped cross section. It is installed at the bottom corner of kitchen cabinets where they meet the floor or countertop. Quarter round molding finishes these edges and hides any cracks or uneven spaces.
Quarter round has a subtle, curving contour. The rounded front edge softly eases the transition from vertical cabinet to horizontal floor. The bottom edge lies nearly flush, discreetly concealing imperfections. Kitchen quarter round molding typically projects out 1-2 inches from the cabinet.
Benefits of Quarter Round Molding
– Rounded transition – Gently eases from cabinet edge to floor for a finished look
– Conceals cracks and gaps – Hides uneven spaces between cabinet and floor
– Protects edges – Prevents chipping and damage to vulnerable corners
– Easy to install – Compact size installs quickly with nails, glue, or caulk
– Affordable – Made from inexpensive wood like poplar or pine
– Versatile – Suitable for a range of kitchen styles from traditional to modern
What Materials are Used for Cabinet Trim?
Kitchen cabinet molding is predominantly made from wood. Hardwoods like oak, maple, poplar and hickory are commonly used. Pine and fir provide budget-friendly options. Wood imparts a sense of warmth and timelessness that suits kitchen spaces. The most common are:
– Oak – Hardwood known for durability and attractive grains
– Maple – Hardwood with fine, uniform grain perfect for painted cabinets
– Poplar – Hardwood affordable option ideal for stain or paint
– Pine – Softwood with pronounced knots, casual styling
– Fir – Affordable softwood, frequently used for light rail
– MDF – Composite wood alternative constructed from wood fibers
– PVC/vinyl – Plastic molding praised for durability and moisture-resistance
– Polystyrene – Lightweight plastic option often used for crown molding
– Foam – Very lightweight synthetic material can be shaped easily
How Much Does Cabinet Trim Cost?
Cabinet trim costs between $2-$25 per linear foot, with most kitchens averaging $500-1500 total. Cost depends on:
Molding Type
| Crown molding | $4-$25 per linear foot |
| Light rail | $2-$8 per linear foot |
| Quarter round | $1-$5 per linear foot |
Crown is most expensive due to intricate profiles. Quarter round is cheapest for its simple shape. Light rail falls mid-range.
Wood Type
| Oak, maple, hickory | $$$ |
| Poplar, pine | $$ |
| MDF, PVC | $ |
Hardwoods are pricier than softwoods and composites. But premium woods add elegance.
Profile Detail
More elaborate, ornate profiles cost more due to complex millwork. Simpler profiles require less machining so they are more affordable.
Contractor vs DIY Install
Hiring a carpenter ranges $40-$80 per hour. DIY provides big savings but requires skill.
What Tools are Needed to Install Cabinet Molding?
Installing kitchen cabinet trim involves basic tools and skills. Necessities include:
– Tape measure – For precise sizing and cutting
– Level – Ensures straight, even installation
– Stud finder – Locates framing behind walls for secure install
– Miter saw – Makes precise angled trim cuts
– Table saw – Alternative for miter cuts
– Brad nailer – Attaches trim with finishing nails
– Hammer – Helps tap nails
– Ladder/step stool – Reaches high areas like crown molding
– Wood glue – Bonds trim for extra strength
– Caulk – Seals gaps for smooth finish
YouTube tutorials demonstrate helpful tips for novice DIYers. Patience and care result in high-quality outcomes. Consider hiring a carpenter for crown molding or intricate light rail projects.
What is the Best Way to Cut and Install Cabinet Molding?
Careful measuring, cutting, and installation results in a flawless finish:
Plan the Layout
– Map placement of trim and outlets, lighting etc that may impact installation
– Account for inside and outside corners which require specialized cuts
Measure Precisely
– Use a laser level to maximise accuracy
– Account for imperfect walls and floors that may not be perfectly square
Cut Trim
– A miter saw makes precise angled cuts for corners
– Cut pieces slightly long then shave for a perfect custom fit
– For crown, cut top edge and bottom edge separately
Install Trim
– Pre-drill holes to prevent splitting
– Use finish nails and glue for strongest hold
– Fill nail holes with putty, sand and finish
– Caulk corners and gaps for a seamless look
Prime and Paint
– Proper prep prevents bleed-through
– Use painter’s tape to protect cabinets
– Consider sheen to highlight or downplay molding
Patience and care pays off in beautiful, flawless results that elevate your entire kitchen.
DIY Tips for Installing Cabinet Molding
Installing cabinet trim yourself can save thousands in labor costs. Follow these tips for success:
– Watch tutorial videos to learn proper techniques before starting
– Work slowly and methodically – rushing causes mistakes
– Use painter’s tape to protect cabinets from nicks and scratches
– Cut trim slightly long, test fitting as you go for a perfect custom fit
– Nail into studs for strongest hold using a stud finder to locate
– Set nails and fill holes with putty for an invisible look
– Caulk gaps and seams for a smooth, cohesive finish
– Consider priming and painting molding before installing for easier finishing
– Touch up paint and caulk once installed for a flawless look
– Ask a friend to help hold longer pieces steady as you nail
– Use scrap wood cut-offs to test cuts and angles before cutting final pieces
– Check each piece with a level as you go to ensure consistent installation
– Work slowly, take breaks, and don’t get frustrated – patience and care pays off!
Conclusion
Kitchen cabinet molding magically finishes off your space with style and aesthetic appeal. Crown, light rail, and quarter round each serve distinct purposes while beautifying your room. Choosing the right materials and profiles elevates your design without breaking budget. With some careful planning and patience, even novice DIYers can install trim themselves, cutting costs while ending up with a magazine-worthy kitchen that looks like a carpenter built it. Crisp, clean molding pulls your whole room together, completing your kitchen with a cohesive finished look.