Through mortise and tenon joints are an ancient woodworking technique used to join together two pieces of wood or timber. They involve cutting a hole (mortise) in one piece to receive a protruding tongue (tenon) on the other piece. Through mortise and tenons pass all the way through the mortised piece but are only visible on one side. They create a strong joint and have been used for centuries in furniture making, timber framing, and other wood construction.
Page Contents
What is a Through Mortise and Tenon Joint?
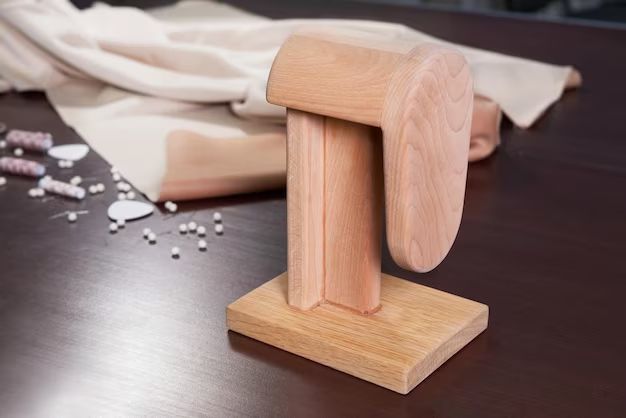
A through mortise and tenon joint is a type of mortise and tenon joint where the tenon passes completely through the mortised piece. The tenon is cut on the end of one piece of wood, and a hole or mortise is cut into the other piece of wood. The tenon fits into the mortise hole and locks the two pieces together at a 90 degree angle.
This differs from a regular mortise and tenon joint where the tenon only extends partially into the mortised piece. With a through mortise and tenon, the tenon is visible extending out the other side of the mortised piece.
Key Features
Some key features of through mortise and tenon joints include:
– The tenon extends completely through the mortised piece so it is visible on both sides.
– The mortise hole passes all the way through the mortised piece.
– The joint is made at a 90 degree angle between the two pieces.
– The mortise hole and tenon are very precisely cut to fit together snugly.
– The end of the tenon is sometimes widened to lock it in place.
– Glue, wedges or pins can be used to further strengthen the joint.
Benefits
Through mortise and tenon joints have several benefits:
– Very strong and rigid 90 degree joint. The extending tenon helps resist tension and racking forces.
– Precision fit results in a stable, long-lasting bond when glued.
– Visible joint has an attractive appearance in many applications.
– Historic and traditional woodworking joint with centuries of proven performance.
– Locking mechanisms like wedges or pins can make disassembly difficult, allowing knockdown and reassembly of furniture and structures.
How Through Mortise and Tenon Joints Work
Through mortise and tenon joints work by tightly interlocking the mortise hole and tenon together. The precision fit, glue, and mechanical fasteners make this a very strong 90 degree joint.
Steps to Create the Joint
Making a basic through mortise and tenon involves four main steps:
1. Cutting the tenon – The tenon is cut on the end of a piece of wood by making two parallel cuts to remove material and create the tongue shape. The cheeks are left square to fit the mortise.
2. Cutting the mortise – The mortise hole is chiseled out of the other piece of wood using precision technique to make a snug fitting hole for the tenon.
3. Fitting the joint – Test fitting ensures the tenon and mortise are precisely aligned with tight seams for maximum strength.
4. Gluing and clamping – Glue is applied to the contact surfaces before bringing the pieces together. Clamps hold the pieces tightly as the glue dries.
Locking Mechanisms
Beyond a basic glue bond, there are several mechanisms to mechanically lock a through mortise and tenon in place:
– Wedges – Small wood or plastic wedges can be tapped into a saw kerf in the end of the tenon once assembled, spreading the end and locking it in the mortise.
– Pins – Wooden pins driven into drilled holes through the tenon also spread the end to lock it in place.
– Drawboring – Shifting the pins slightly off center creates traction that pulls and locks the joint tight.
– Widening the tenon – Flaring the end of the tenon makes it wider than the mortise, locking in place when assembled.
Uses and Applications
Due to their strength, through mortise and tenon joints have traditionally been used in:
Furniture Making
– Joining rails, stretchers and legs in tables, chairs, beds and cabinets.
– Frame and panel construction for doors and cabinet panels.
Timber Framing
– Post and beam house construction.
– Timber bridges and barns.
Other Woodworking
– Doors, window frames, decks, and fence structures.
– Traditional wood toys and games.
While less common in modern machined wood construction, through mortise and tenon joints are still valued in furniture and woodworks today when visible joined appearance and traditional craftsmanship are desired. They require more skill and time to construct than modern joints like biscuits or pocket holes.
Variations
There are many variations of through mortise and tenon joints adapted to different situations:
Open Mortise and Tenon Joint
An open mortise and tenon joint has a gap between the shoulder of the tenon and face of the mortised piece. This allows for wood movement between pieces.
Closed Mortise and Tenon Joint
A closed mortise and tenon joint fits together snugly with no gap, maximizing glue surface and strength. Care must be taken to allow for some wood expansion and contraction.
Haunched Mortise and Tenon
A haunched mortise and tenon has a raised portion or “haunch” near the shoulder that sits inside the mortise hole. This adds strength and stiffness but is harder to construct.
Skewed Mortise and Tenon
Cutting the mortise and tenon at an angle or “skew” increases the locking action. Skews of 4-7 degrees are common.
Asymmetrical Tenons
Tenons with off-center or multiple shoulders add strength and prevent racking while still allowing wood movement with a gap.
Pegged Mortise and Tenon
Hardwood pegs can be driven into holes through the tenon instead of wedges or pins for a clean appearance.
Cutting a Through Mortise and Tenon Joint by Hand
Cutting through mortise and tenon joints by hand takes patience, skill and the proper tools but results in a very strong traditional joint. Follow these general steps:
Marking and Layout
– Use a combination square, marking gauge, pencil and knife to lay out the locations of the mortise and tenon. Ensure proper fit and angle.
Cutting the Tenon
– Clamp the tenon piece securely to your workbench. Make two shoulder cuts with a handsaw or chisel down the sides of the marked tenon.
– Remove waste wood from between the shoulder cuts with a chisel to create the tongue shape. Check frequently with measuring tools for a good fit.
Cutting the Mortise
– Use a chisel to cut down the sides of the mortise hole, then chip away waste until the hole is cleaned out. A drill can remove the bulk first.
– Test the fit with the tenon and continue to pare the sides until the joint goes together snugly but not too tight.
Final Fitting and Gluing
– Do a dry test fit, making any final adjustments for seam gaps and angle. Disassemble then add glue and quickly reassemble, clamping until the glue dries firmly.
Cutting a Through Mortise and Tenon with Power Tools
While traditional hand tools can cut fine through mortise and tenon joints, power tools greatly speed up the process while still allowing precision:
Table Saw and Dado Blade
– A table saw with a dado blade can accurately cut the cheeks of the tenon very quickly.
Hollow Chisel Mortiser
– A dedicated mortising machine with a square hollow chisel precisely cuts the mortise hole in seconds.
Drill Press
– A drill press with a Forstner or spur bit can bore out most of the mortise prior to hand chiseling the sides square.
Band Saw
– Fairly straight cuts can be made with a band saw by carefully following pencil lines.
Router
– A router with an edge guide can cut the cheek shoulders of a tenon. Jigs help cut mortises with a plunge router.
These power tools still require skill in setup, operation and final hand fitting. The mortise and tenon are typically test fit then any final tweaks made by hand.
Tips for Strong Through Mortise and Tenon Joints
Follow these tips when cutting through mortise and tenon joints:
– Select straight grain hardwood for strength. Avoid brittle woods and end grain cuts.
– Lay out lines and measurements carefully for accurate fit.
– Cut the mortise tight to the tenon for maximum glue surface. Aim for 1/16″ gaps or less.
– Keep shoulders square for maximum joint strength.
– Clamp in alignment until glue reaches full strength to prevent movement.
– Wedges and pins should fit snugly without splitting the wood when driven in.
– Allow adequate room for wood movement over time by keeping some gaps in the joint assembly.
– Glue joints precisely before glue starts to skin over and lose tack.
Conclusion
Through mortise and tenon joinery is a hallmark of quality woodworking using time-honored techniques. When properly designed and constructed, the result is an attractive timber-frame style joint that connects pieces securely at right angles. This joint will last for many years when protected from excessive moisture. With some care taken to allow seasonal wood movement, through mortise and tenon joints can provide both strength and beauty.
The steps for successful through mortise and tenon joints include:
– Careful sizing of the mortise hole and tenon tongue based on precise layout lines.
– Cutting the components accurately by hand or power tools.
– Fitting the joint snugly with precise gaps for optimum glue strength.
– Reinforcing with wedges, pins or other mechanical fasteners.
– Clamping securely while the glue fully cures in the joint.
The result is a durable wooden joint using timeless craftsmanship methods that withstands both tension and racking forces while showing an attractive visible beam end grain pattern. This makes through mortise and tenon construction ideal for furniture and timber frame structures alike.