When building a sturdy, durable workbench for DIY projects and carpentry work, the type of wood you choose is an important decision. The most common woods used for workbench tops are softwoods like pine, fir, and spruce. Hardwoods like oak, maple, beech, and ash can also make excellent workbench tops that will stand up to years of use. The key factors in choosing wood for a workbench are stability, strength, hardness, and cost. In this article, we’ll go over the benefits and drawbacks of using different woods and provide recommendations for the best lumber for DIY 2×4 workbenches.
Page Contents
Softwoods
Softwoods like pine, fir, and spruce are the traditional choice for workbench tops. Here are some of the characteristics that make them good options:
- Inexpensive – Softwood lumber is widely available and costs much less than hardwood.
- Easy to work – Softwoods are relatively easy to cut, drill, sand, and shape using both hand and power tools.
- Stability – Softwoods tend to be lightweight yet strong. The low density provides good resistance to warping and cupping.
- Handles abuse well – Softwoods have a fairly high strength-to-weight ratio and can stand up to impacts, gouges, and nicks.
- Easy to replace – When the top does eventually wear out after years of use, it’s cheap and easy to replace with new softwood lumber.
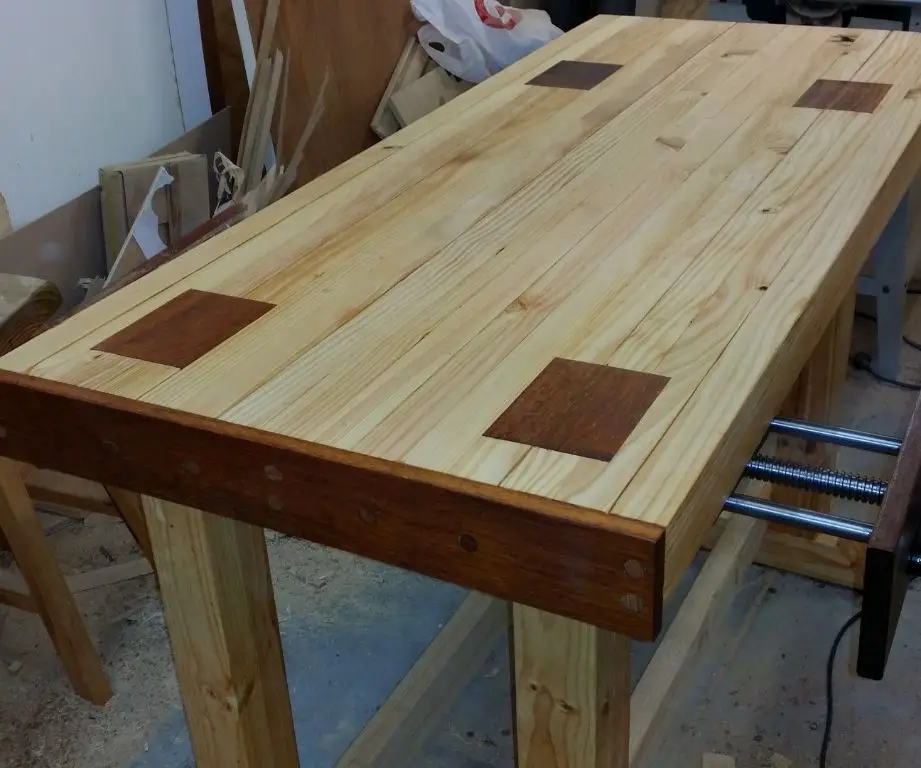
Pine is perhaps the most popular choice for workbench tops. Its low cost, lightweight yet stable qualities, and ability to handle abuse make it ideal for the garage or hobby workshop. Other softwoods like fir and spruce share many of the same desirable characteristics.
Pine
Here are some specifics on using pine for a 2×4 workbench:
- Go with construction-grade lumber – The 2x4s and 2x6s used for framing houses are versatile, strong, and inexpensive.
- Kiln-dried is best – This removes moisture evenly to prevent future warping and twisting.
- Check boards for knots – Avoid boards with lots of large knots, which are weak points.
- Arrange grain direction alternately – This prevents cupping and adds strength.
- Glue joints – Use waterproof wood glue and secure with screws or nails.
- Sand smooth – For comfort and splinter prevention.
- Apply finish – Polyurethane or spar urethane will protect the top.
With basic carpentry skills, you can build a sturdy pine workbench on a budget using standard 2×4 and 2×6 lumber from the home center.
Hardwoods
Hardwoods like oak, maple, beech, and ash also make excellent workbench top materials provided you don’t mind the higher cost. Here are some benefits of using hardwood:
- Extremely durable – Hardwoods stand up to heavy-duty projects for decades.
- Damage resistant – They resist dents, gouges, and wear better than softwoods.
- Nice appearance – Hardwoods can look great with just a clear finish applied.
- Handles moisture – Holds up to spills, dampness, and humidity.
- Workable – Hardwoods take well to cutting, drilling, routing, etc.
- Heavy and stable – The density prevents vibration and bench movement.
Oak is probably the foremost choice for a hardwood workbench. It combines strength, durability, appearance, and workability. But other species like maple, beech, ash, and hickory also make excellent sturdy work surface materials.
Oak
Here are some tips if you decide to use oak for your 2×4 workbench top:
- Red oak vs white oak – Both are very strong. Red oak is a bit more porous.
- Quartersawn boards recommended – This grain orientation minimizes expansion and contraction.
- Use oak plywood – A 4×8 sheet provides a large surface with good stability.
- Edge glue multiple boards – Makes a wider and stronger work surface.
- Allow wood to acclimate – Let oak boards sit in your shop to adapt to moisture levels.
- Pre-drill holes – Prevents wood from splitting when driving screws.
- Apply spar urethane – Provides the best protection for oak.
Though more expensive than softwoods, oak workbench tops are a lifetime investment that look great and can handle whatever you throw at them.
Other Hardwoods
Some other hardwoods that make good workbench top candidates include:
Maple
- Very dense and impact resistant
- Expensive, but costs less than oak in many cases
- Workable – machines and sands nicely
- Prone to dents – marks require sanding to remove
Beech
- Exceptionally hard with good wear resistance
- Stains easily from spills – apply finish promptly
- Stable material that glues up well for wider tops
- Smooth sanded surface that’s gentle on workpieces
Ash
- Similar strength and hardness to oak
- Machines cleanly and is easy to sand
- Ring porous wood prone to scratching
- Attractive light color with interesting grain patterns
While not as commonly used as oak, all of these hardwoods will make a benchtop that lasts for generations. The choice comes down to your budget and personal preferences.
Laminates
Laminate countertops present another option for workbench tops. Here are some potential benefits:
- Durable plastic surface resists chemicals, moisture, impacts
- Low cost pre-fabricated option
- Wide variety of colors and patterns
- Easily repaired or replaced as needed
- Provides a smooth work surface
High pressure laminates (HPL) provide the most durability and best performance for shop use. Common brands like Formica and Wilsonart offer lots of finish options. A substrate like MDF or plywood is needed to attach laminates to.
One downside is that laminates don’t have the same natural look and feel as wood. And cuts or gouges in the plastic surface are difficult to repair undetectably. But laminates make a practical, affordable work surface.
Other Materials
Some other materials that could work for a DIY workbench top include:
- Plywood – Affordable and stable. May sag under heavy loads.
- MDF – Machines well and doesn’t warp. Low moisture resistance.
- Plastic lumber – Waterproof and chemical resistant. Less rigid than real wood.
- Galvanized steel – Extremely durable work surface for heavy tasks.
- Stainless steel – Resists rust. Can dent and is noisy when struck.
- Hardboard – Low cost but not very durable. Easily replaced.
- Recycled materials – Get creative with old doors, bowling alley lanes, etc!
Part of the fun with a DIY workbench is picking a top material that fits your budget, needs, and style. Don’t be afraid to use unconventional materials if you can make them work.
Conclusion
When it comes to choosing wood for a 2×4 workbench top, softwoods like pine offer an affordable, durable option. Hardwoods like oak and maple are premium choices that bring strength, wear resistance, and natural beauty. Laminates also present a practical alternative. Ultimately the “right” material comes down to your budget, workshop needs, and personal preferences. Carefully selecting lumber and properly fastening the boards will result in a workbench that provides years of reliable service. With a homebuilt bench made from quality materials, you’ll have a sturdy, flat work platform that can handle whatever projects you throw at it.
Additional Considerations
Beyond just the worktop, there are some other considerations when building a 2×4 workbench:
Legs
- 2x4s or 4x4s are commonly used for legs
- Spread the legs at least 32″ apart for stability
- Attach securely using corner braces, lap joints, or mortise and tenon joinery
- Add bracing halfway up the legs on at least two sides
- End grain is best for leg bottoms to prevent rotting
Base
- Use a sheet of 3/4″ plywood or 2×6 members
- Attach the legs by screwing and/or bolting through the base
- Consider adding wheels or casters for mobility
- Leave the base flat or add shelves below for storage
Height
- Standard bench height is 34-36″
- Taller benches around 40″ work well for taller users
- Shorter benches are nice for detailed work
- Consider adding retractable casters for adjustable height
Joinery
- Use construction adhesive and screws/bolts for strength
- Pocket holes allow easy joining of 2×4 frames
- Mortise and tenon joints are strong and attractive
- Half lap and cross lap joints add stability without fasteners
Take the time to properly construct your workbench base and you’ll end up with a piece of shop furniture that provides a rock solid foundation for decades of woodworking and DIY projects.
Sample Workbench Plans
To give you an idea of how to put the concepts covered in this article into practice, here are a few sample plans for building your own 2×4 workbench:
Basic 2×4 Workbench
- Top – Two layers of 2x4s edge glued, alternated grain direction
- Legs – 4×4 posts
- Base – 2×4 frame
- Joinery – Pocket screws and construction adhesive
- Dimensions – 6 feet long by 2 feet deep
- Height – 34 inches
- Storage – Bottom shelf
This straightforward design makes an affordable, sturdy workbench using just 2×4 and 4×4 lumber.
Mobile Multi-Purpose Workbench
- Top – Maple plywood with replaceable hardboard face
- Legs – Heavy duty steel tubing with levelers
- Base – Sheet metal with integrated storage
- Joinery – Bolt together assembly
- Dimensions – 4 feet long by 2 feet deep
- Height – Adjustable 31-39 inches
- Mobility – Heavy duty casters
The plywood top, metal base, casters and leveling feet make this an adaptable, industrial-style bench.
Traditional Woodworker’s Workbench
- Top – Laminated oak 5″ thick
- Legs – Laminated maple, splayed for stability
- Base – Stretchers joined with mortise and tenon
- Joinery – Drawbored mortise and tenon
- Dimensions – 6 feet long by 2.5 feet deep
- Height – 36 inches
- Storage – Cabinet and drawers
This traditional bench has beefy joints and thick top for serious woodworking needs.
With a set of detailed plans tailored to your specific needs, you’ll have an easier time constructing a workbench that meets your exact shop requirements.
Tips for Success
Here are some final tips for successfully building your own 2×4 workbench:
- Choose the right location – Good lighting and access is key.
- Build it extra sturdy – A beefy bench can handle anything.
- Include clamps, vises, and dog holes – Essential work holding capability.
- Optimize height for your use – Customize for comfort.
- Add storage options – Keep tools and supplies handy underneath.
- Sand well and apply finish – For smooth feel and moisture protection.
- Take your time – Don’t rush the construction process.
- Make future alterations easy – Like swapping tops or adding casters.
With smart planning, quality materials, and careful workmanship, you can build a customized 2×4 workbench that serves all your project needs for years to come. The ideal bench fits your space, budget and tasks – whether that means all-out woodworking, DIY projects or home repairs. Building it yourself lets you save money while ending up with furniture quality results. Use the recommendations in this article to create the perfect 2×4 workbench for your home shop needs.