Tile grout cracking is a common issue that many homeowners face. Over time, grout can become brittle and cracked due to normal wear and tear, improper installation, moisture issues, or changes in the foundation. Cracked grout is not just an aesthetic issue, it can lead to water damage, mold growth, and loose tiles if left unrepaired.
Page Contents
Why is my tile grout cracking?
There are several common reasons tile grout can start to crack:
- Normal wear and tear – Grout is designed to be somewhat flexible, but over many years of use it will naturally begin to harden and crack.
- Improper installation – If the tile or grout was not installed correctly, it can lead to cracking as the flooring materials settle.
- Moisture issues – Sustained moisture from spills, leaks, flooding, or steam in bathrooms can seep into and break down grout.
- Foundation/structural issues – Any shifting or changes in the substrate, walls, or foundation that the tiling was installed on can cause cracking as it settles.
- Poor quality grout – Lower quality grout that contains too much sand or filler is more prone to cracking over time.
- Extreme temperatures – Grout in outdoor applications or bathrooms with dramatic temperature fluctuations can crack as it expands and contracts.
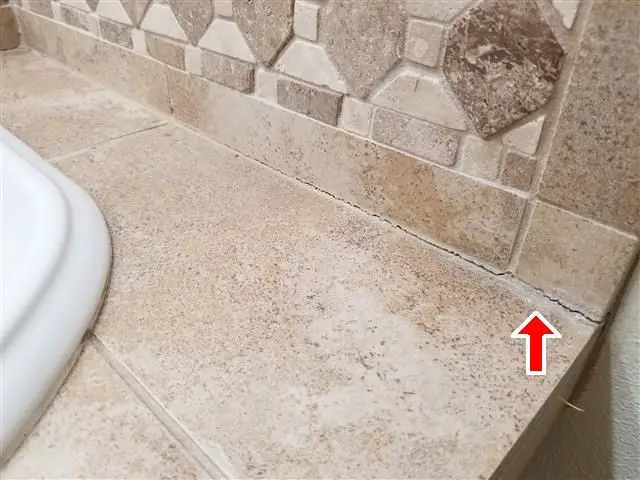
If the cracks are isolated to one section of flooring, it points to moisture or foundation issues. If the grout is cracking throughout the entire installation, it is likely failing due to age or material quality.
Should I be concerned about cracked grout?
While cracked grout may seem only like a cosmetic annoyance at first, it is important to repair it to avoid more significant issues:
- Loose tiles – If the grout completely deteriorates, tiles can work loose, chip, or even come detached.
- Water damage – Cracked grout provides an entry point for water to seep under tiles and damage the subfloor.
- Mold/mildew growth – Wet grout becomes a prime breeding ground for mold, presenting health hazards.
- Tripping hazards – Jagged or missing grout can be a trip-and-fall risk.
- Looks unappealing – Cracked grout just looks bad, decreasing the value and appeal of the space.
The longer damaged grout is left unrepaired, the worse these secondary issues may become. Even if the problem seems minor now, it is best to fix it promptly.
Should I regrout or caulk cracked grout?
There are two main options for repairing existing cracked grout:
Regrouting
Regrouting involves scraping out the old damaged grout fully and replacing it with new grout.
- More durable, long-term solution.
- Matches the original appearance.
- Requires cleaning out all old grout first – Labor intensive.
- Needs at least 24 hrs to cure before sealing & using.
Caulking
Using silicone caulk to fill cracks is quicker and easier.
- Very easy application into cracks.
- Fast drying time.
- Doesn’t look quite the same as original grout.
- Short term solution – Caulk can recrack.
For minor hairline cracks, caulk may suffice as a temporary solution. For more significant cracking or failing grout, full regrouting will provide a neater, long-lasting repair.
Step-by-Step Guide to Regrouting Tile
If your tile grout needs complete replacement, here is a step-by-step guide to properly regrouting:
1. Prepare the area
- Clear the area – Remove all items & furniture from the tiled area.
- Clean thoroughly – Use a tile & grout cleaner to scrub away dirt, grime & old sealant.
- Inspect closely – Look for any damaged or loose tiles that may need re-adhering or replacement.
2. Remove old grout
- Use a carbide-tipped grout saw or rotary tool cut into and scrape out all old cracked grout, down to the bottom.
- Be careful not to scratch or damage the tile surfaces.
- Vacuum up all debris as you work.
3. Apply new grout
- Choice a polymer-modified sanded grout for most floors.
- Unsanded grout can be used for joints 1/8” or less.
- Apply to joints according to package directions, using a rubber grout float.
- Push grout fully into joints and clean excess off tile surfaces.
4. Clean & seal the grout
- Let grout cure fully, 24 – 48 hrs is ideal if possible.
- Use a damp sponge to gently clean grout haze from tile surfaces.
- Apply a penetrating sealant to the grout lines to protect from moisture.
With the old grout removed and fresh grout applied, the area will look as good as new and last for many years.
Tips for Preventing Cracked Grout
Some tips to help prevent grout from cracking and failing in the first place include:
- Use a high quality polymer-modified grout.
- Seal grout annually to protect from moisture.
- Caulk joints between tile and tub/sinks to prevent water seepage.
- Quickly clean spills and standing water.
- Maintain stable temperature and humidity in the room.
- Re-grout any areas showing early wear every few years.
With proper installation, care, and maintenance grout can stay crack-free for many years before needing repair.
When to Call a Professional for Grout Repair
While minor grout cracking and touch up can be a DIY project, it’s best to call a professional tiler for:
- Major cracking or failing of grout throughout a large area.
- Indications the tile itself is damaged or becoming unbonded.
- There are underlying moisture issues or foundation problems.
- You do not feel comfortable fully removing and replacing old grout.
- Specialty grout such as epoxy is used.
A professional can properly diagnose the root cause, re-adhere any loose tiles, and ensure the new grout installation is up to code for your long term safety and satisfaction.
Conclusion
Cracked or crumbling grout is an issue that will only worsen over time if neglected. With some basic DIY skills it can often be repaired, especially if just minor cracking is present. For larger areas needing complete regrouting, a professional tiler may be advisable. Stopping moisture penetration and matching the color of original grout does take some skill. But no matter what method you choose, addressing cracked grout promptly eliminates safety hazards and keeps your tile looking its best.