Installing laminate flooring can seem daunting, but with the right tools and preparation, it can be an easy DIY project. Laminate flooring is a versatile, affordable, and attractive option for flooring that can transform the look of any room. By equipping yourself with the proper tools and knowledge, you’ll be ready to install laminate flooring like a pro.
Page Contents
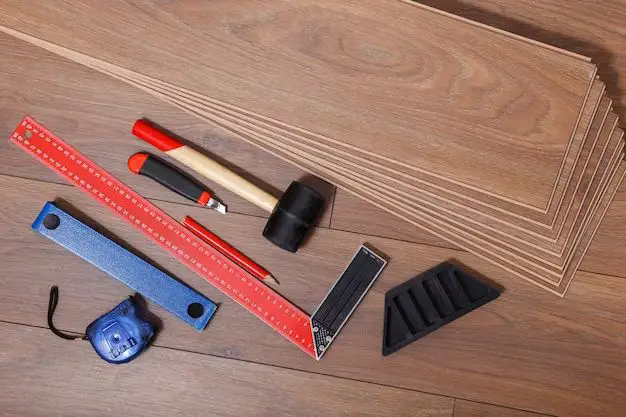
Essential Tools
There are a few key tools needed to properly install laminate flooring. Having these tools on hand will make the installation process smooth and efficient.
Tape Measure
An accurate tape measure is crucial for measuring the room and cutting planks to the correct length. Look for a tape measure that is at least 25 feet long so you can measure wall-to-wall lengths.
Utility Knife
A sharp utility knife with extra blades will be used to cut laminate planks to size. Look for one with an easy-to-grip ergonomic handle for comfort during extended cutting.
Jigsaw
A jigsaw allows you to make detailed curved cuts around door frames, pipes, and other protrusions. Choose one with adjustable speed and orbital action for smooth cuts.
Circular Saw
While not an absolute necessity, a circular saw fitted with a finetooth blade simplifies cutting planks lengthwise. This helps reduce chips and tears compared to scoring and snapping planks by hand.
Rubber Mallet
A rubber mallet is used to gently tap laminate planks into place and ensure a tight fit without damaging the planks. Select a 2-3 pound rubber or soft-faced mallet for the best results.
Pull Bar
Also known as a tapping block, a pull bar is a must for properly installing laminate flooring. It allows you to tap planks into place while preventing damage to the locking edges.
Spacers
Spacers are small plastic wedges placed between the laminate planks and wall during installation. This maintains the proper expansion gap around the perimeter of the room.
Hammer
A standard claw hammer comes in handy for tapping flooring into place in tight spots. Use in combination with a tapping block to prevent plank damage.
Other Helpful Tools
Beyond the core installation tools, there are some additional tools that can make the process easier and give your flooring a professional finish.
Table Saw
For making straight rip cuts lengthwise, a table saw fitted with a fine-tooth blade is the best tool. This makes perfectly straight cuts quickly.
Miter Saw
A miter saw is ideal for miter cuts, such as any trim or molding around the floor’s perimeter. It allows you to make straight, angled cuts with precision.
Level
A four-foot level is useful for checking that your subfloor is flat. Look for any low or high spots that may need addressing before installation.
Moisture Meter
Testing your subfloor moisture prior to installation is critical. A moisture meter takes the guesswork out and gives reliable readings to ensure your subfloor is ready.
Vacuum
Give your subfloor a thorough vacuum prior to installation to remove any dust, dirt, or debris. A shop vac with hose attachments makes this easy.
Claw
A flooring claw can help you lift or pull planks into place in tight areas. The long reach helps you get planks aligned without risking damage.
Underlayment
Underlayment is an important component often overlooked. A foam or cork underlay helps level minor subfloor imperfections, absorb sound, and provide moisture protection.
Tapping Block
Also called a pull bar, a tapping block is used in conjunction with a rubber mallet to tap laminate joints into place without chipping or scratching the planks.
Side Cutters
Side cutters allow you to trim away irregular edges for a clean look. This helps give flooring a seamless, flush transition between rooms.
Basic Steps for Installing Laminate Flooring
Once you’ve gathered the necessary tools, follow these basic steps for a smooth laminate flooring installation:
Step 1: Prepare the Subfloor
– Clear all furniture and debris from installation area
– Inspect subfloor thoroughly – fill any cracks or holes
– Make sure subfloor is clean and dry
Step 2: Plan Your Layout
– Measure room dimensions and total square footage
– Plan out plank direction and layout
– Dry lay a few rows to test layout
Step 3: Install Underlayment
– Roll out underlayment in same direction as planks
– Butt edges together tightly with no overlap
– Use patching tape at seams if needed
Step 4: Cut the Planks
– Measure and mark planks for cuts
– Use utility knife to score plank if hand cutting
– Use tools like jigsaw or table saw for involved cuts
Step 5: Lock the Planks Together
– Always work from left to right in each row
– Maintain proper offset/stagger between rows
– Use mallet and pull bar to fully lock planks
Step 6: Use Spacers at Walls
– Place spacers between floor and walls
– Maintain proper expansion gap around perimeter
– Do not remove spacers until install is complete
Step 7: Complete the Install
– Lay final row of planks
– Remove all spacers
– Install trim pieces as needed
Step 8: Enjoy Your New Floor!
– Allow 24 hours for adhesive to fully cure
– Avoid dragging heavy furniture across floor
– Clean using damp mop or vacuum
Tips for a Successful Installation
Follow these tips and tricks to help your laminate flooring installation go smoothly:
- Always read manufacturer instructions thoroughly first
- Acclimate flooring to room temperature 48-72 hrs before installing
- Check that subfloor is clean, dry, and flat
- Use proper underlayment and vapor barrier
- Allow proper expansion gaps around perimeter
- Work slowly and methodically row by row
- Use spacers against walls during installation
- Ensure joints are fully locked before moving on
- Protect floors once installed until construction is finished
Safety Tips
When tackling a DIY laminate flooring installation, keep these safety recommendations in mind:
- Wear safety goggles, gloves, and dust mask
- Read and understand tool manuals before use
- Keep area clean and clear of debris
- Stack planks neatly to prevent tipping
- Follow all tool safety and operation instructions
- Exercise proper lifting techniques
- Have a first aid kit on hand
Common Mistakes to Avoid
By being aware of the most common mistakes, you can avoid missteps and have a flawless installation:
Not Acclimating the Flooring
Failing to let flooring acclimate to room temperature can lead to gaps, buckling, or damage later.
Neglecting Underlayment
Quality underlay is crucial for moisture protection, sound insulation, and subfloor imperfections.
Improper Expansion Gaps
Lack of proper expansion space can cause buckling or planks to separate over time.
Failing to Stagger Rows
Consistent plank layout can create weak spots and cause the floor to separate.
Not Locking Planks Completely
Planks not fully locked together can unlock or become damaged under foot traffic.
Using Wrong Adhesive
Be sure to use the adhesive recommended for your subfloor type if using glue-down flooring.
Rushing the Job
Take your time with each step – rushing leads to mistakes that can damage the floor.
Conclusion
Installing laminate flooring is an achievable DIY project with the right tools, preparation, and knowledge. By equipping yourself with the essential tools, understanding the basic steps, and avoiding common mistakes, you can have beautiful new laminate floors to enjoy for years to come. What are you waiting for? Get ready to tackle those floors!