Installing new cabinets in your kitchen or bathroom can seem like a daunting task, but having the right tools makes the job much easier. The basic toolkit for cabinet installation includes tools for measuring, cutting, fastening, leveling, lifting, and more. With some advanced planning and preparation, you can gather everything needed to safely and successfully install cabinets on your own.
Page Contents
Measuring and Marking Tools
Accurate measurements are crucial when installing cabinets. Even small errors can throw off your entire layout. Having the right measuring and marking tools helps ensure your measurements are precise.
Tape Measure
A standard 25-foot tape measure is essential. Make sure to get one with marks that are easy to read. You’ll need to measure cabinet openings, countertop lengths, and distances between cabinets and walls. A tape measure that retracts smoothly without bending also helps.
Carpenter’s Pencil
A carpenter’s pencil has a wide, flat tip that makes thin, legible marks. You’ll use it to mark cutting lines, center points, and more. The flat tip helps the marks stand out.
Carpenter’s Square
A carpenter’s square has one arm set at a 90-degree angle to the other, allowing you to mark perfect right angles. Use it to outline cabinet positions on the floor and walls. Models with rulers along the edge help simplify measurements.
Laser Level
A laser level projects a perfectly straight laser beam to mark level lines. This helps make sure your cabinets will be installed plumb and level. Self-leveling lasers are the easiest to use for DIY installation.
Stud Finder
A stud finder locates wood studs behind drywall so you can screw cabinets securely into the wall framing. This is crucial for upper cabinets. Electronic stud finders with LCD screens are most accurate and easy to use.
Cutting Tools
Carefully cutting cabinets to size is key for a professional-looking fit. Having the proper cutting tools makes achieving clean, precise cuts much simpler.
Circular Saw
A circular saw makes straight cuts through plywood, lumber, and laminate. You’ll use it to trim cabinet sides, floors, and fronts. One with a carbide blade designed for fine cuts in woodworks best.
Jigsaw
A jigsaw handles curved cuts for notching around pipes or cutting out openings for sinks. Choose one with adjustable orbital action for fast, clean cuts. An ultra-fine tooth blade optimizes cutting through laminates.
Oscillating Multi-Tool
An oscillating multi-tool equipped with a wood blade has a fast, narrow oscillation perfect for intricate trim work. Use it for quick adjustments to get a perfect cabinet fit.
Hand Saw
A standard hand saw like a crosscut saw tackles simple short straight cuts. It’s great for quick trimming jobs that don’t require power tools. The thin blade allows for easy control.
Sandpaper
An assortment of sandpaper grits helps smooth cut edges for a seamless look. Coarse grits quickly smooth rough edges, while fine grits polish to a finished smoothness.
Fastening Tools
Properly securing the cabinets to the floor, walls, and each other is critical for safety and functionality. The right fastening tools make achieving a solid installation much easier.
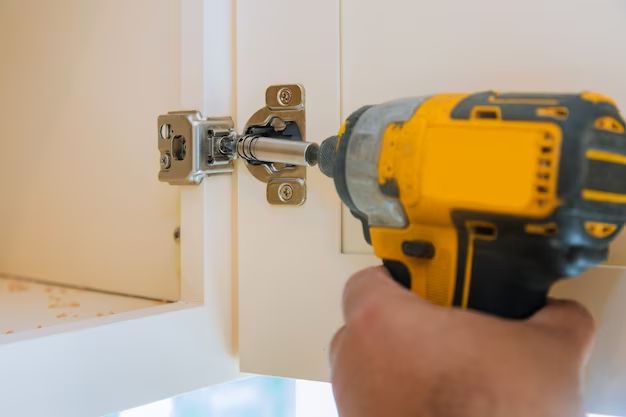
Cordless Drill/Driver
A cordless drill/driver allows you to drill pilot holes and drive screws to fasten cabinets efficiently. Choose one with variable speed and torque control for best results. Bring extra charged batteries.
Screwdriver Bits
Having a variety of Phillips and square drive screwdriver bits ensures you can drive all cabinet screws properly. Magnetic bits help prevent dropped screws during fastening.
Hammer
A standard claw hammer comes in handy for setting nails, taping pieces into place, and adjusting cabinets. One with a comfortable rubberized grip prevents hand fatigue.
Nail Gun
For assembling cabinet boxes, a brad nailer or narrow crown stapler speeds the process. The compressed air power drives fasteners in quickly without splitting the wood.
Wood Glue
Water-resistant wood glue creates ultra-strong bonds between cabinet components. Applying glue before driving fasteners adds stability and helps prevent squeaks.
Leveling and Lifting Tools
Leveling cabinets properly ensures they fit together squarely and function correctly. Lifting heavy upper cabinets into place safely also requires specialized tools.
4-Foot Level
A 4-foot level lets you check for level and plumb on installed cabinets. The longer length provides more accurate readings to prevent errors. Handy for doors, drawers, and cabinets.
6-Foot Step Ladder
A sturdy step ladder provides safe access for installing upper cabinets. The extended height allows you to easily position and secure cabinets overhead.
Pry Bar
A pry bar helps adjust cabinets into the proper position once mounted. Inserting the tapered end allows for controlled inching and aligning.
Cabinet Jack
A cabinet jack temporarily supports the weight of wall-mounted cabinets as you fasten them in place. This makes installing uppers much easier and safer.
| Tool | Purpose |
|---|---|
| Tape measure | Measuring openings, countertops, and distances |
| Carpenter’s pencil | Marking cut lines, center points, etc. |
| Carpenter’s square | Marking 90 degree angles to outline cabinets |
| Laser level | Projecting level lines to mount cabinets |
| Stud finder | Locating wood studs to secure cabinets |
| Circular saw | Cutting plywood, laminate, and lumber |
| Jigsaw | Making curved cuts around pipes, sinks, etc. |
| Oscillating multi-tool | Precision trim work and adjustments |
| Hand saw | Short straight trim cuts |
| Sandpaper | Smoothing cut edges |
| Cordless drill/driver | Driving screws to assemble cabinets |
| Screwdriver bits | Driving various cabinet screws |
| Hammer | Tapping parts into place, adjusting |
| Nail gun | Assembling cabinet boxes quickly |
| Wood glue | Bonding components for added strength |
| 4-foot level | Checking cabinets for level and plumb |
| 6-foot step ladder | Safely installing upper cabinets |
| Pry bar | Adjusting cabinets into proper position |
| Cabinet jack | Supporting uppers during installation |
Other Essential Supplies
Beyond tools, having certain supplies on hand helps the installation process go smoothly and safely.
Fasteners
Stock up on appropriate screws, nails, bolts, and other fasteners for assembling and mounting cabinets. Using the proper fasteners prevents splitting or pull-out.
Building Materials
Have lumber, plywood, shims, and trim ready for building out your installation. Pre-drilling lumber helps prevent splitting when driving screws.
Safety Gear
Wear safe clothes, gloves, eye protection, knee pads, and a dust mask to protect yourself. A face shield provides added protection from power tools.
First Aid Kit
Keep a well-stocked first aid kit on hand in case of minor injuries like cuts or abrasions. Bandages, gauze, antibiotic cream, etc. help treat wounds.
Renting Specialty Tools
Some specialty cabinet installation tools may only be needed for a short time or single project. Consider renting these items rather than buying.
Air Compressor
If you don’t already own one, an air compressor powers pneumatic nail guns and staplers for fastening. Rental units are available.
Table Saw
A table saw cleanly rips lumber and plywood to width for structural parts of a cabinet build. Rent for one-time cuts.
Compound Miter Saw
A compound miter saw makes precision angled trim cuts for molding and intricate fittings. Usually not needed for a basic install.
Most Important Cabinet Installation Tools
While having a full array of tools makes cabinet installation easier, you can get by with just a few essential items:
- Tape measure
- Carpenter’s pencil
- Carpenter’s square
- Circular saw
- Cordless drill/driver
- Screwdriver bits
- 4-foot level
- Step ladder
Focus on acquiring the vital measuring, cutting, fastening, and leveling tools first. You can then add to your collection over time as needs arise.
Renting vs. Buying Tools
The choice between renting or buying cabinet installation tools often depends on factors like:
Cost
If your budget is tight, renting expensive power tools like a table saw can save substantially compared to purchasing.
Frequency of use
For tools only needed for one project, renting makes sense. Tools used often are worth buying.
Quality needed
Rental tools may be adequate for DIY jobs. Pros may want to buy high-end tools that withstand heavy use.
Storage space
Renting tools eliminates storing them long-term. Owned tools require dedicated storage space.
Used Tools
One way to acquire good tools while saving money is buying high-quality used items. Options include:
- Garage and estate sales
- thrift stores
- Online auction and classifieds sites
- Pawn shops
Look for well-maintained tools from reputable brands. Carefully inspect and test them before purchasing.
Tool Rental Costs
Average rental costs for common cabinet installation tools are:
- Table saw – $50-100 per day
- Air compressor – $25-50 per day
- Chop saw – $15-30 per day
- Nail gun – $10-20 per day
- Laser level – $10-20 per day
Multi-day and weekly rates offer the best value for longer rentals. Expect to pay a security deposit and possibly delivery fees too.
Conclusion
Installing kitchen or bathroom cabinets is an ambitious but rewarding DIY project. Having the proper tools for measuring, cutting, fastening, leveling, and lifting makes completing the work much more efficient and professional looking. Focus first on acquiring the essential tools like a tape measure, saws, drill, and level. Consider renting specialty items you may rarely need again. With the right tools and some diligent preparation, you can tackle cabinet installation successfully.