The edging used on wooden flooring serves both decorative and functional purposes. It goes by a few different names depending on the specific style and material. Some common terms used to refer to wooden floor edging include baseboard, quarter round, shoe molding, nosing, reducers, T-molding, and threshold. Understanding the differences between these trim pieces can help ensure you select the right options for your flooring project.
Page Contents
Baseboard
Baseboard is a type of trim that runs along the bottom of walls where they meet the floor. It covers the small gap that exists due to natural irregularities in walls and floors. Baseboard is typically 3-6 inches tall and available in different styles and materials. For wooden floors, it’s common to use wooden baseboard trimmed to match the flooring. This provides a clean, seamless look. Popular wood choices for baseboard include oak, maple, cherry, pine, and more.
In addition to its decorative appearance, baseboard serves the important purpose of protecting walls from scuffs and moisture. Over time, walls can get bumped by furniture, vacuums, feet, and more. The baseboard takes this abuse instead of the drywall. It also blocks moisture from washing along the floor and seeping into drywall, which can cause damage.
Quarter Round
Quarter round is a thin strip of trim with an L-shaped cross-section. It is installed on top of the baseboard where it meets the floor. The purpose of quarter round is to cover the small gap that sometimes exists between baseboard and the floor. It provides a smooth, tidy transition.
Quarter round is typically the same species of wood and finish as the flooring and baseboard. Oak, maple, hickory, and cherry are common choices. Using a coordinating material gives a seamless, integrated look. Quarter round is available in set heights ranging from 1/4″ to 1″ tall. The appropriate size depends on the gap needing to be covered.
In addition to its decorative purpose, quarter round also acts as a subtle transition piece. It helps smooth out minor differences in height between the floor and baseboard. It can adjust for slight irregularities in the floor or imperfections in the baseboard installation.
Shoe Molding
Shoe molding is very similar to quarter round, but with a slimmer profile. It also installed on top of baseboards to hide gaps, provide subtle transitions, and give a clean finish. The main difference is it has a height of just 1/4” to 1/2”.
Shoe molding is best for tight spaces where quarter round would overlay too far onto the flooring. For example, it can be used when carpet transitions to wood flooring and there isn’t room for thicker quarter round. It provides that same finished edge with a lower profile.
Nosing
Nosing refers to edging strips installed along the front edge of stair treads. It overhangs the riser (vertical part of the step) by 1-2 inches. Nosing serves both decorative and functional roles for staircase edges.
For decoration, nosing frames the edge of the tread to provide a finished look. Coordinating materials like wood, metal, or stone can match or accent the tread. For safety, nosing creates an overhang and angle that make the edge of steps more visible and reduces risk of slipping. The overhang also compensates for areas where the riser height is slightly off spec.
Stair nosing comes in set sizes based on tread depth and thickness.Customization, like adding anti-slip strips, is also available. Proper installation of nosing requires precision angle cuts for optimal tread coverage.
Reducers
Reducers, also called transitions, are T-shaped strips used where two floors meet at different heights. For example, if hardwood in Room A is 3/4″ thick, and tile in Room B is 1/4″ thick, a reducer bridges the 1/2″ height difference between the floors. Reducers eliminate tripping hazards from uneven floor heights.
Reducers are available in a range of heights and depths to match different flooring dimensions. Common materials include wood, metal, and vinyl. Color and finish are selected to coordinate with the adjoining floors. Reducers provide both form and function when transitioning between various flooring types.
T-Molding
T-molding provides a seamless transition between flooring materials in abutting rooms or hallways. It bridges over the gap where two floors meet and caps the exposed edge of each one. The “T” shape allows it to cover the edges of both flooring pieces.
T-molding eliminates gaps that can catch toes or heels. It also provides a decorative finish to the adjoining floors for a continuous look. T-molding comes in various depths, colors, and materials. Size is determined by the thickness of the flooring pieces being joined. Correct installation ensures a flush, even transition.
Thresholds
Thresholds are trim pieces used at doorways to transition between flooring types. One side covers the edge of the flooring at the doorway, while the other provides a slim trim profile on the opposite side. Thresholds serve both functional and decorative purposes.
For function, thresholds eliminate tripping hazards and cover uneven edges at doorways. They provide a smooth, even transition on both sides. Thresholds also act as a barrier to prevent moisture migration between rooms – important for flowing between tile and wood floors.
Aesthetically, thresholds frame doorways and finish the flooring edges. Metal, wood, and stone choices allow matching or accenting the adjoining floors. Threshold height and depth are adjustable for the flooring thickness. Proper sizing and sealing during installation prevents moisture issues.
Considerations for Selecting Wood Floor Edging
When selecting wooden edging and trim for floors, here are some important considerations:
Material
| Edging Material | Benefits |
| Solid wood | Matches wood flooring; durable; natural appearance |
| Engineered wood | Resists swelling/shrinking; durable |
| PVC | Affordable; moisture-resistant |
| Laminate | Durable; scratch-resistant; affordable |
| Metal | Highly durable; decorative |
Style
Edging comes in different profiles like baseboard, quarter round, and T-molding. Choose styles suitable for each location, like baseboard along walls and transitions between flooring.
Dimensions
Size edging appropriately for your flooring thickness, transition heights, and gap widths. Nosing and reducers must account for stair dimensions and flooring heights.
Finish
Select edging in a finish that matches or complements your flooring. Consider sheen level and color consistency. Unfinished wood can be stained on site to match.
Moisture Resistance
Consider moisture resistance if edging will experience water exposure. PVC and laminate are very water-resistant, while wood needs sealing.
Installation Method
Edging can be nailed, glued, or floated in place. Follow manufacturer guidelines to ensure proper, long-lasting adhesion.
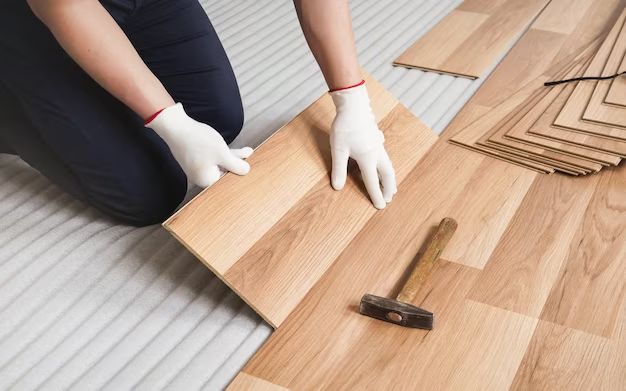
Installing Wood Floor Edging
Proper installation technique ensures wooden floor edging looks beautiful and performs correctly for years:
Acclimate the Wood
Let wood edging acclimate to the room’s temperature/humidity to prevent later warping or gapping.
Cut Miters and Angles
Precisely miter borders and butt edging ends for crisp, seamless transitions.
Dry Fit Pieces
Dry fit edging before final installation to check fit and make adjustments.
Fasten Securely
Follow manufacturer guidelines for spacing and pattern of nails, adhesive, etc. Avoid splitting wood.
Fill Gaps
Use wood putty to fill any remaining gaps for smooth, consistent edges. Let dry completely.
Sand Edging
Lightly sand edging to smooth out saw marks or irregularities prior to finishing.
Finish Smoothly
Apply finish evenly across all edging to match the flooring finish and sheen. Allow proper drying time.
Seal Thoroughly
Seal all joints with caulk or sealant for a moisture barrier and prevent gaps from opening.
Clean Up Dust
Carefully clean up all dust to restore a smooth surface and prevent finish dulling.
Maintaining Wood Floor Edging
With proper care, wood floor edging can last for many years:
– Dust mop frequently to prevent dust buildup that can dull the finish.
– Clean with hardwood floor cleaner and microfiber mops. Avoid excessive moisture.
– Use felt pads under furniture legs and lift items when moving to prevent scuffs.
– Limit direct sunlight exposure which can cause fading over time.
– Keep pet nails trimmed to avoid excessive scratches.
– Avoid using rubber-backed mats or abrasive cleaners.
– Refinish worn areas when needed to restore appearance.
– Check for signs of swelling or gapping that require adjustment.
– Re-caulk edges as needed to maintain water barriers and prevent gaps.
Conclusion
The edging trim used on hardwood floors serves both practical and aesthetic roles. Options like baseboard, quarter round, nosing, reducers, T-molding, and thresholds provide finished edges for flooring installations. Careful selection of edging style, material, size, and finish creates durable, seamless transitions between floors. With proper installation and maintenance, wood floor edging can beautifully frame floors for years of stylish performance.