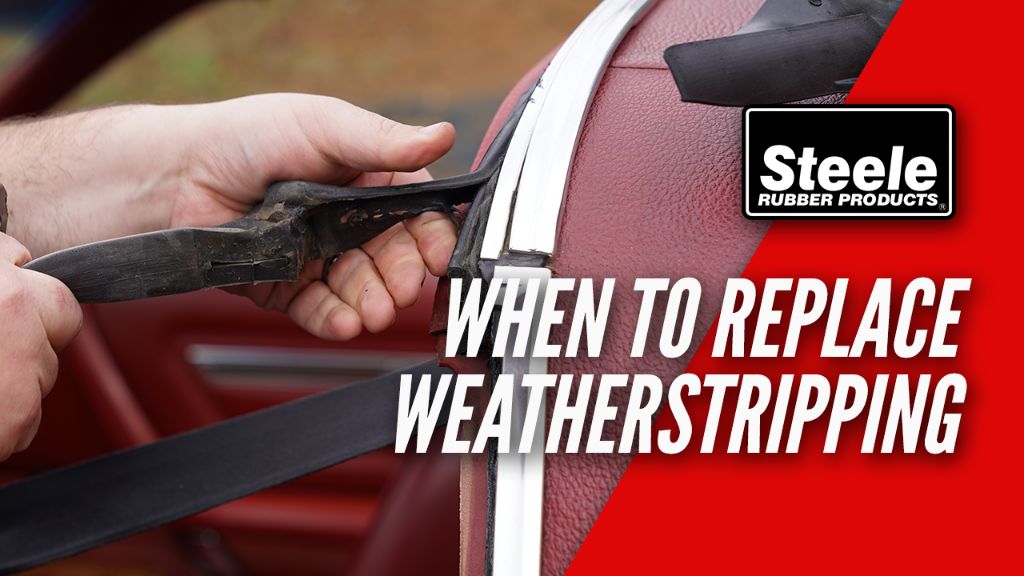
Weatherstripping is an important part of your vehicle that helps keep water, air, dust and noise outside of the passenger compartment. Over time, weatherstripping can wear out, crack, shrink or otherwise deteriorate, allowing water, noise and dust to enter your vehicle. Knowing when to replace weatherstripping can help keep your car’s interior dry and quiet.
Page Contents
- 1 What is weatherstripping?
- 2 Signs it’s time to replace weatherstripping
- 3 How often should I replace weatherstripping?
- 4 What areas need weatherstripping replaced?
- 5 Can I replace weatherstripping myself?
- 6 How much does it cost to replace weatherstripping?
- 7 Can I just glue broken weatherstripping?
- 8 What about aftermarket weatherstripping kits?
- 9 Tips for making weatherstripping last
- 10 Conclusion
What is weatherstripping?
Weatherstripping is the rubber seals around a vehicle’s doors, windows, trunk, hood and any other openings that help block water, noise, and dust. Weatherstripping is typically made of rubber, vinyl, or a combination of materials. It is specially designed to be flexible and durable, while also forming a tight seal against the vehicle’s body.
Common types of weatherstripping include:
- Door seals – Run along the door edges to seal the gap between the door and body
- Window seals – Seal around roll-up windows to block water
- Hood and trunk seals – Seal gaps around the hood and trunk to prevent moisture and dirt
- Windshield seals – Seal the windshield and prevent wind/water leaks
Properly functioning weatherstripping compresses when the door or trunk is closed, filling any gaps and preventing moisture, noises and drafts from entering the cabin. Over time, the weatherstripping can degrade and lose its sealing effectiveness.
Signs it’s time to replace weatherstripping
Here are some signs that it may be time to replace your vehicle’s weatherstripping:
- Visible cracks or tears – Look closely along door, window and trunk seals for any cracked, damaged or torn areas. Any gaps can allow water intrusion.
- Spongy or dried out – Healthy weatherstripping feels firm yet flexible. If the seals are overly soft, spongy or dried out they won’t seal properly.
- Gaps or openings – When doors are closed, the weatherstripping should fully contact and seal along the entire door edge. Any visible gaps mean water can enter.
- Wind or water leaks – Drafts, wind noise or water leaks inside your car point to a bad seal.
- Door is hard to close – If you have to excessively slam the door to get it to latch, seals are likely worn.
- Stiff or shrunken – Weatherstripping can stiffen or shrink with age. This reduces its sealing capability over time.
Even if your weatherstripping looks fine, it may have lost sealing effectiveness simply due to age and use. Most auto experts recommend inspecting seals at least annually and replacing weatherstripping at least every 5-7 years as preventative maintenance.
How often should I replace weatherstripping?
Most vehicle manufacturers recommend replacing weatherstripping every 50,000 to 100,000 miles as part of routine maintenance. However, driving conditions and climate can also impact how long weatherstripping will last.
Here are some general guidelines on weatherstripping replacement intervals:
| Driving Conditions | Recommended Replacement Interval |
|---|---|
| Normal commuting in moderate climate | Every 7 years or 70,000 miles |
| Stop-and-go city driving | Every 5-6 years or 50,000 miles |
| Extreme hot or cold climates | Every 4-5 years or 40,000 miles |
| Off-road driving | Every 2-3 years or 20,000 miles |
Of course, you don’t need to solely rely on mileage intervals. Closely inspect weatherstripping at least yearly and replace any seals that are visibly cracked, damaged or letting in air/moisture. Catching weatherstripping issues early helps prevent water damage or humidity buildup inside your car.
What areas need weatherstripping replaced?
The most common weatherstripping replacement areas are:
- Door seals – Your doors see constant opening/closing pressure and are most prone to wear. Door edge seals usually need replaced first.
- Window seals – Window seals also suffer frequent use and drying from sun exposure. Inspect front and rear window seals.
- Windshield seal – This large seal takes abuse from sun, temperature changes and road debris. Windshield seals commonly need early replacement.
- Trunk seal – Check the main trunk opening seal as well as any rear hatchback seals.
- Hood seal – Don’t forget the hood seal keeping engine heat, noise and fumes out.
When replacing weatherstripping, do all seals at once rather than spot-replacing individual seals. This ensures everything matches and seals correctly. Only replace visibly damaged seals if financial constraints don’t allow a full replacement.
Can I replace weatherstripping myself?
Replacing weatherstripping is a relatively straightforward DIY project for handy vehicle owners. You’ll need some basic tools, replacement seals and patience. Here are some tips for a successful DIY weatherstrip replacement project:
- Watch online videos to understand the full replacement process for your vehicle’s year, make and model.
- Carefully remove the old weatherstripping – pry gently to avoid scratching paint.
- Thoroughly clean all sealing surfaces of old adhesive residue.
- Test fit the new weatherstripping and trim to ensure proper fit before adhering.
- Apply adhesive sealant carefully according to directions.
- Press the new weatherstripping firmly into place along the length of the seal.
- Allow adhesive to fully cure before closing doors/trunk.
- Adjust striker plates or latches if doors don’t close properly.
Patience and attention to detail are key for a leak-free seal. Overall, plan on at least 2-3 hours for a DIY weatherstripping replacement job. Alternatively, you can also have your local auto body shop replace the weatherstripping for you if you’re unsure of taking on the project.
How much does it cost to replace weatherstripping?
Weatherstripping costs vary depending on the amount needing replacement, but expect to pay:
- $100-$250 for door edge seals only
- $250-$400 for door and window seals
- $400-$700 for full door, window, windshield and trunk seals
Labor and shop fees for weatherstripping replacement from a professional may add $150-$500 or more to the job. Buying quality weatherstripping specifically designed for your vehicle also helps ensure a perfect fit and seal.
Can I just glue broken weatherstripping?
You can try gluing small cracks or tears in weatherstripping seals to get a little more use, but this is just a very temporary fix. The underlying rubber is likely stiff and shrinking with age, so the damage will continue spreading. And glued repairs often don’t hold well due to seal movement and vibration when closing doors and trunks.
It’s better to completely replace visibly damaged sections or entire seals that have gaps and cracks. Using sealant adhesive to glue weatherstripping should only be considered a last-resort emergency fix until you can properly replace bad seals.
What about aftermarket weatherstripping kits?
Many companies sell aftermarket weatherstripping kits as a DIY-friendly and budget-conscious alternative to factory replacement seals. These kits provide all the common seals for most vehicles in one package.
Aftermarket kits can work well if an exact match, but material quality is sometimes lower. Proper installation is also key so seals fit, align and function correctly. Overall, factory weatherstripping specifically designed for your vehicle is recommended for the very best fit and performance.
Tips for making weatherstripping last
Along with regular replacement, here are some tips to maximize the lifespan of your car’s weatherstripping:
- Park in the garage to protect from sun and weather.
- Regularly clean seals with gentle soap and water to prevent dirt buildup.
- Apply occasional rubber conditioner to keep seals flexible.
- Avoid slamming doors – open/close gently.
- Check for rocks, sticks or other debris caught in seals.
- Fix misaligned doors/latch plates that put excessive pressure on seals.
Proper weatherstripping maintenance helps block water, noise and dust from causing damage or annoyance. Ignoring needed weatherstripping repairs inevitably leads to more headaches down the road.
Conclusion
While it may not be the most exciting maintenance task, replacing worn weatherstripping is important to keep your vehicle’s cabin dry and comfortable. Typical recommended replacement intervals are about every 50,000 miles or 5-7 years, but inspect yearly and replace any visibly damaged or leaking seals right away. Investing in quality weatherstripping specifically engineered for your make and model helps ensure many miles of leak-free performance. With some DIY skills and proper adhesive usage, you can tackle this project yourself and save on shop labor costs. Keep your weatherstripping fresh and you’ll be kept dry on all your future journeys.