Page Contents
Quick Answer
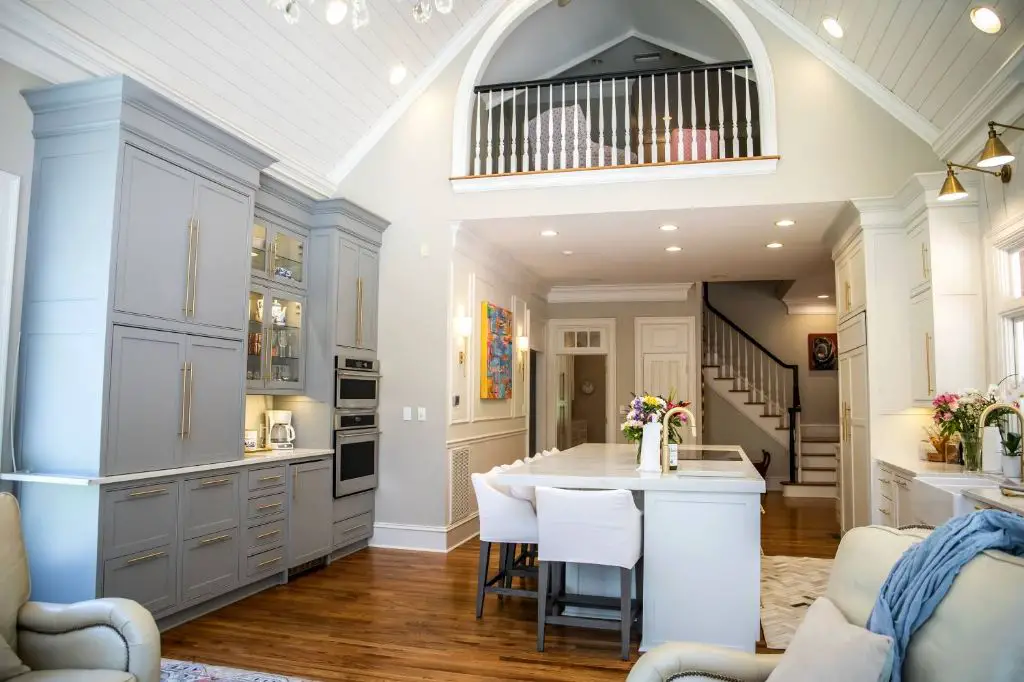
The best place to install recessed lights on a vaulted ceiling is along the center ridge line. This provides even illumination and highlights the architecture of the ceiling. Other good options include:
– In rows along the slope of the ceiling on either side of the ridge line
– In a grid pattern spaced evenly apart
– Around the perimeter to wash the walls with light
Avoid installing too many lights or placing them too close together, as this can create a distracting polka-dot effect on the ceiling. Careful planning is required to ensure proper placement for optimal lighting.
Where to Place Recessed Lights on Vaulted Ceilings
When determining where to place recessed lighting fixtures on a vaulted ceiling, there are a few guidelines to follow:
Along the Center Ridge Line
Installing recessed lights along the center ridge line of the vaulted ceiling is often the most aesthetically pleasing placement. Lights lined up on the high point of the ceiling accentuate the architecture and draw the eye upward.
Spacing the lights 1-2 feet apart creates a row of even illumination along the entire length of the vaulted area. If the ceilings are very high or the room very long, the lights can be spaced slightly farther apart, up to 4 feet. Just be sure the light patterns overlap enough to provide consistent lighting.
The central ridge line is a perfect place for narrow beam spotlights aimed toward artwork or architectural elements you want to highlight. Add some wash lights along the ridge as well to provide ambiance.
On Either Side of the Ridge Line
Placing rows of recessed lights on either side of the ridge line, angled toward the center, is another option. This casts even light across the entire sloped portion of the ceiling. Spacing the lights 2-3 feet apart, depending on ceiling height, looks best.
Make sure the rows are evenly spaced apart to create symmetrical lighting. The lights should be mounted at an equivalent height vertically and their patterns adjusted to overlap in the center.
In a Grid Pattern
For very large vaulted ceilings, mounting the lights in a grid pattern is a great way to provide complete coverage. Place the lights in organized rows spaced evenly apart both horizontally and vertically.
As a rule of thumb, recess lights should be spaced approximately 2-1/2 times the height of the ceiling apart. For example, lights could be spaced 5 feet apart on a 10 foot ceiling. Adjust as needed to fit the exact dimensions of the room.
Using the same spacing horizontally and vertically creates a consistent lighting pattern. It may be necessary to adjust the light angles in the slope area to reach the edges.
Around the Perimeter
While most of the lighting on a vaulted ceiling should be focused in the center sloped area, don’t forget the walls! Adding recessed fixtures around the perimeter washes the walls with light and makes the space feel bigger. This prevents a cave-like effect that can happen with only overhead lighting.
Space perimeter lights 3-4 feet apart for even illumination. Wall sconces or track lighting work here as well. Just be sure to use warm light bulbs (2700-3000K color temperature) to avoid feeling like the room is flooded with light.
Placement Considerations and Tips
To ensure proper placement of recessed lighting in a vaulted ceiling area, keep these considerations in mind:
Light Requirements
Factor in how much light is needed in the space based on its purpose. For example, a kitchen vault requires brighter task lighting than a bedroom vault. Make sure to install sufficient fixtures to provide adequate lighting.
As a general rule of thumb, space recessed lights 2 feet apart for ambient lighting, and 4 feet apart for task lighting. Adjust as needed for higher or lower ceilings.
Beam Angle and Direction
Most recessed lights have adjustable heads to aim the light where needed. Narrow flood lights (25-40 degree beams) are good for accenting specific areas or highlighting architectural details. Wide flood lights (60-90 degrees) provide better general lighting.
Evaluate the lighting requirements and adjust the beam angles accordingly. Also plan the direction each light should point based on its location. Focus the lights toward the center of the room or downward for the perimeter.
Fixture Types
Standard recessed lights work well for most vaulted ceiling applications. For angled ceilings, adjustable fixtures that can pivot up to 45 degrees are useful. Some fixtures are designed specifically for slope ceilings.
Another option is low-voltage track lighting which can be aimed and adjusted as needed. Make sure to choose the appropriate fixture before installing.
Avoid a Polka Dot Effect
Placing too many recessed lights too close together on a vaulted ceiling results in a polka dot effect. Start with fewer fixtures spaced well apart, then add more later if needed. It’s easier to add more lights than to fill in holes from removing some.
Stick to the guidelines for recommended spacing based on ceiling height. Spreading the lights out enhances the architecture versus cluttering the space.
Use Multiple Circuits
When installing several recessed lights, use multiple lighting circuits so they aren’t all on the same switch. Divide the lights into logical groups controlled by different switches or dimmers.
This allows you to create lighting zones to suit any mood or activity. Don’t forget to leave some lights switched on for safety reasons.
Choosing the Right Recessed Lights
Picking the perfect recessed lighting involves selecting the right type, finish, trim, bulb, and features:
Lighting Types
– Standard incandescent – Basic, inexpensive option good for ambient lighting
– LED – More energy efficient and longer lasting, excellent choice
– Halogen – Bright, sparkling light perfect for kitchens
– Fluorescent – Rarely used anymore, inefficient and humming noise
LED is the best option today – choose warm white (2700-3000K) color temperature for a soft, inviting glow.
Finishes
– White – Provides a clean, neutral appearance
– Nickel – Matches brushed nickel faucets and hardware
– Bronze – Warmer tone good for traditional decor
– Black – For a modern, dramatic look
– Natural brass or antique finishes – Great for vintage, rustic styles
Match existing fixtures and faucets for a cohesive look.
Trim Styles
– Reflector – Provides the most directed beam of light
– Baffle – Allows some light to escape up into the ceiling
– Lens – Disperses light softly with no glare or hotspots
Baffle and lens trims are popular for ambient vaulted ceiling lighting.
Specialty Bulbs
– Dimmable – Allows you to control the light level
– Color changing – Fun for kids rooms or parties
– Smart bulbs – Connect to phone apps and voice assistants
Ensure the fixture and dimmer switch are compatible for dimmable bulbs.
Other Features
– Adjustable – Allow custom aiming of the light
– Insulation contact rated – Safe for direct contact with insulation
– Airtight – Prevents air leakage for energy efficiency
– Rotational trim – Rotate the fixture for perfect alignment
Look for adjustable lights with pivot, swivel, or gimbal features to direct the beam.
How Many Recessed Lights in a Vaulted Ceiling
Determining how many recessed lights you need for a vaulted ceiling depends on a few factors:
– Size of the ceiling – Larger vaults need more lights
– Ceiling height – Taller ceilings usually require more fixtures
– Lighting needs – Task lighting needs more lights than ambient lighting
– Room use – Kitchens, offices need brighter lighting than bedrooms, living rooms
As a general guideline, here are some recommendations on number of lights needed:
| Vaulted Ceiling Size | Number of Lights |
| 5×5 feet | 2-4 lights |
| 10×10 feet | 4-6 lights |
| 15×15 feet | 6-8 lights |
| 20×20 feet | 8-12 lights |
Start with the minimum number then add more as needed for proper illumination. Place lights according to recommended spacing for the ceiling height rather than crowding too many together.
Pro Tips for Layout and Placement
Follow these professional installer tips and tricks for laying out and placing recessed lighting effectively on vaulted ceilings:
Map it Out
Draw a plan marking all ceiling slopes, architectural elements, and desired lighting locations. Indicating beam angles helps visualize the coverage. This makes installation much easier than trying to lay it out onsite.
Use Laser Lines
Laser level tools project straight lines across the ceiling to mark light positions accurately. Much easier than measuring! Be sure to use eye protection when using any laser device.
Mind the Ductwork
Note all HVAC ductwork and wiring routes on the ceiling plan. Avoid piercing ducts or having to re-route things later. Install lights between framing members.
Focus on Artwork
Highlight special art, architectural details, and features with directional accent lighting. Wall wash lights also show off special areas.
Remember Dimmer Switches
Separating lights into different dimmer zones lets you alter the mood and light level. Wall dimmers should be easily accessible.
Use Temporary Lights
Plug in some portable construction lights to evaluate light placement and brightness before installing. Adjust as needed for the perfect lighting design.
Wiring and Installation
Proper installation of recessed lighting involves electrical wiring, cutting holes, insulating, and mounting the fixtures securely:
Electrical Requirements
Consult an electrician to ensure sufficient power supply and circuit capacity for multiple recessed lights. Follow all national and local electrical codes for safety.
Cutting Holes
Use the properly sized hole saw bit for each fixture to cut an accurate opening. Hole size depends on the type and size of the light’s housing.
Insulation Clearance
Maintain 3” clearance between recessed lights and attic insulation. Some special IC-rated fixtures can contact insulation directly.
Secure Mounting
Attach recessed light housings securely between ceiling joists or framing using provided mounting brackets and screws. Fixtures must be firmly anchored.
Junction Boxes
Make sure to install recessed lights through a proper electrical junction box. Do not cut holes over un-boxed wiring in the ceiling.
Sealing Air Leaks
Caulk and foam seal around fixtures to minimize air leakage for energy efficiency. This also reduces dust and insect intrusion.
Conclusion
The optimal placement for recessed lighting on a vaulted ceiling is in a row or grid pattern along the ridge line and sloped areas. Space the lights evenly based on the size of the ceiling and required brightness. Too many fixtures crowded together creates a polka dot look.
Focus on lighting the center area but don’t forget to add perimeter lights as well. Careful planning is needed for layout and installation. Following the recommendations and tips in this article will help ensure your vaulted ceiling lighting design is both beautiful and functional.
With smart planning and proper installation, recessed lighting allows you to highlight the dramatic architecture of your vaulted ceilings and provide both ambiance and task lighting as needed. The ceiling transforms into a focal point and design feature when the lighting is thoughtfully placed.