Over time, the sprayer nozzle on your kitchen sink can wear out or break entirely. When this happens, replacing the sprayer is an easy DIY project that can usually be completed in less than an hour. Replacing a faulty kitchen sprayer will restore full functionality to your sink and prevent leaks or other problems.
In this comprehensive guide, we will walk through the whole process of replacing a kitchen sink sprayer step-by-step. We will cover:
- How to choose the right replacement sprayer
- What tools you will need
- How to remove the old sprayer
- Installing the new sprayer
- Connecting and testing the new sprayer
Follow these instructions carefully and you can upgrade your kitchen sprayer simply and successfully.
Page Contents
Choosing a New Kitchen Sink Sprayer
When selecting a replacement sprayer, you first need to determine whether you need to match your existing sprayer style or can choose a new style. The main options are:
- Pull-Down Sprayer – This style features a nozzle on a hose that pulls down for extended reach. It retracts back into the sprayer head when not in use.
- Pull-Out Sprayer – With this style, the hose and nozzle pulls out of the sprayer head and stays extended. The hose retracts back into the sprayer by hand.
- Side Sprayer – A side sprayer mounts onto the faucet or sink near the primary faucet. It provides an extra sprayer for tasks like rinsing dishes.
- Standard Fixed Sprayer – This is a stationary sprayer nozzle mounted to the sink that does not extend or pull out.
If your existing sprayer has a unique or specialized design, you may need to replace it with the same style and brand. Otherwise, you can choose whichever style best suits your needs.
When selecting a new sprayer, look for one designed specifically for kitchen use. Confirm that it will fit standard sink holes and includes the necessary hose, fittings, washers and nuts for easy installation. Also consider the sprayer’s finish, flow rate, spray settings and warranty.
Key Features to Look for
- Solid brass or stainless steel construction.
- High flow rate – 1.5 GPM or higher.
- Flexible stainless steel hose length of at least 5 inches.
- Stream and spray settings.
- Matching finishes for your faucet and décor.
- Easy to clean nozzles.
- Warranty of at least 1 year.
Selecting a sprayer head that matches your existing faucet finish will provide a seamless, coordinated look. Some of the most popular finishes include:
- Chrome
- Stainless Steel
- Oil Rubbed Bronze
- Matte Black
- Nickel
You can find replacement sprayer heads at any hardware store or order them online. Prices typically range from $15 to $150 depending on the style and quality. Investing in a higher quality sprayer usually pays off with better functionality and longevity.
Tools and Materials Needed
Replacing a kitchen sprayer does not require any specialized tools. Here are the basic tools and materials you will need:
- Replacement sprayer
- Adjustable wrenches (2)
- Basin wrench
- Plumber’s putty or silicone sealant
- Old rags or towels
- Flashlight
- Safety goggles
Before starting, turn off the water supply lines under the sink. You will need to shut off the hot and cold water valves to disconnect the old sprayer.
Clear space under the sink to access the water lines and existing sprayer. Lay down towels to catch any water drips or spills during the process.
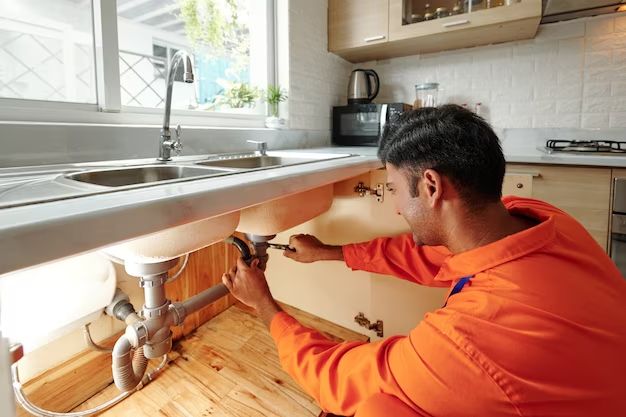
Removing the Old Kitchen Sink Sprayer
With the right tools and preparation, removing an old kitchen sprayer takes just a few minutes. Follow these steps:
- Turn off hot and cold water supply valves located under the sink.
- Turn on the faucet to release pressure and drain any remaining water from the lines.
- Disconnect and detach the sprayer hose from the water supply line. You may need an adjustable wrench for the coupling nut.
- Unscrew the retaining nut holding the sprayer to the sink.
- Remove the old sprayer unit. You may need a basin wrench to reach up behind the sink.
- Clean away any old plumber’s putty, sealant, or gunk with a putty knife. Scrub the sink surface clean.
Examining the old sprayer before disposal can indicate why it failed and help you make sure the new one fits correctly. Look for cracks, mineral deposits indicating leaks, worn out gaskets, or problems with the hose.
If the existing sprayer is still in good shape, save it as a spare. Now you are ready to install the new sprayer.
Installing the New Kitchen Sink Sprayer
Here are step-by-step instructions for properly installing your new kitchen sink sprayer:
- Apply plumber’s putty around the underside of the new sprayer base according to the manufacturer’s directions. This seals the connection to the sink.
- Insert the sprayer tailpiece through the sink hole from above. Make sure any washers or gaskets are in place.
- From under the sink, thread the retaining nut onto the tailpiece and tighten by hand first. Then use a basin wrench to finish tightening the nut fully.
- Wipe away any excess putty around the base. Make sure the sprayer sits securely with no leaks.
- Attach the sprayer hose to the water supply lines. It connects to the hot and cold valves just like the old sprayer.
- Before connecting the hose, install any weights, brackets or retainers needed for the new style sprayer.
- Tighten the supply line connections by hand first, then use a wrench to make them water tight.
The specific connection steps can vary by sprayer model. Refer to the manufacturer’s instructions for details.
Leave the water supply valves turned off until you have completed all steps and are ready to test the new sprayer.
Connecting and Testing the New Sprayer
Once assembled, reconnect the water supply and test your new sprayer:
- Turn on the hot and cold water supply valves under the sink.
- Check for leaks at all connections. Tighten them more if needed.
- Turn on the faucet and sprayer to flush out any debris.
- Let the water run for a full minute to clear the lines.
- Test out all the sprayer settings and check the flow strength.
- Adjust water pressure or temperature if needed.
- Watch the hose and sprayer head for any drips or issues.
If no leaks or problems are found, the installation is complete! Rinse down the sink and clean up any tools or supplies.
Check the new sprayer periodically over the first few days of use to ensure no problems develop. Your patience will be rewarded with a fully functional sprayer that should provide years of reliable service.
Troubleshooting Common Problems
On rare occasions, you may encounter minor issues with a newly installed sprayer. Here are solutions for some common problems:
Sprayer Leaks from Connections
- Tighten the connections more, especially the supply line nuts
- Ensure gaskets or washers are in place
- Apply more plumber’s putty or sealant if needed
Sprayer Drips from Nozzle
- Flush sprayer for a full minute to clear any debris
- Disassemble nozzle and rinse out any dirt particles
- Replace nozzle washer if worn out
Low Water Flow
- Make sure shutoff valves are fully open
- Check for kinks or obstructions in the sprayer hose
- Remove nozzle and rinse out any sediment or deposits
- Adjust water pressure at shutoff valves if too low
Sprayer Won’t Retract or Extend
- Lubricate O-rings with silicone grease
- Ensure weight at end of hose moves freely
- Check for obstructions blocking recoil
- Replace worn out springs or tighten retaining nut
Pay attention to any changes in sprayer performance that could signal an underlying issue. Addressing problems quickly can prevent more costly repairs down the road.
Conclusion
Upgrading your kitchen sprayer is one of the easiest and most rewarding DIY upgrades you can make. Following the steps outlined in this guide, you can smoothly remove your old sprayer and install a replacement model in under an hour.
The key steps include:
- Selecting a new sprayer suited for your space and needs
- Gathering necessary tools and shutting off water valves
- Removing existing sprayer and prepping sink surface
- Installing new sprayer unit with proper sealing
- Connecting supply lines and testing for leaks
- Troubleshooting any minor issues
Taking your time and following instructions will ensure success. Investing in a quality kitchen sprayer from a reputable brand will provide long-lasting performance. A properly functioning sprayer makes kitchen tasks much easier.
With regular cleaning and occasional maintenance, your new kitchen sprayer should operate flawlessly for years before needing to be replaced. Don’t hesitate to contact a plumber for assistance if you encounter any difficulties during installation or use. Enjoy putting your upgraded kitchen sprayer to good use!